Tips & Tricks for furniture development.
HDPE
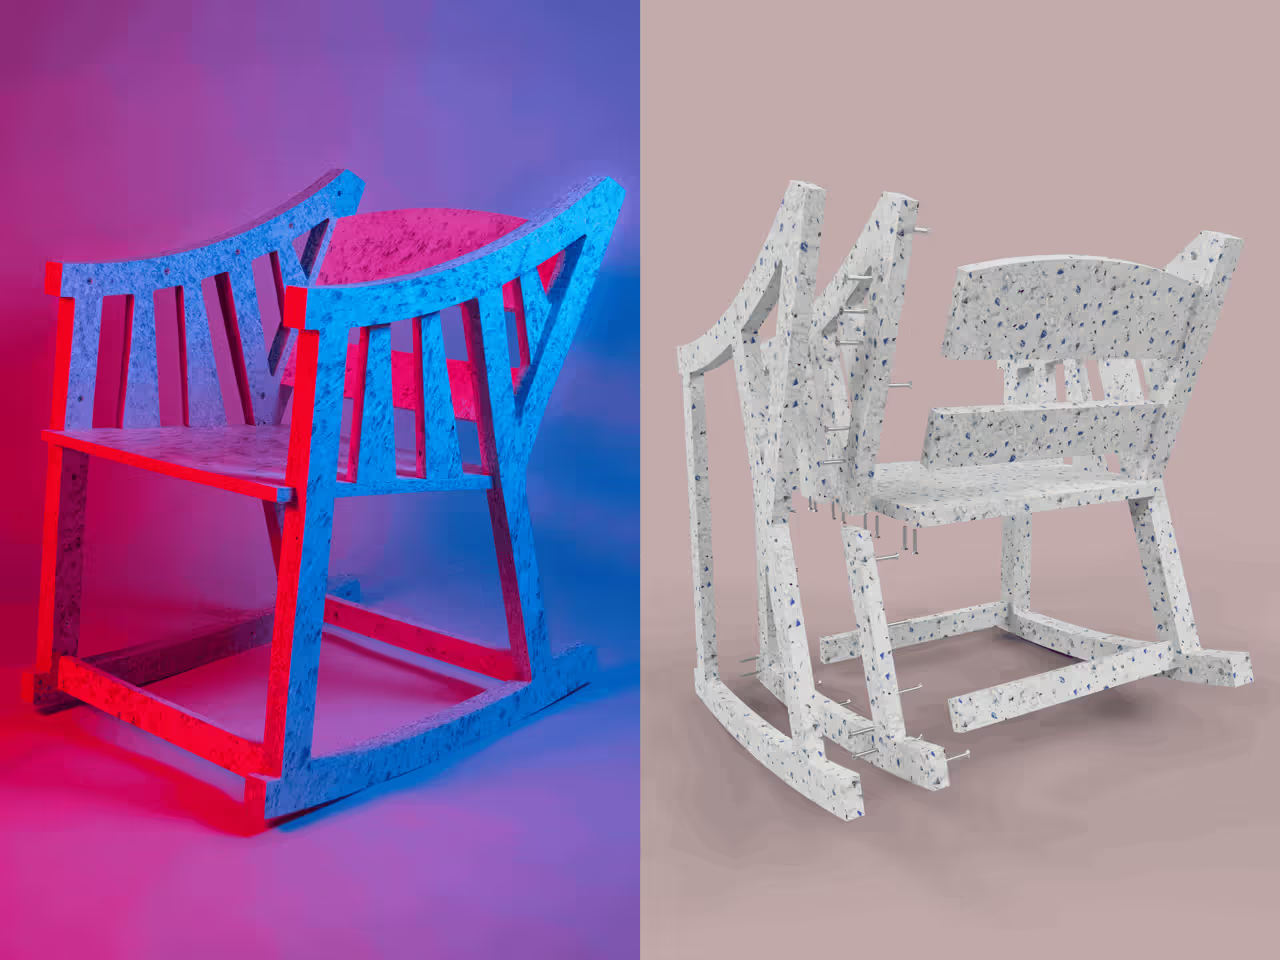
PRODUCT
Achieving a smooth and glossy finish is essential. The aim is to make plastics appear attractive and high-quality.
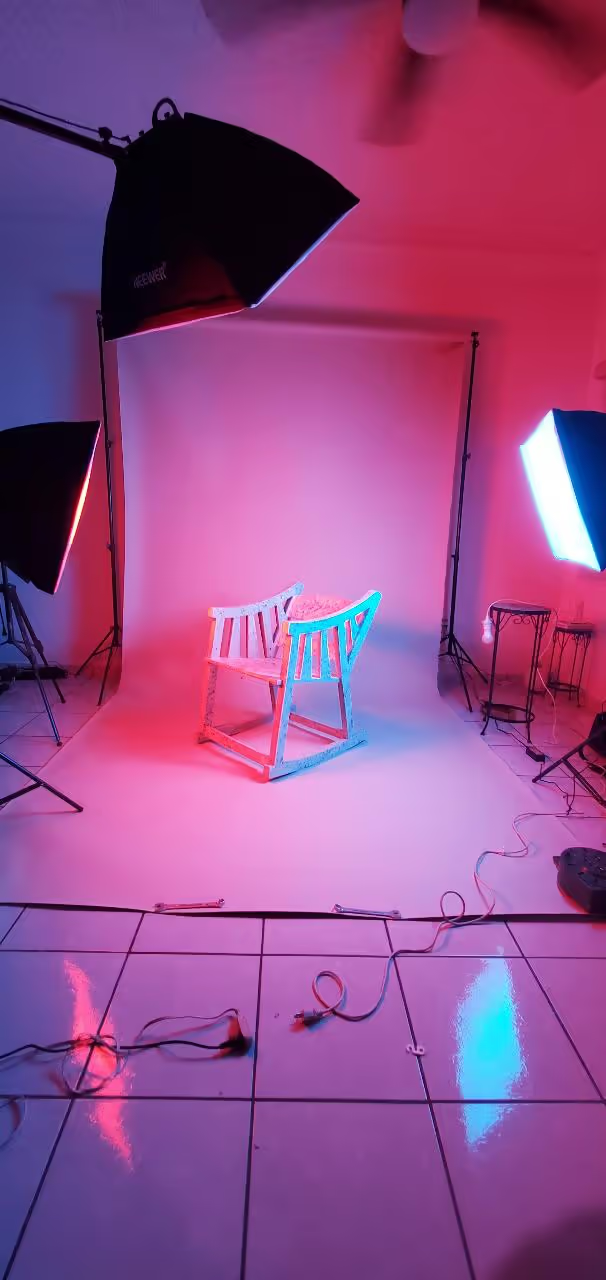
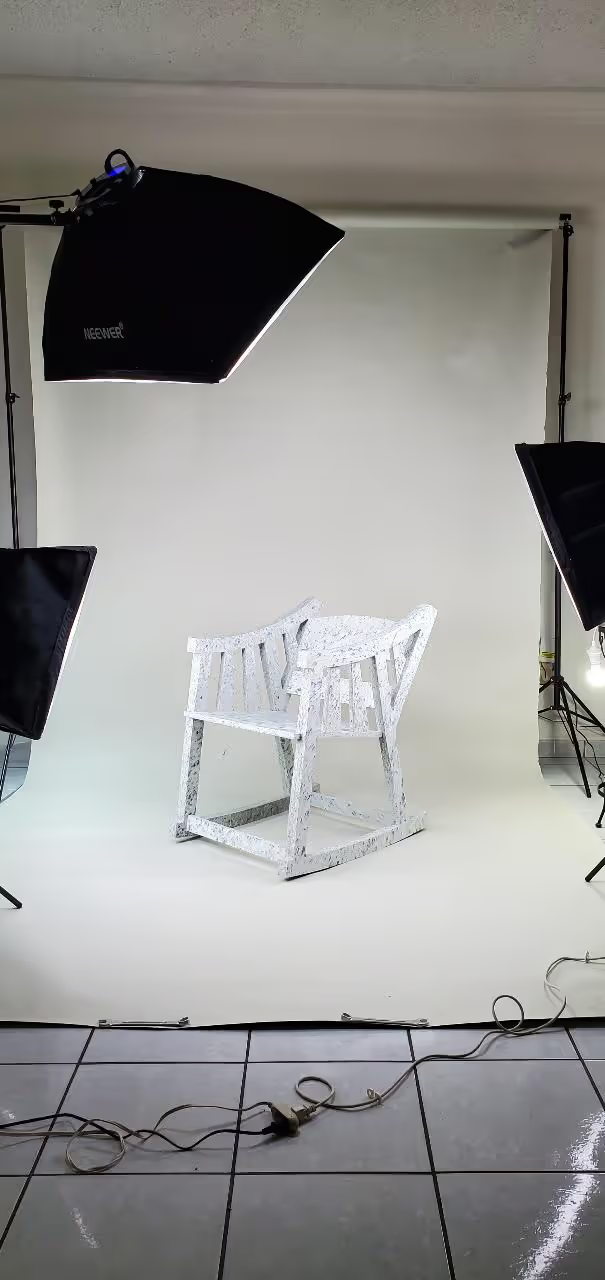
We outline the process to create an HDPE cradle that can be transformed into two rocking chairs. Tips and techniques are provided to attain a shiny finish and conceal screws or fixings effectively.
This video outlines the steps involved in assembling and finishing the cradle. The following instructions cover essential details about the materials and tools used.
The process was developed by Blue Phoenix Plastic Mexico. The method of manufacturing plastic sheets affects the surface finish. To achieve a smooth finish, apply a mold release and use a polished surface.
CNC parameters:
When producing plastic sheets, thickness may vary between batches. If a specific thickness is required, a wood planer can be used.
Save the plastic remnants, as they are ready for future use. In this project, these remnants were utilized for the next step.
Hardware:
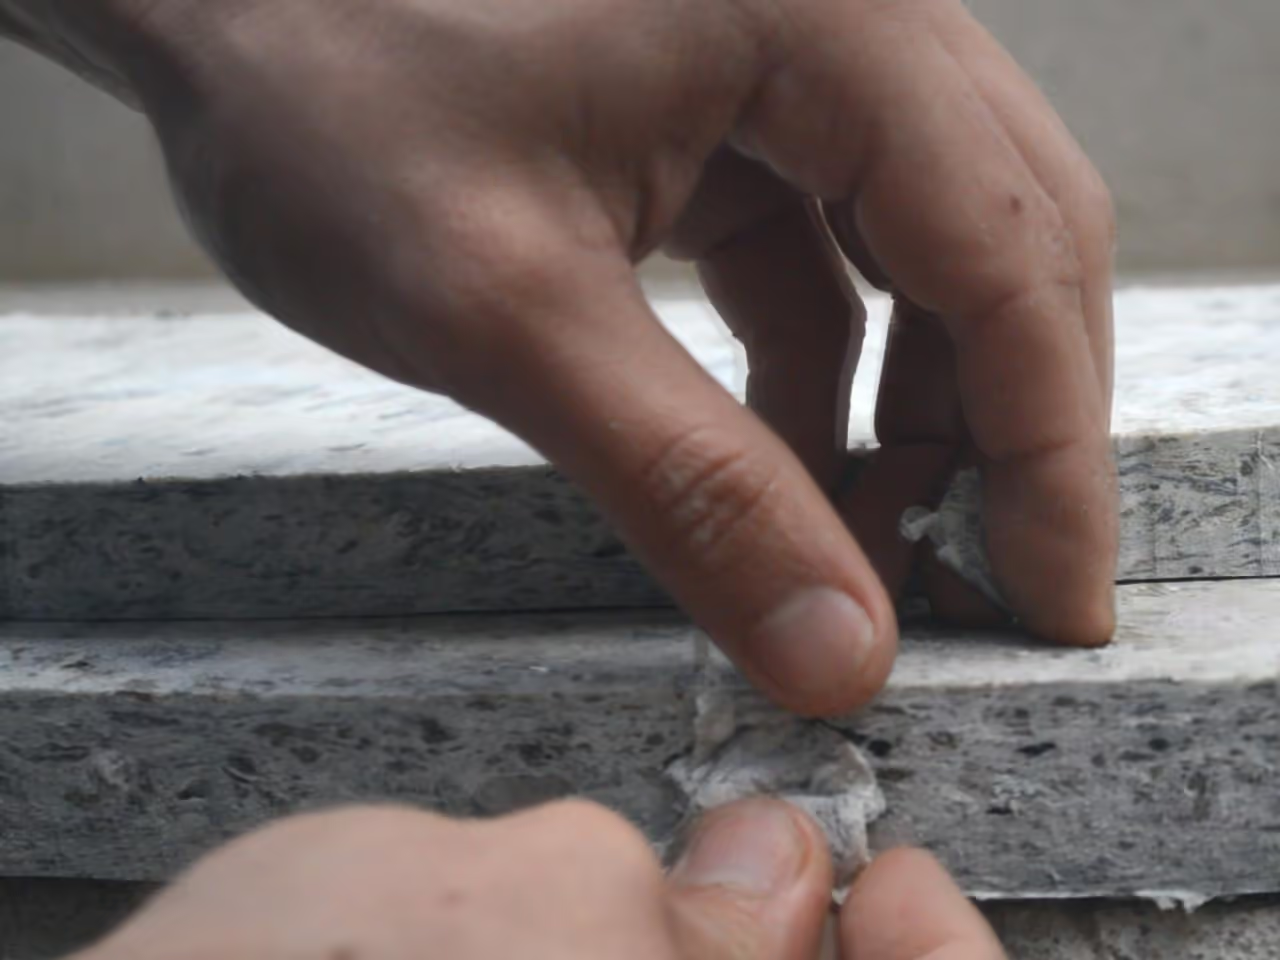
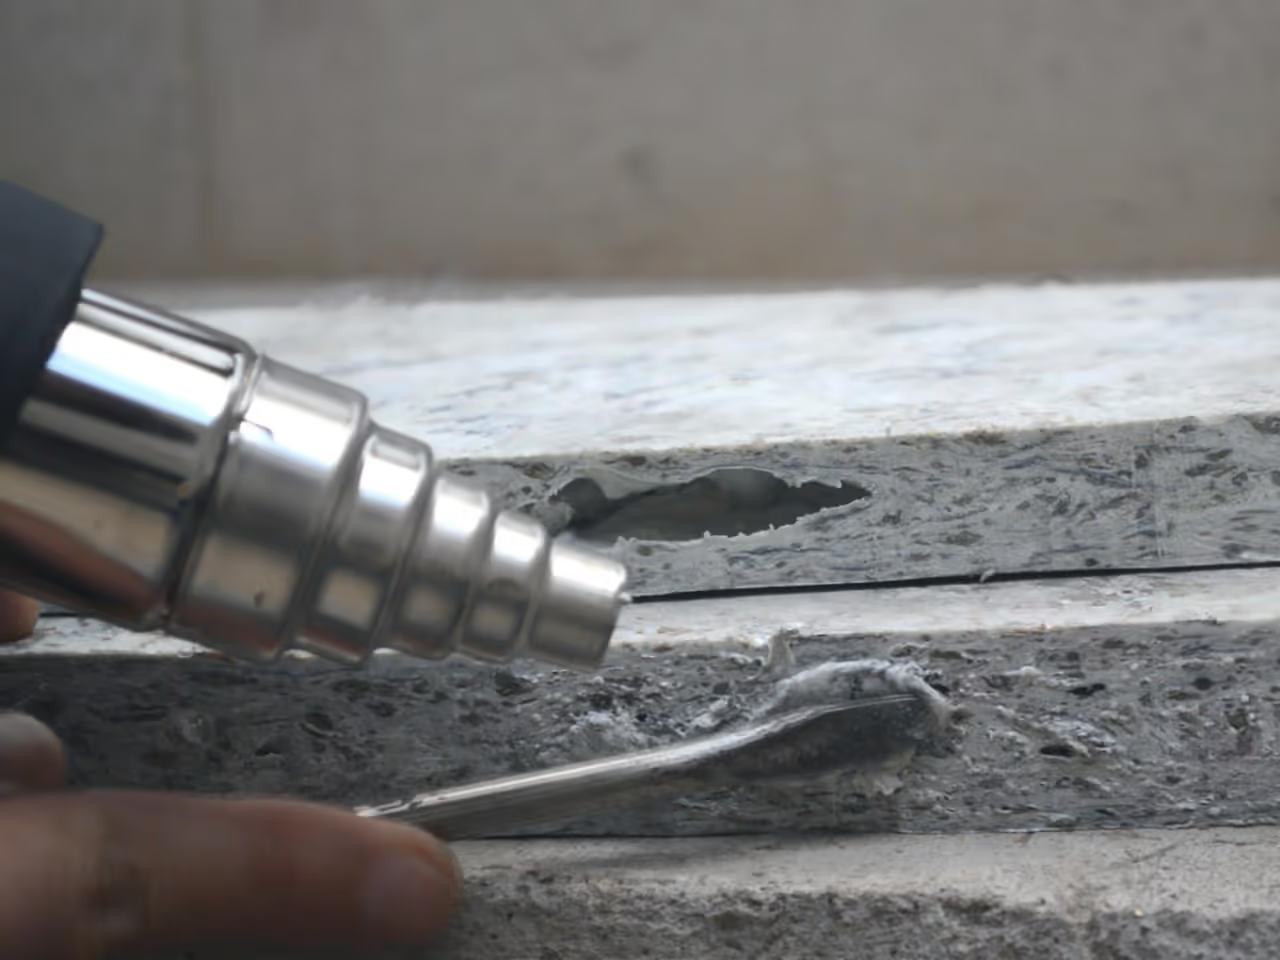
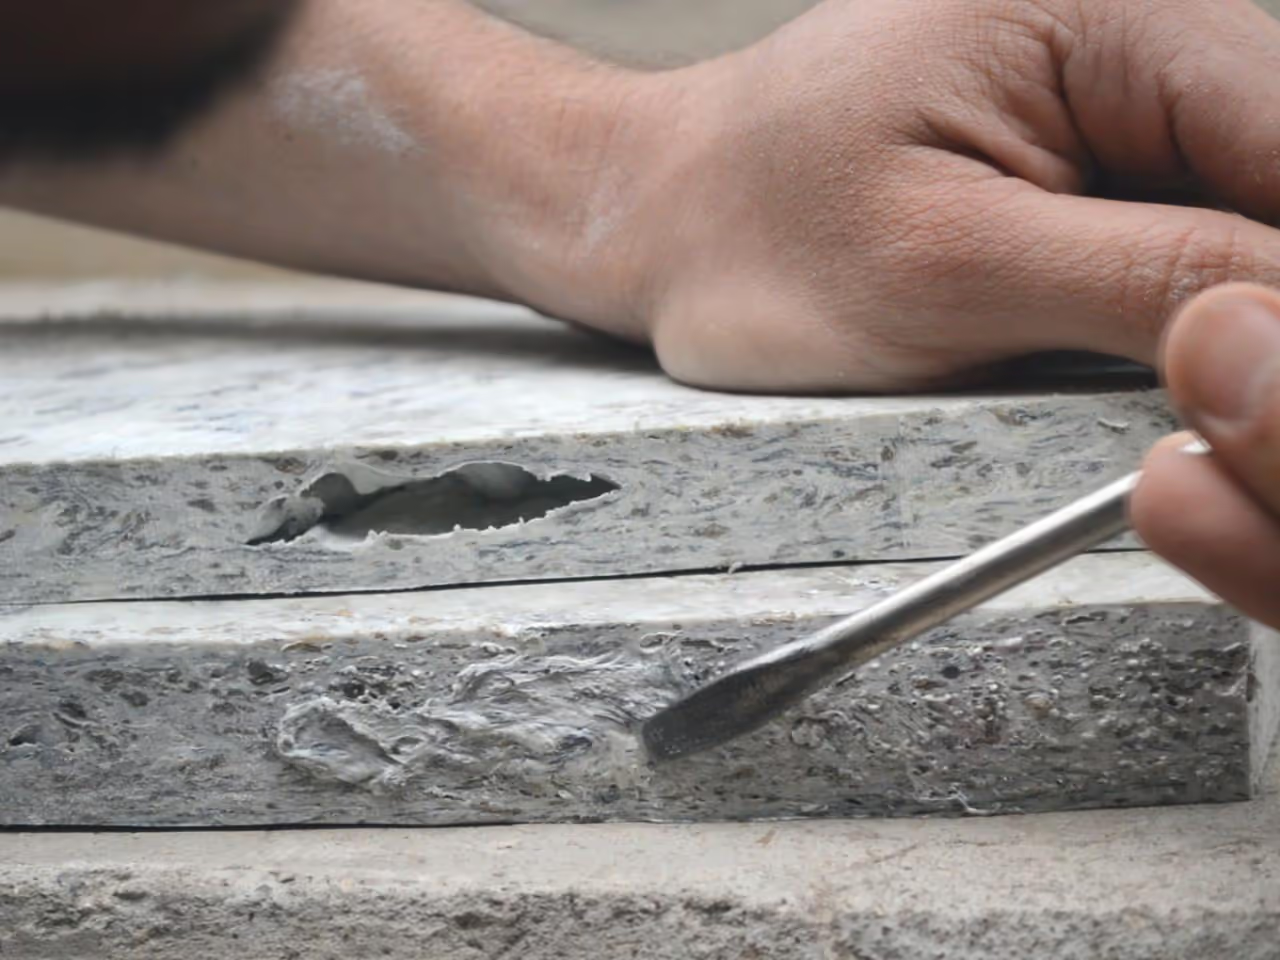
Even industrially produced recycled plastic sheets may have imperfections. These can be repaired using the same material.
Employ a heat gun or hair dryer and shape leftover material into a ball slightly larger than the hole. Pre-heat the affected area and, using a flathead screwdriver, press the plastic ball into the hole, applying additional heat if necessary.
Leave extra material to ensure complete filling; excess can be sanded off.
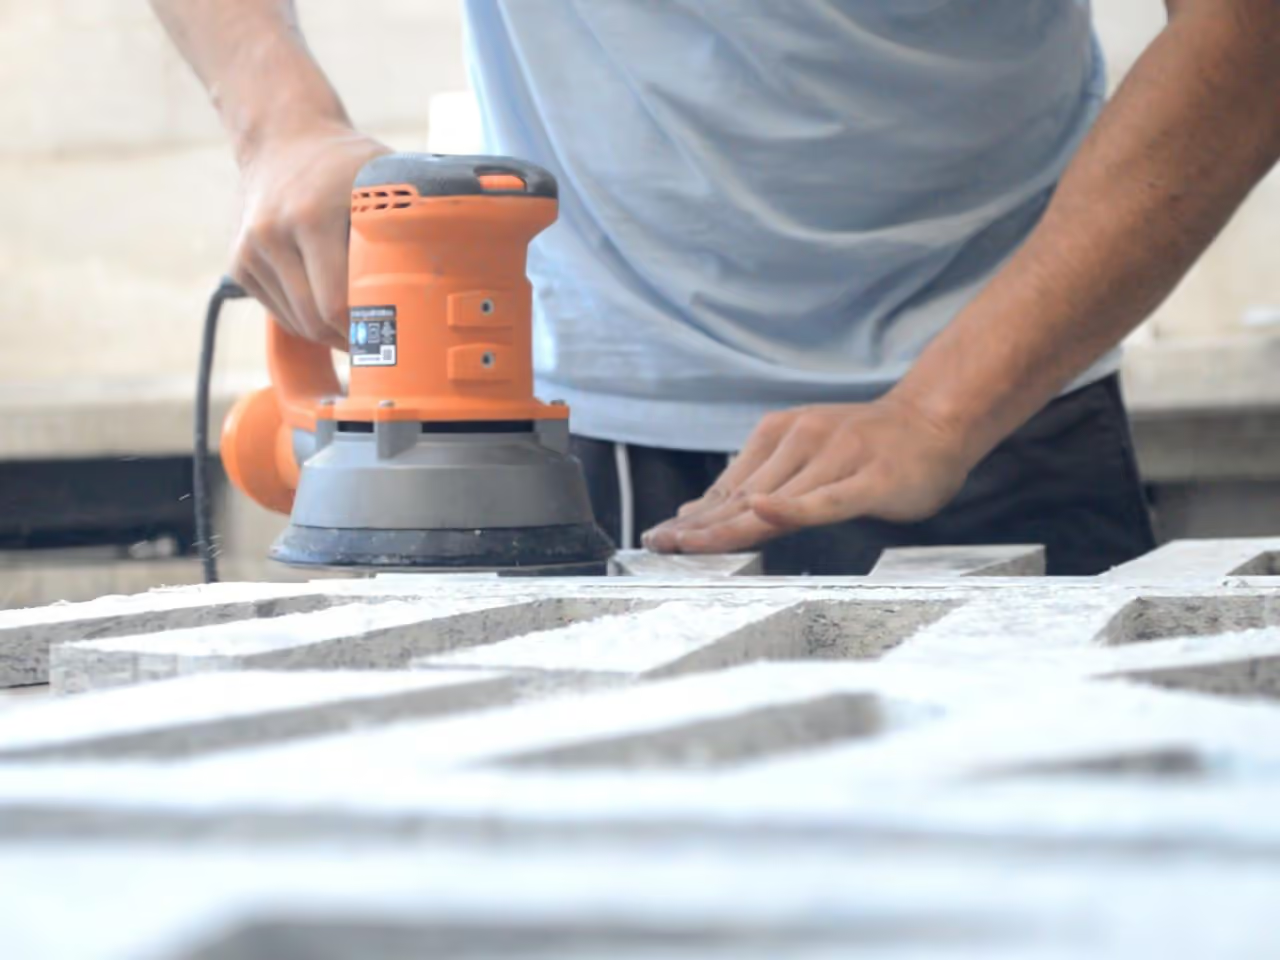
The quality of the HDPE sheet's surface affects the finishing process. If the surface is rough, it can be sanded manually or with a band or orbital sander. Using a wood planer for a specific thickness may result in a rough surface, necessitating the use of wet-dry sandpaper. We used grits in this order: 220, 320, 400, 800, 1200, 2000.
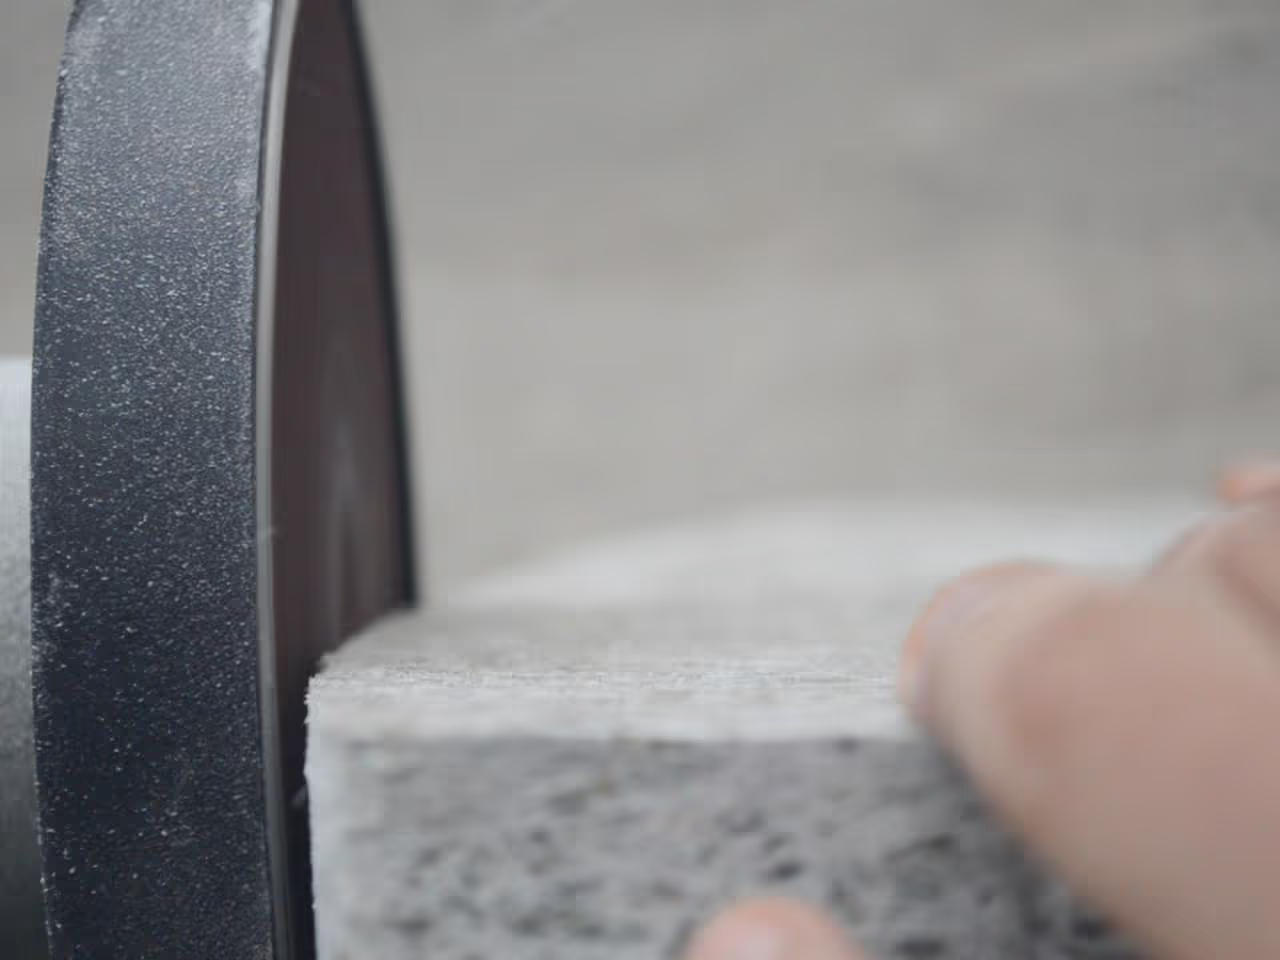
For a smooth edge finish, utilize a worn belt on a band sander. Applying pressure against the rotating belt can melt the rough edge, resulting in a smooth finish within seconds.
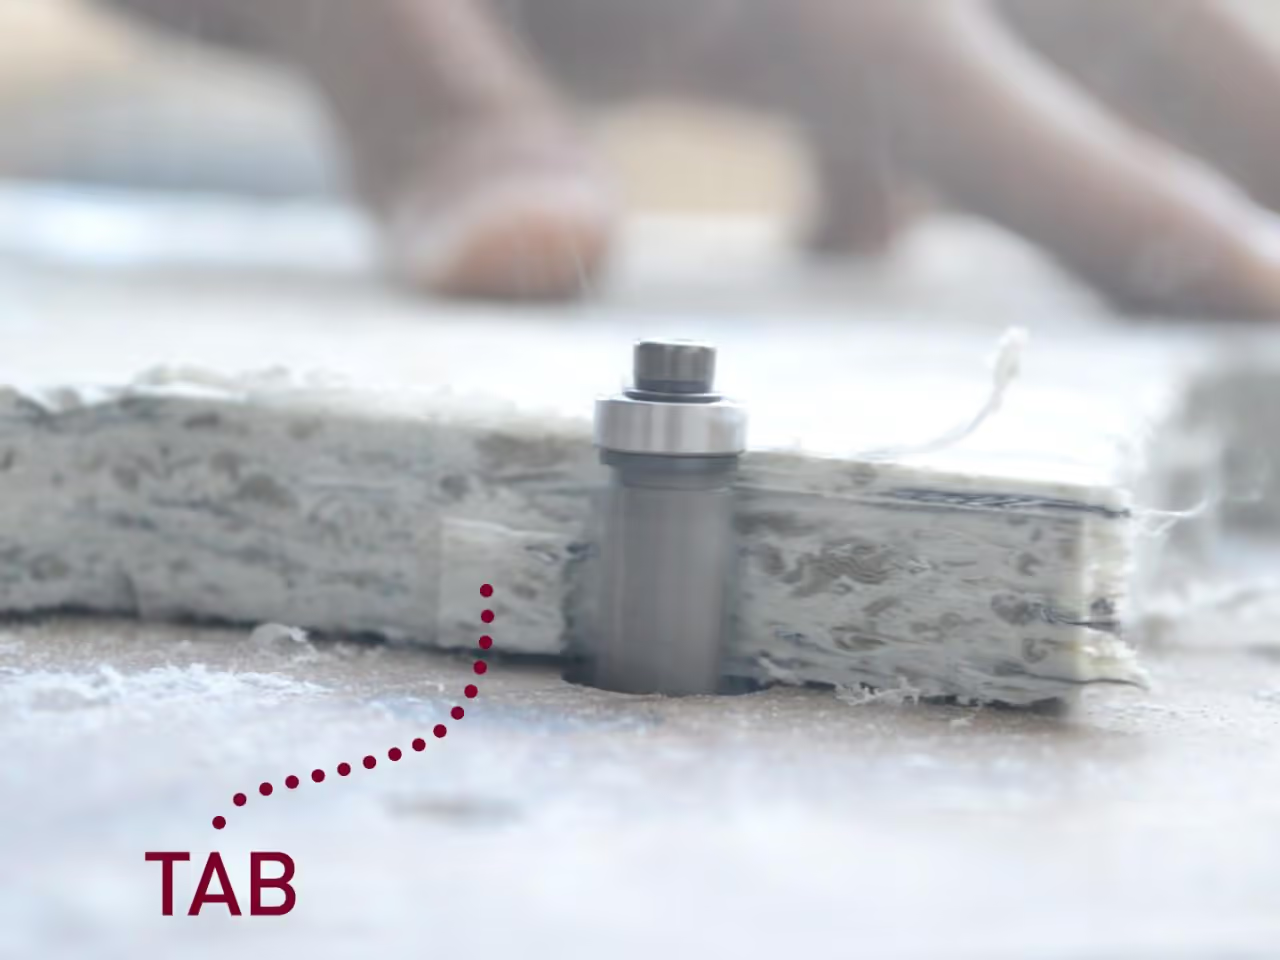
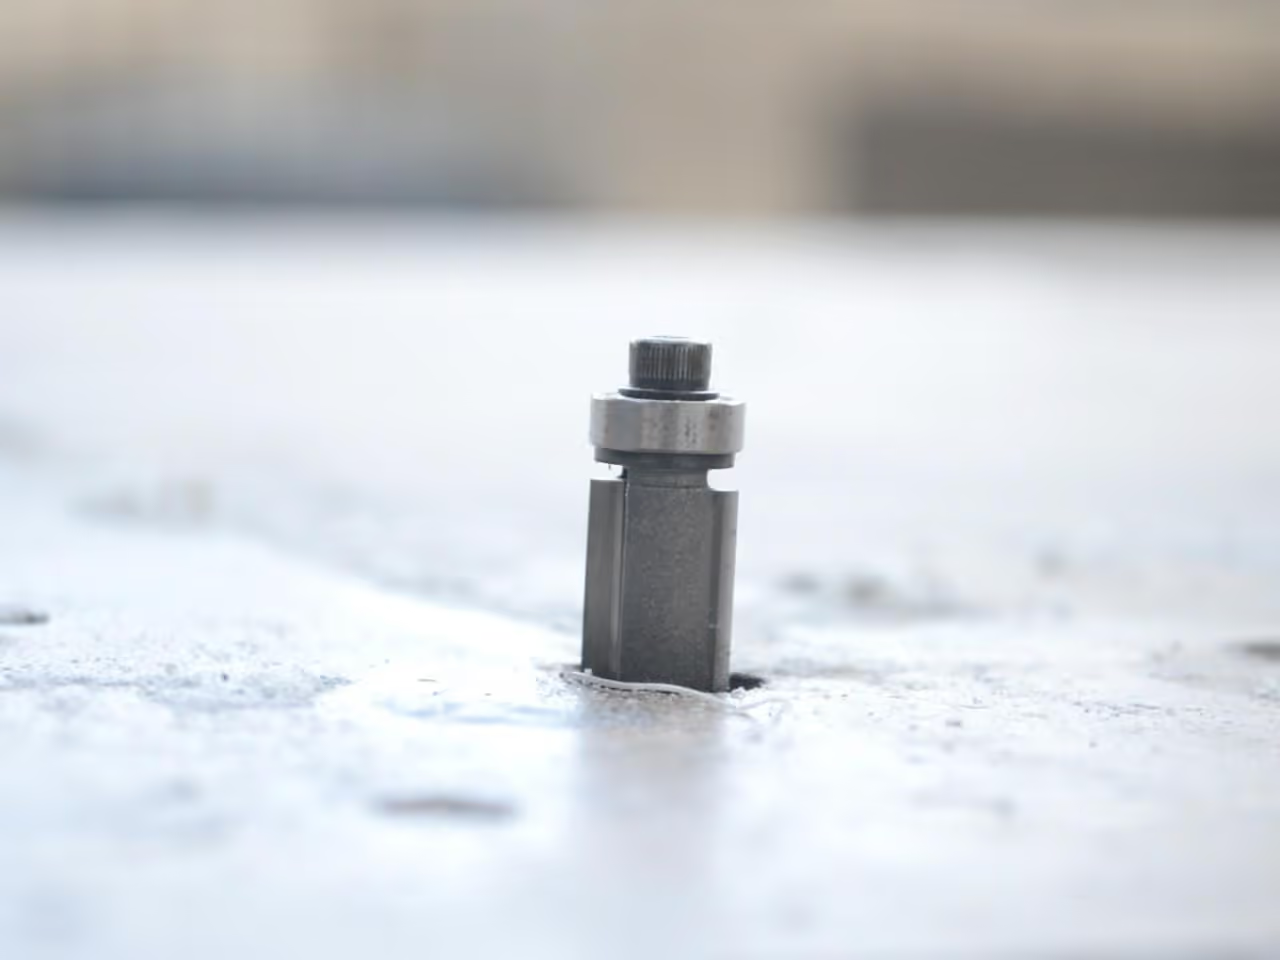
This step applies to sheets cut with CNC leaving tabs for attachment during transportation. It also ensures smooth edge finishes.
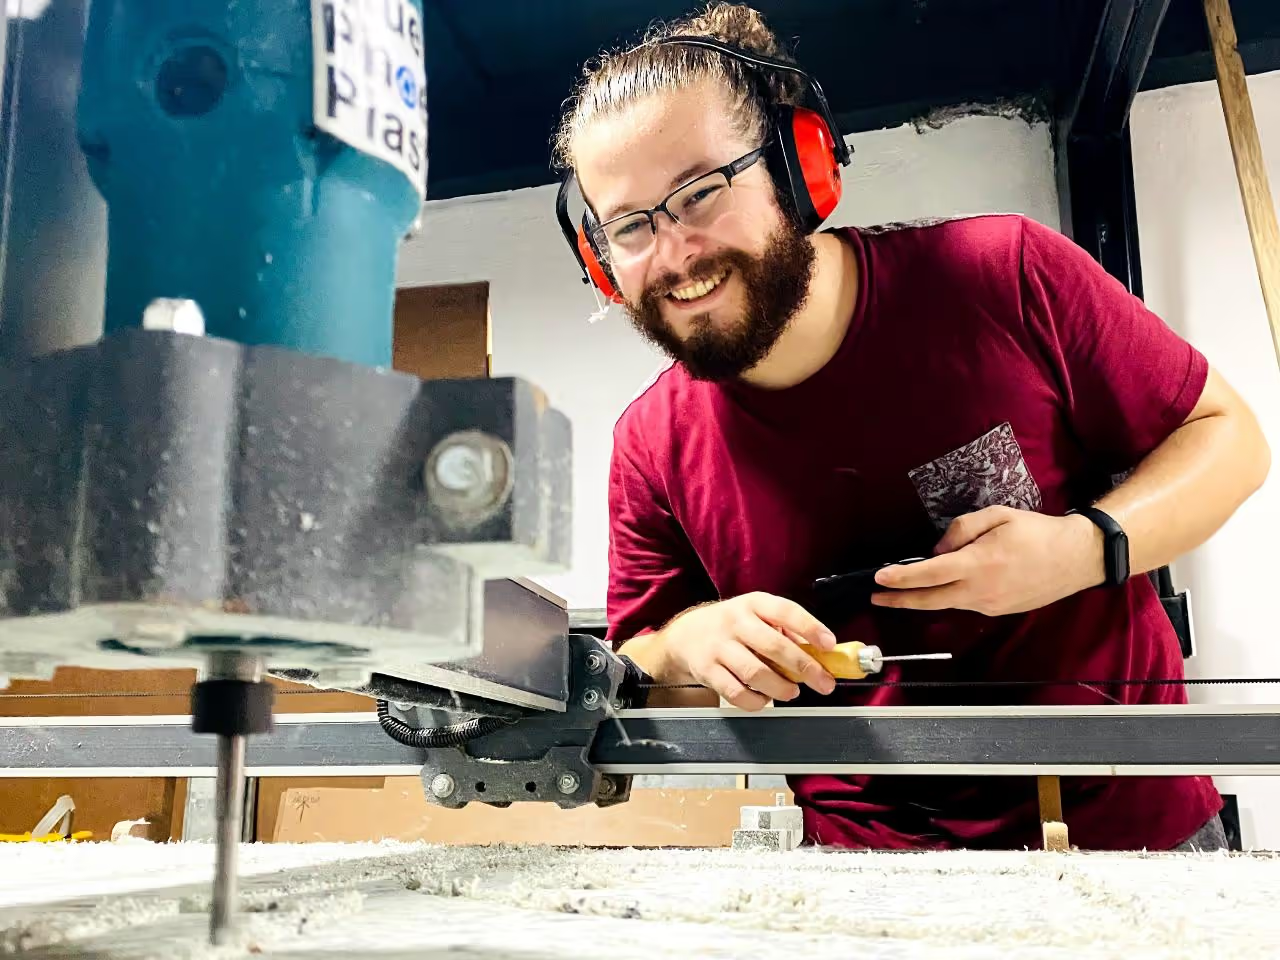
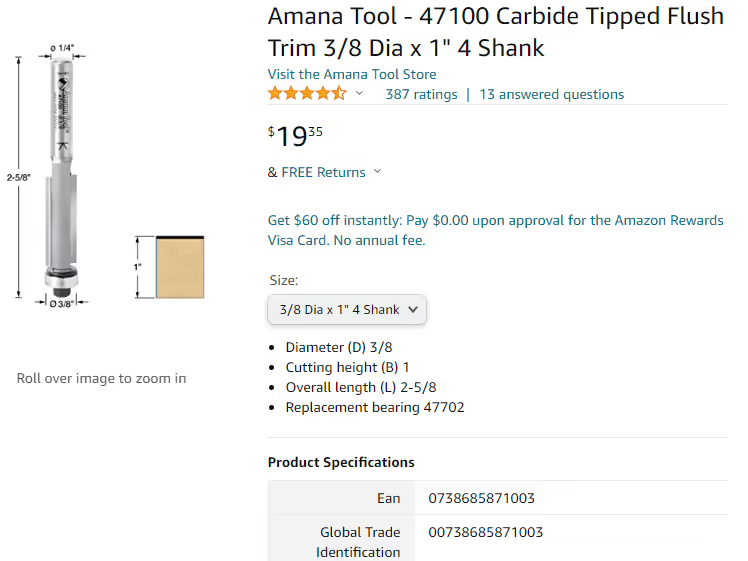
Using a CNC Router at 35,000 RPM with a flush trim CNC Router bit effectively removes the tabs and refines the edges.
The design process is fundamental, even though it is interlinked with subsequent steps.
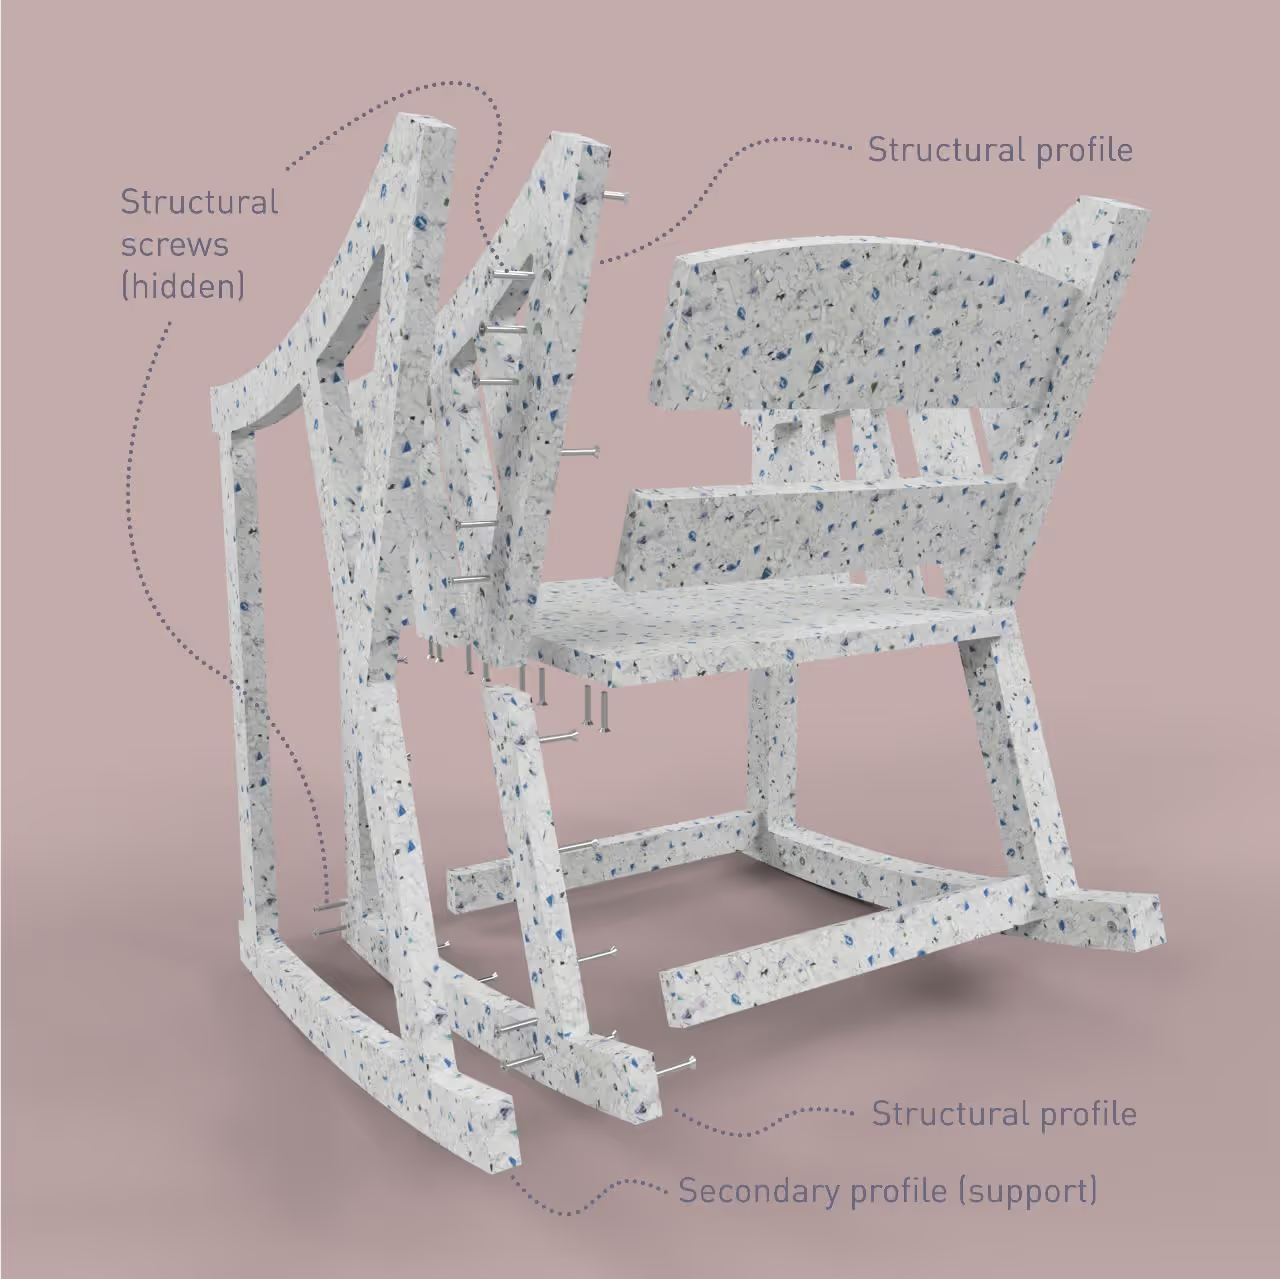
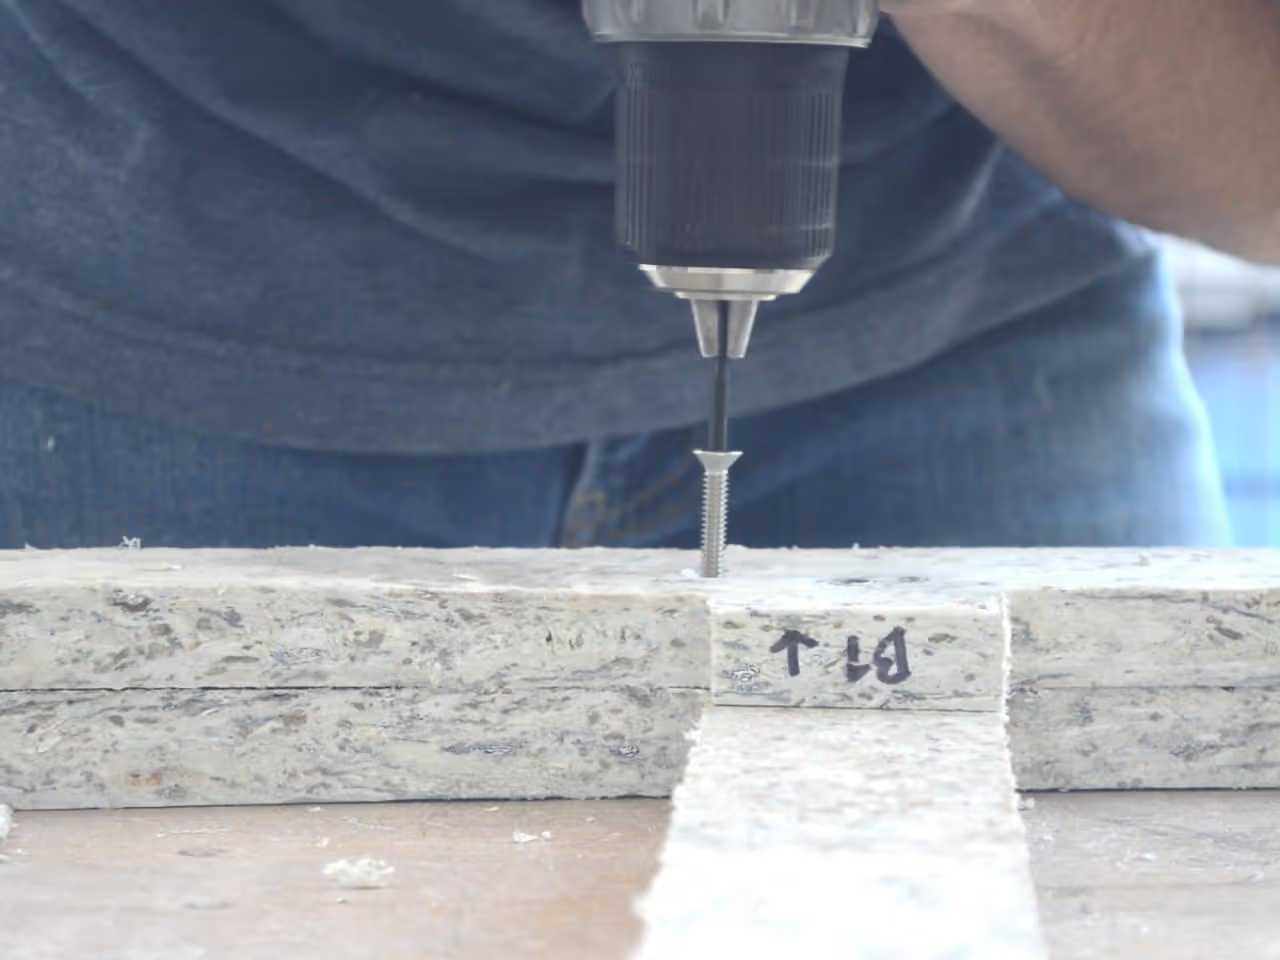
Concealing screws and fixings can create a seamless appearance. An important design choice involves selecting the material and head type of screws. For this furniture, stainless steel flathead socket screws were used.
It is important to plan screw placement to ensure they remain hidden or less visible during use. In this instance, the sides of the rocking chairs were divided into two profiles. This approach conceals the structural screws with an additional profile, enhancing mechanical strength while providing an exterior without visible screws.
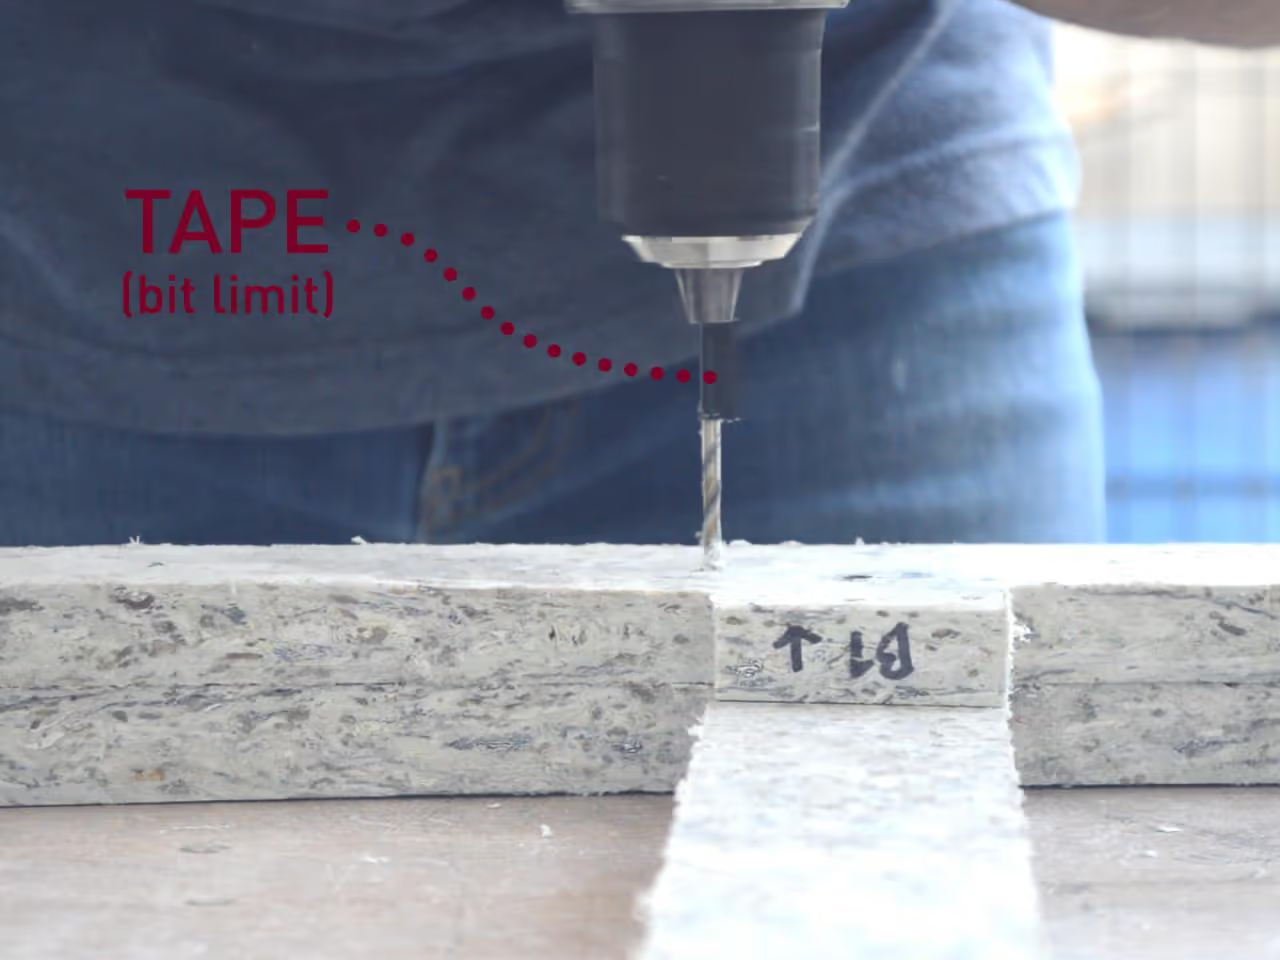
This process can be completed using a CNC machine. However, due to varying thicknesses in the plastic sheets, it was done manually.
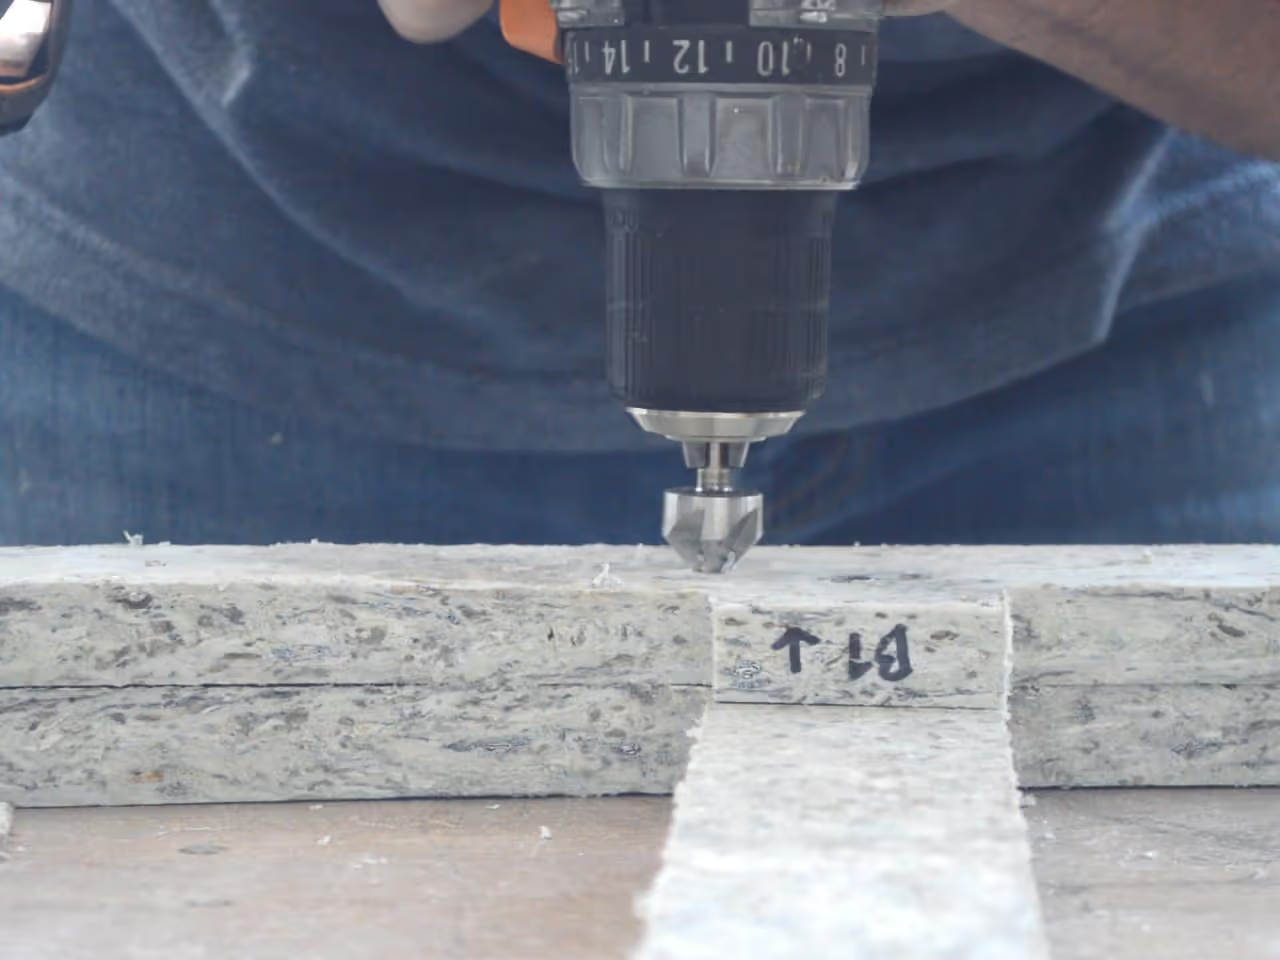
A countersink bit was employed to ensure the screw head is level with the sheet.
A well-presented product requires high-quality photos to showcase the craftsmanship involved.
Lighting is paramount in photography, surpassing even camera quality.
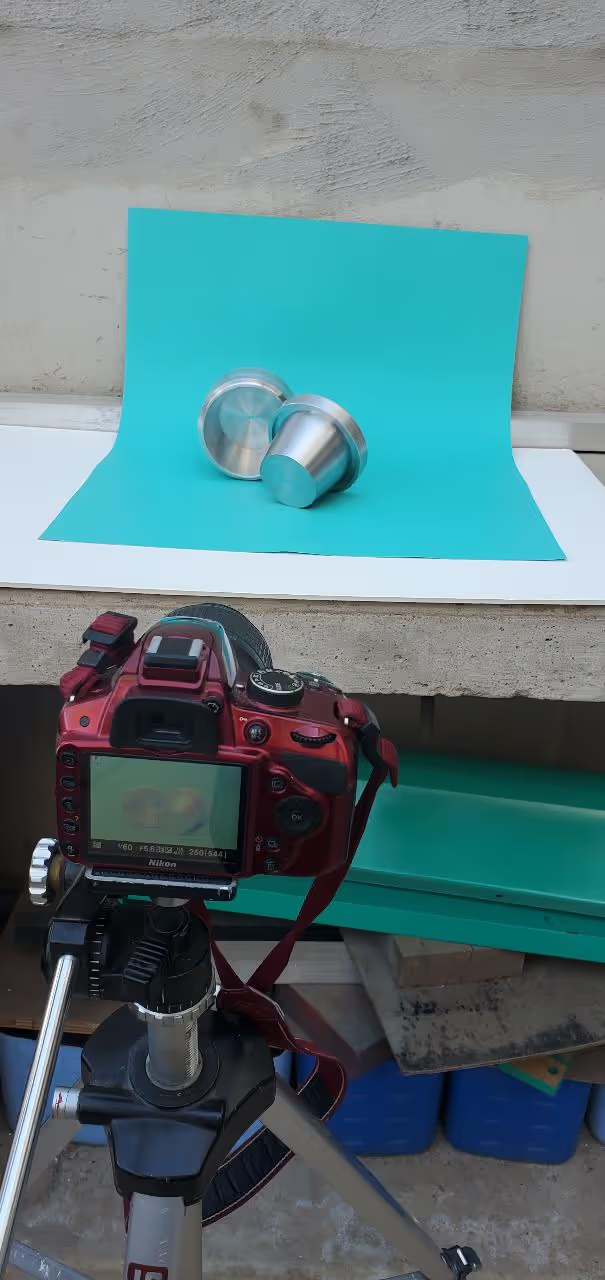
For photographing small items, use colorful cardboard and find an outdoor area with ample lighting. Capture multiple angles to have a range of options.
For an example, see our Instagram reel of a photo shoot for a screwless plant mold here.