Surf Fins Mould

PRODUCT
INJECTION
PP
MOULD
This tutorial demonstrates a straightforward method for creating a mold to produce surf fins.
It covers preparing 2D/3D models for laser cutting, injecting plastic waste, and finishing the product.
Included in this folder:
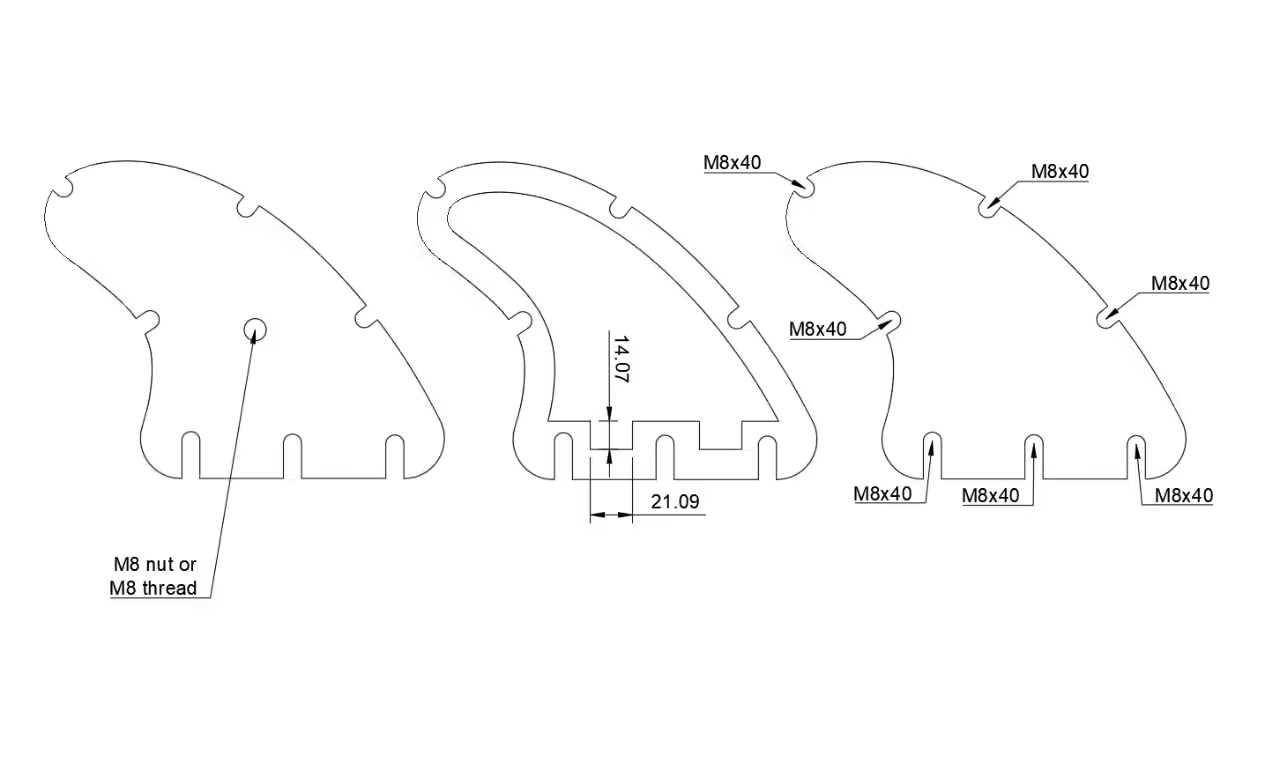
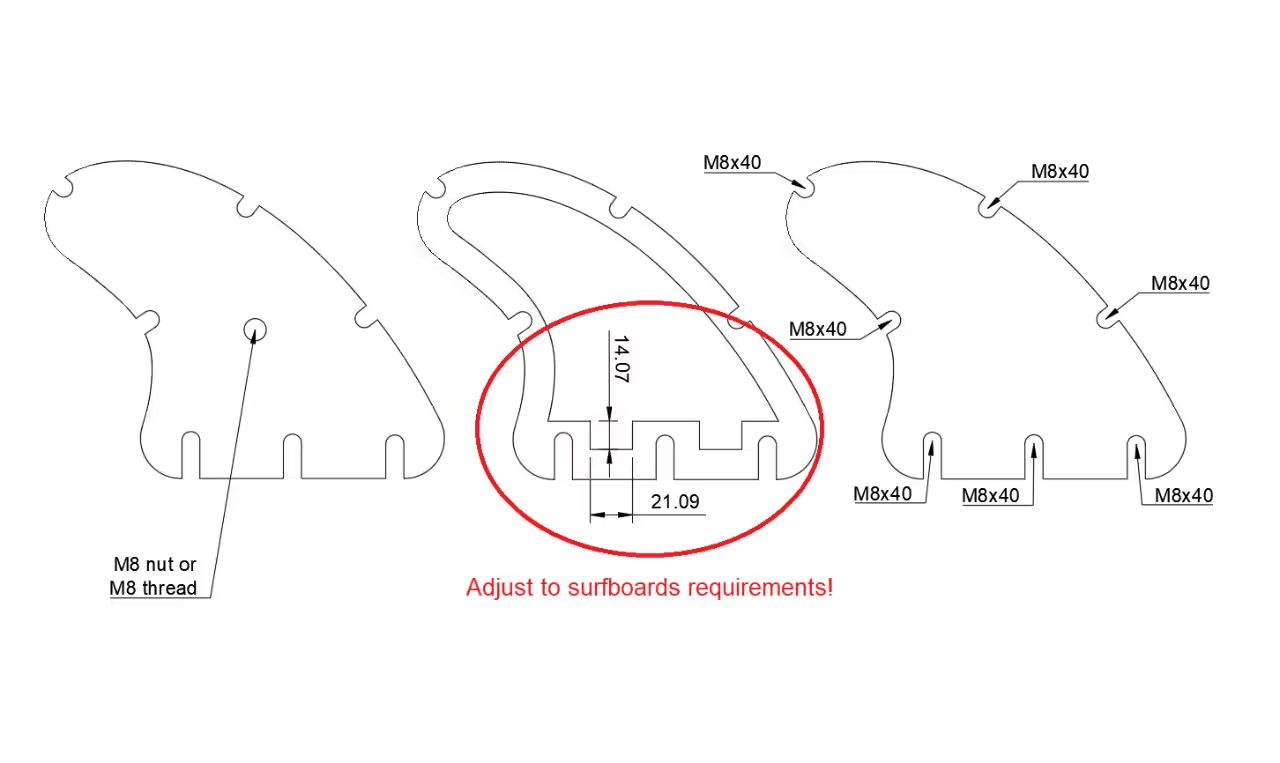
To begin, design the fin to meet surfboard specifications. Key dimensions include the area connecting the fin to the board, which may vary. Ensure accuracy in measuring width, height, and thickness. The thickness is based on the stainless steel sheet, typically 0.24 inches (6 mm). The recommended thickness for top and bottom pieces is 0.39 inches (10 mm).
Modify or verify measurements in the downloadable .DXF and .F3D files.
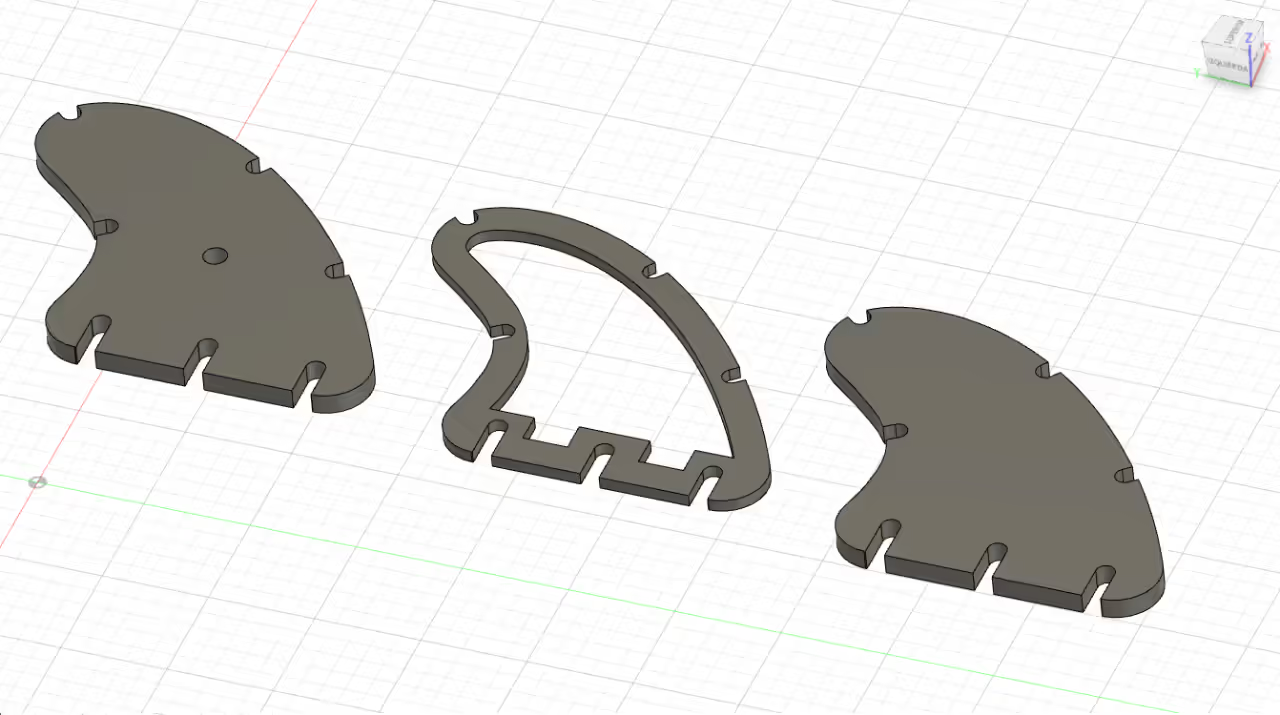
Once confirmed, export each of the three designs in .DXF format for laser cutting from stainless steel. Utilize an industrial laser cutting service, which is generally cost-effective.
Request the service to include an M8 thread at the center of the top piece. If unavailable, you can weld an M8 nut. This feature is essential for connecting the injection nozzle to the mold; verify compatibility with your machine.
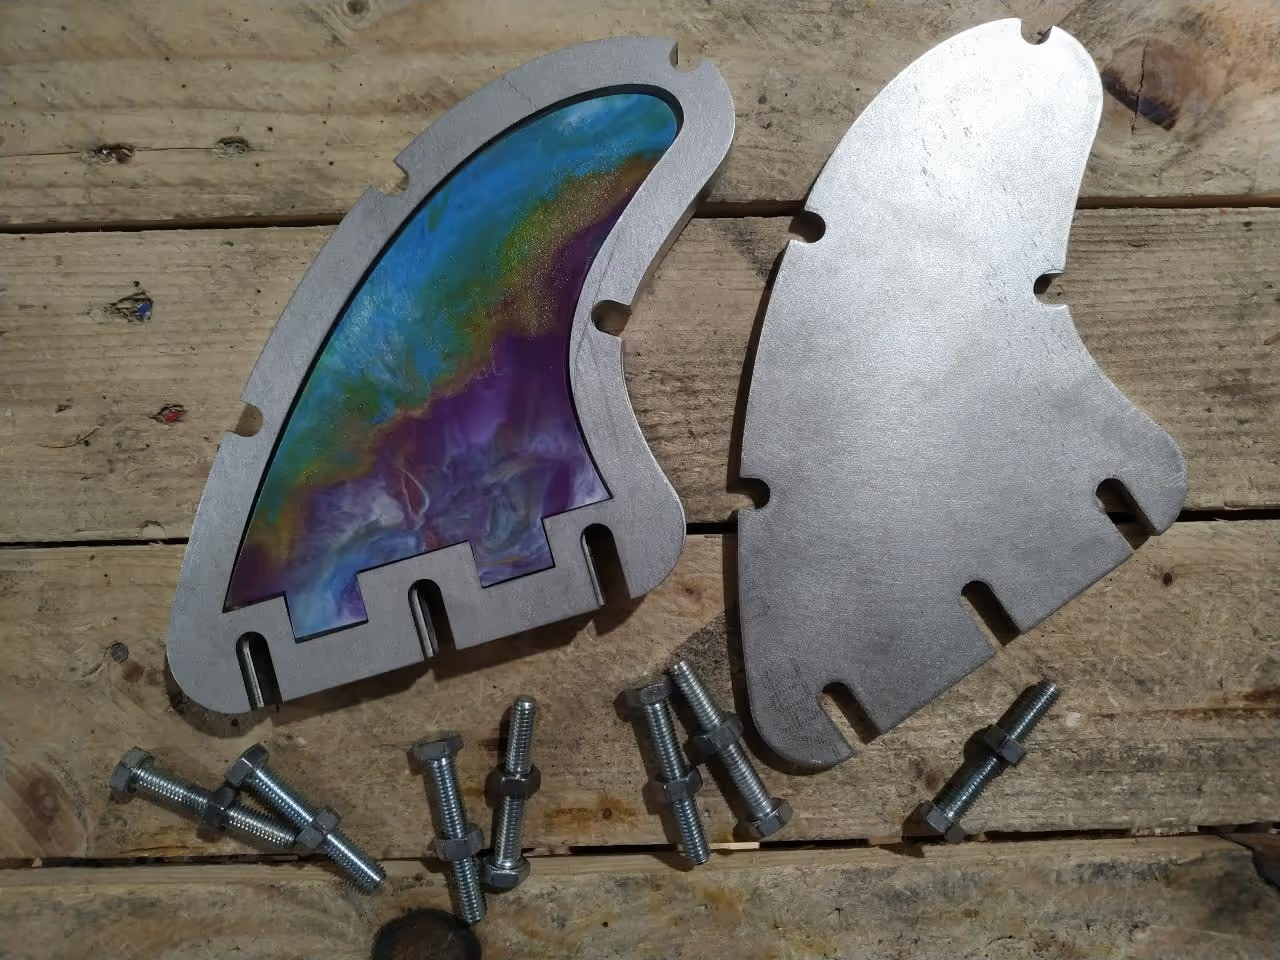
Once your laser-cut mold is ready, fill it with plastic waste.
Use seven M8x40 (5/16x1 9/16 inch) screws, or longer, to secure the three mold layers. An M8 nut connects the mold to the injection machine, allowing for varied injection point positions. If your injection machine lacks threading, use the hole without thread.
Consider using PP, as PE may break easily.
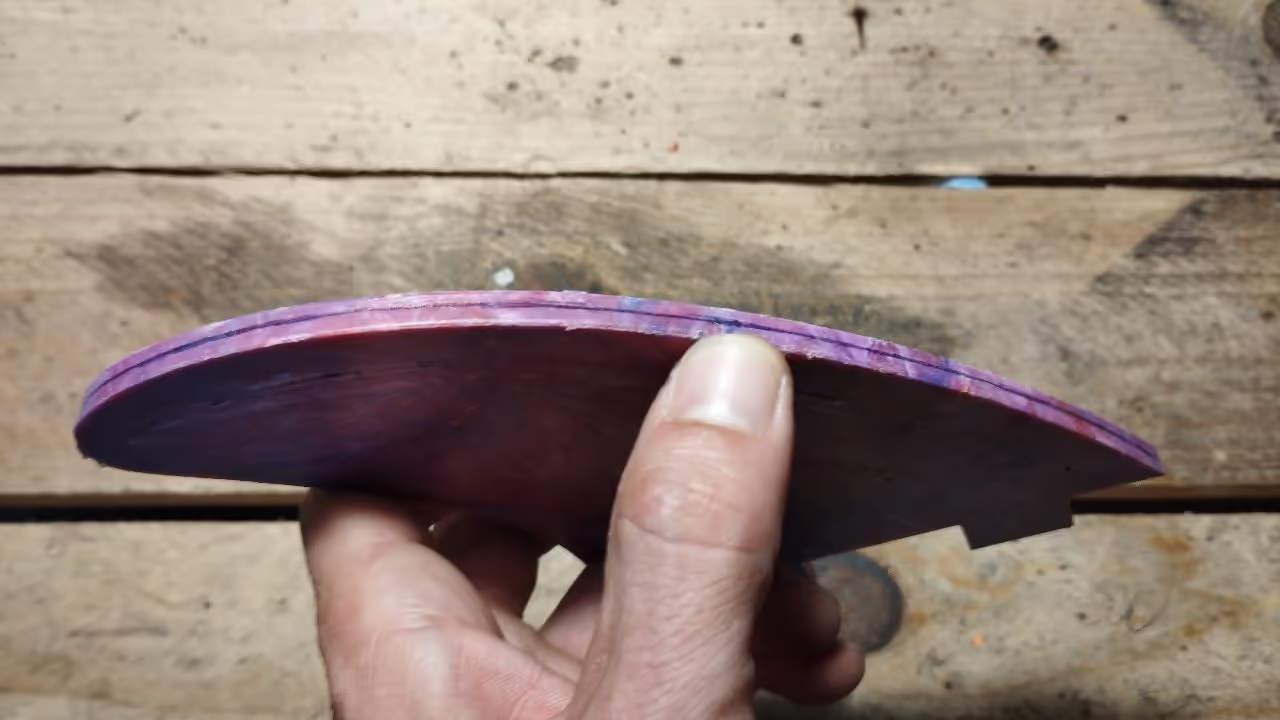
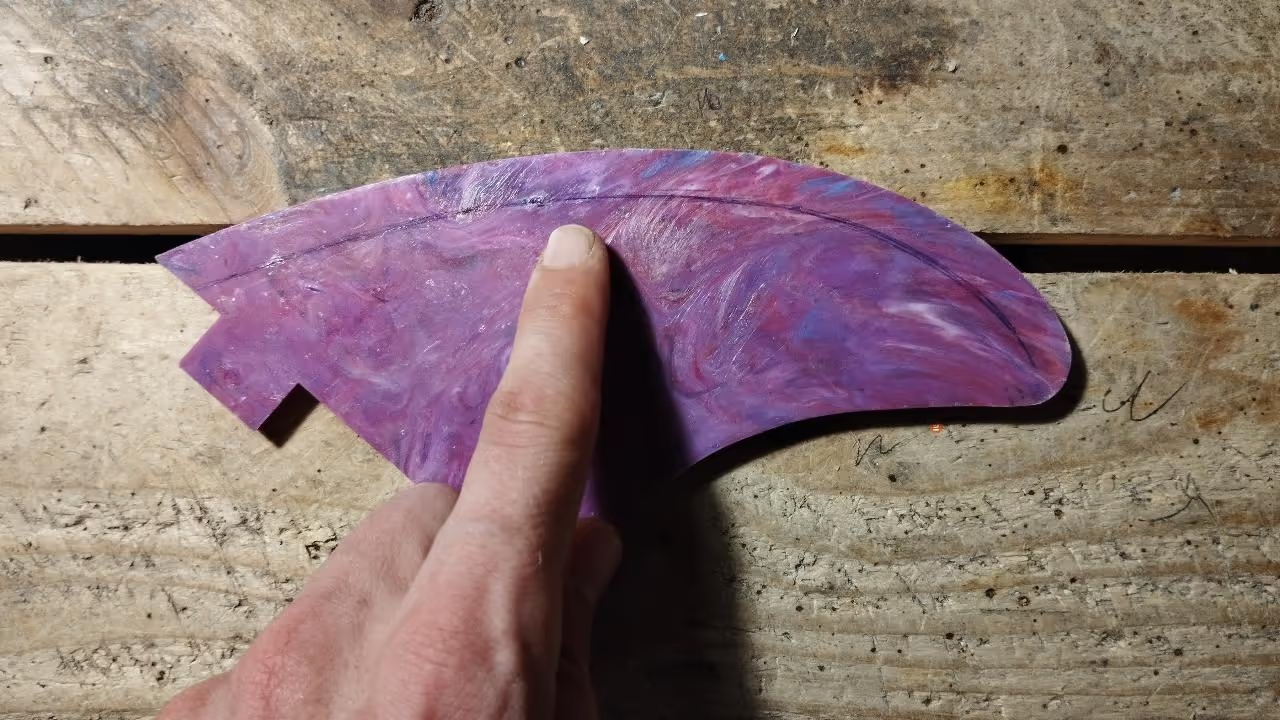
The laser-cut mould has straight edges that are not suitable for surfing. These edges must be sanded down for a hydrodynamic shape.
Preparation:
To maintain the central alignment and verticality, draw a central line and outline on both faces. This will guide you to avoid excessive material removal.
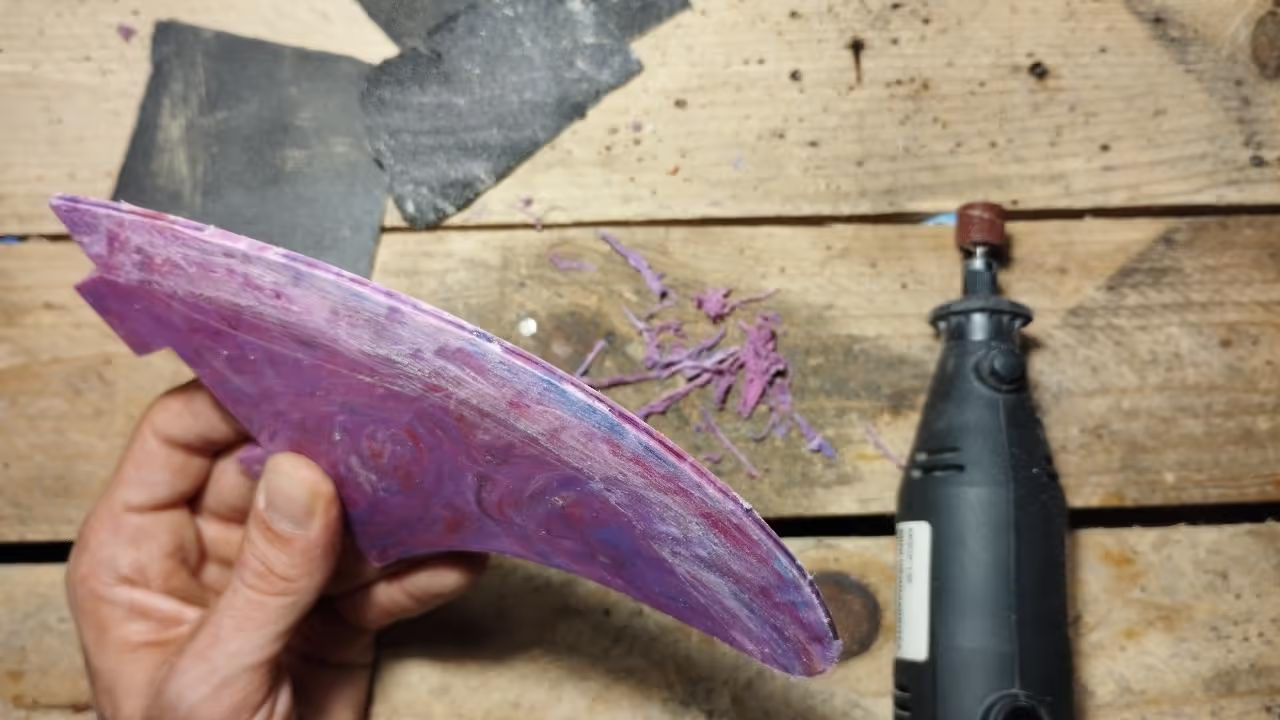
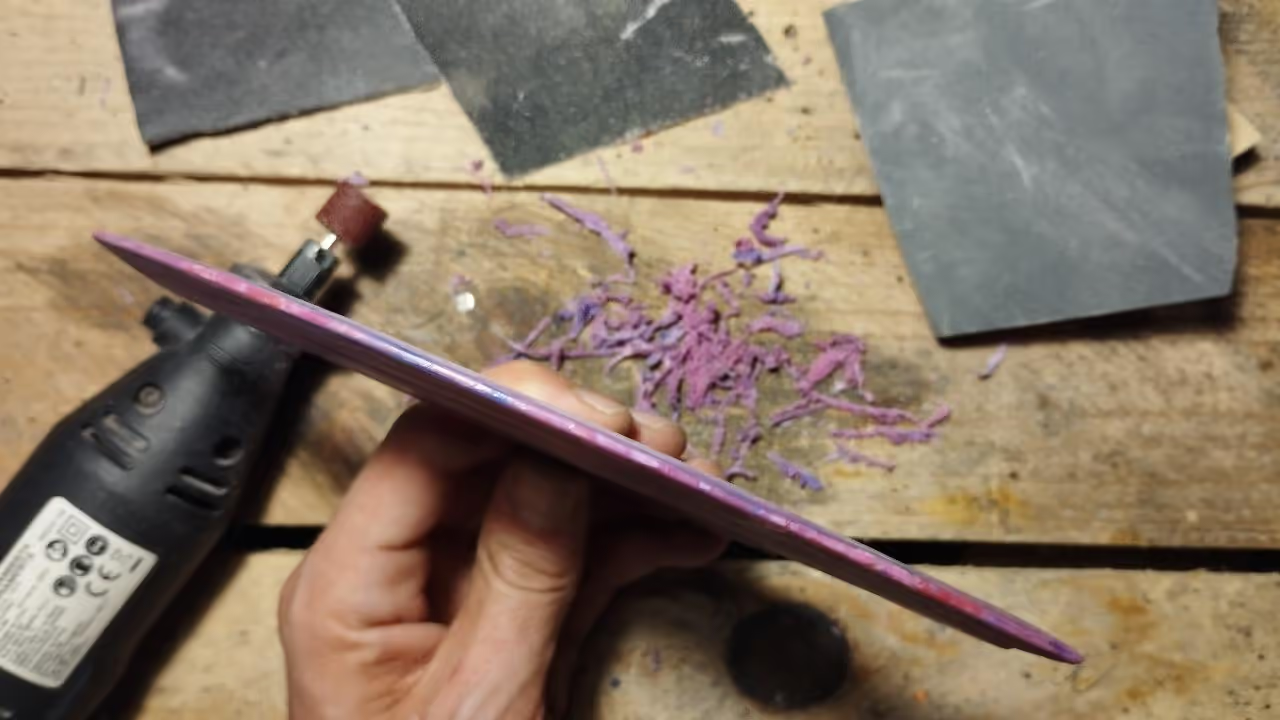
Sanding:
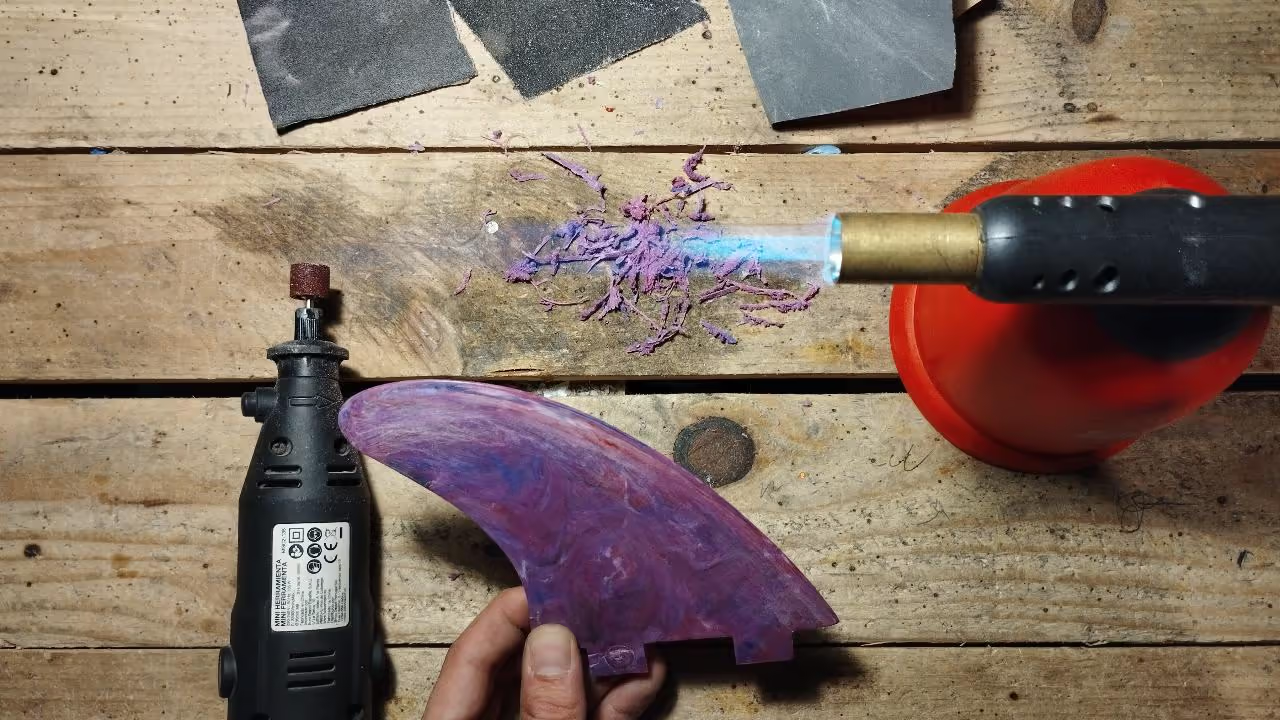
Use a rotary tool for precise sanding. Wear safety glasses and a mask for protection.
Note: A CNC mould, though costlier, provides a naturally hydrodynamic shape without the need for additional sanding.
Use an electric sander to save time. Start with a coarse grit (120) to remove most material, then use a medium grit (320), and finish with a fine grit (800). These grits are just guidelines; you may experiment with different grits or polish with a very fine grit (3000 or higher).
For the final touch, apply brief heat to enhance the surface.