HDPE Dowel Nuts for Break Down Furniture
MELTING
HDPE
PRODUCT
HACK
I use an induction stovetop to heat a steel pipe to cast HDPE plastic for threaded inserts. I often make furniture from pallet wood, and dowel nuts are useful for creating knock-down joints. They are not available in sizes larger than 1/2 inch (13 mm) in diameter.
I am beginning to work with HDPE and currently use scissors and power tools for cutting. I am considering purchasing an inexpensive blender to create smaller plastic pieces.
Melt the plastic using a magnetic pan on an induction cooktop. Set the temperature to 200°C (400°F) for efficient melting.
I also used a steel cylinder heated on the induction plate to aid in rolling the plastic into a sheet.
Refer to the video at the 3:00 mark for the plastic melting process.
I heated a conduit/steel pipe (1" interior diameter [2.54 cm]) by placing it on a hot metal surface. Then, I gradually added melted HDPE into the pipe. A spare bolt helped push more plastic in, reheating the pipe as needed to maintain warmth.
Once filled, I used a clamp and 1" (2.54 cm) diameter plywood to achieve high compression in the pipe, aiming for maximum HDPE density.
As the HDPE shrinks while cooling, I tightened the clamps accordingly.
Frequent addition of smaller HDPE pieces with regular compression yielded the best results, though my technique is still a work in progress.
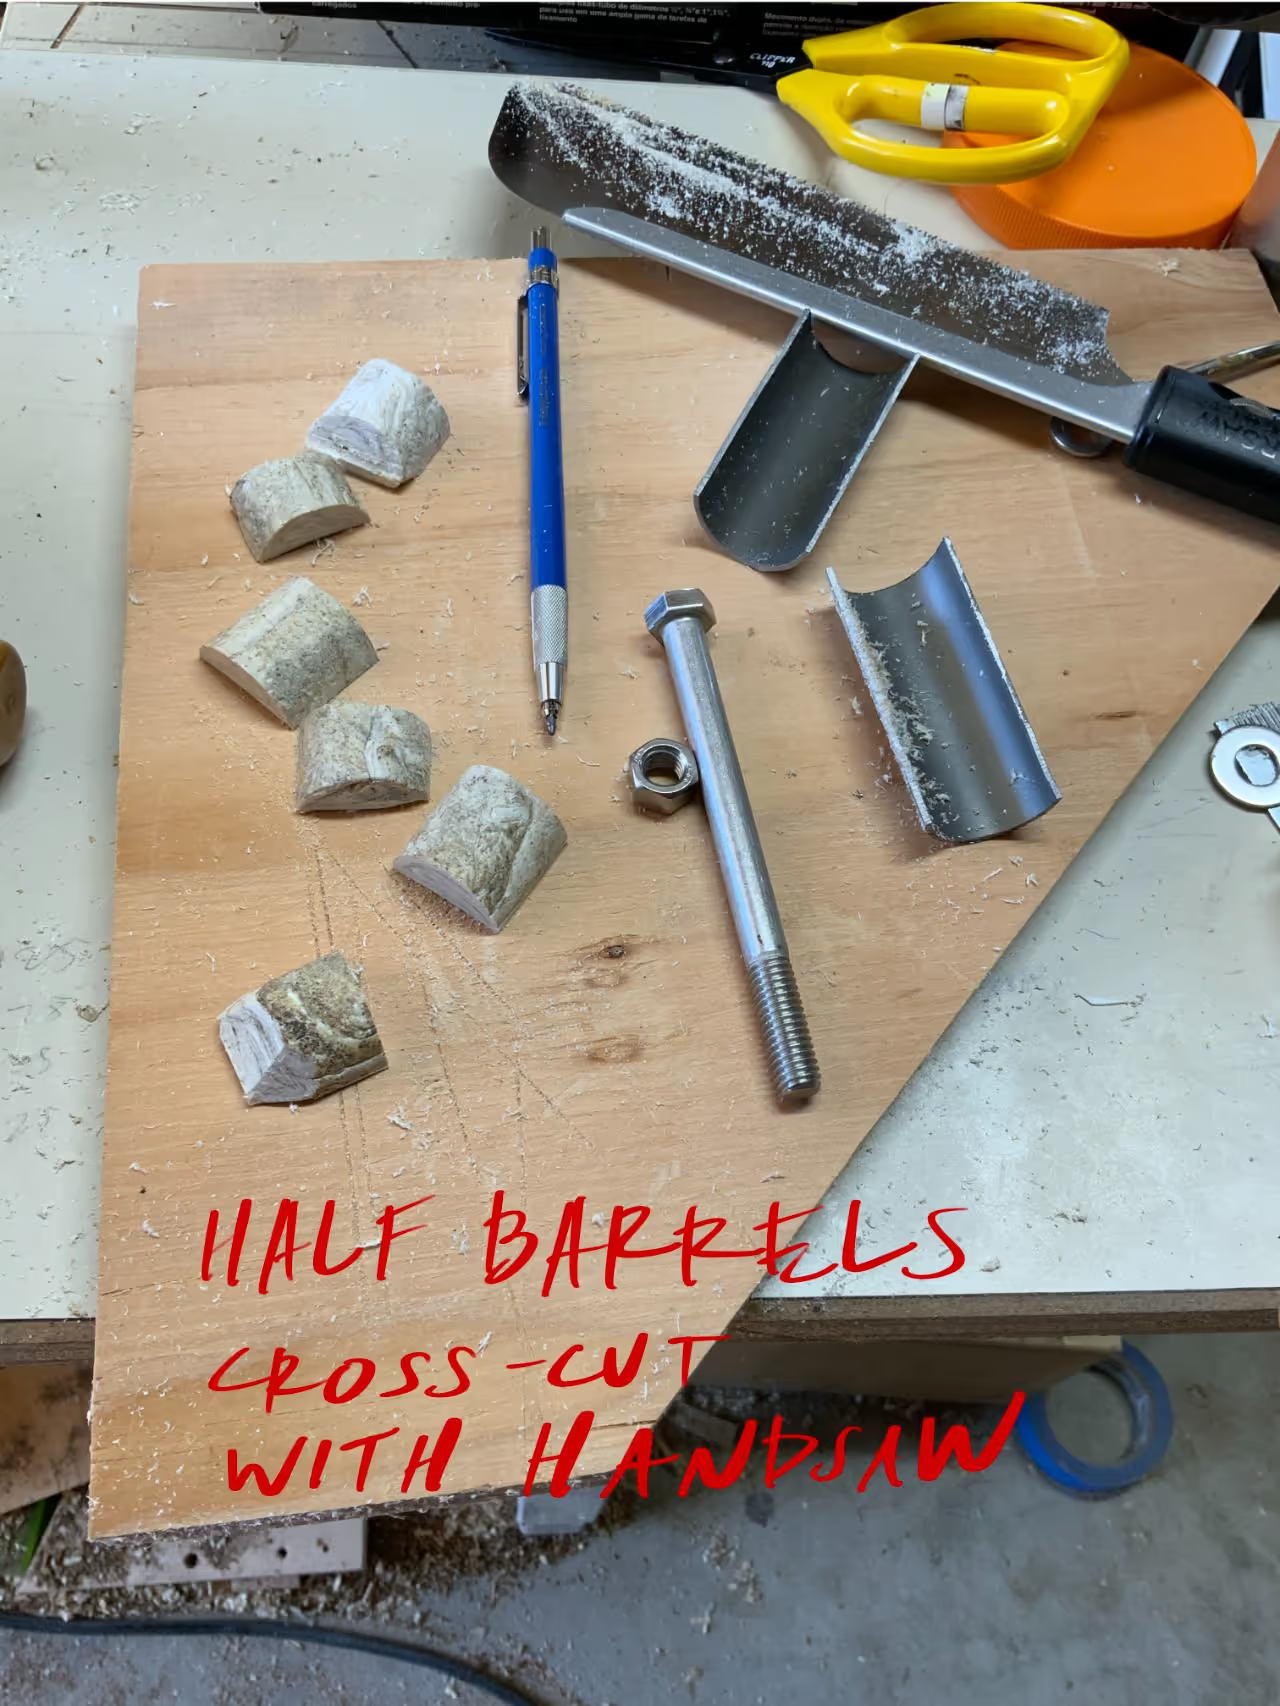
Removal and Cutting: Once the HDPE solidifies inside the conduit or pipe, it can be easily removed. Cut it into 1-inch (2.54 cm) long cylinders using a handsaw, then halve each cylinder.
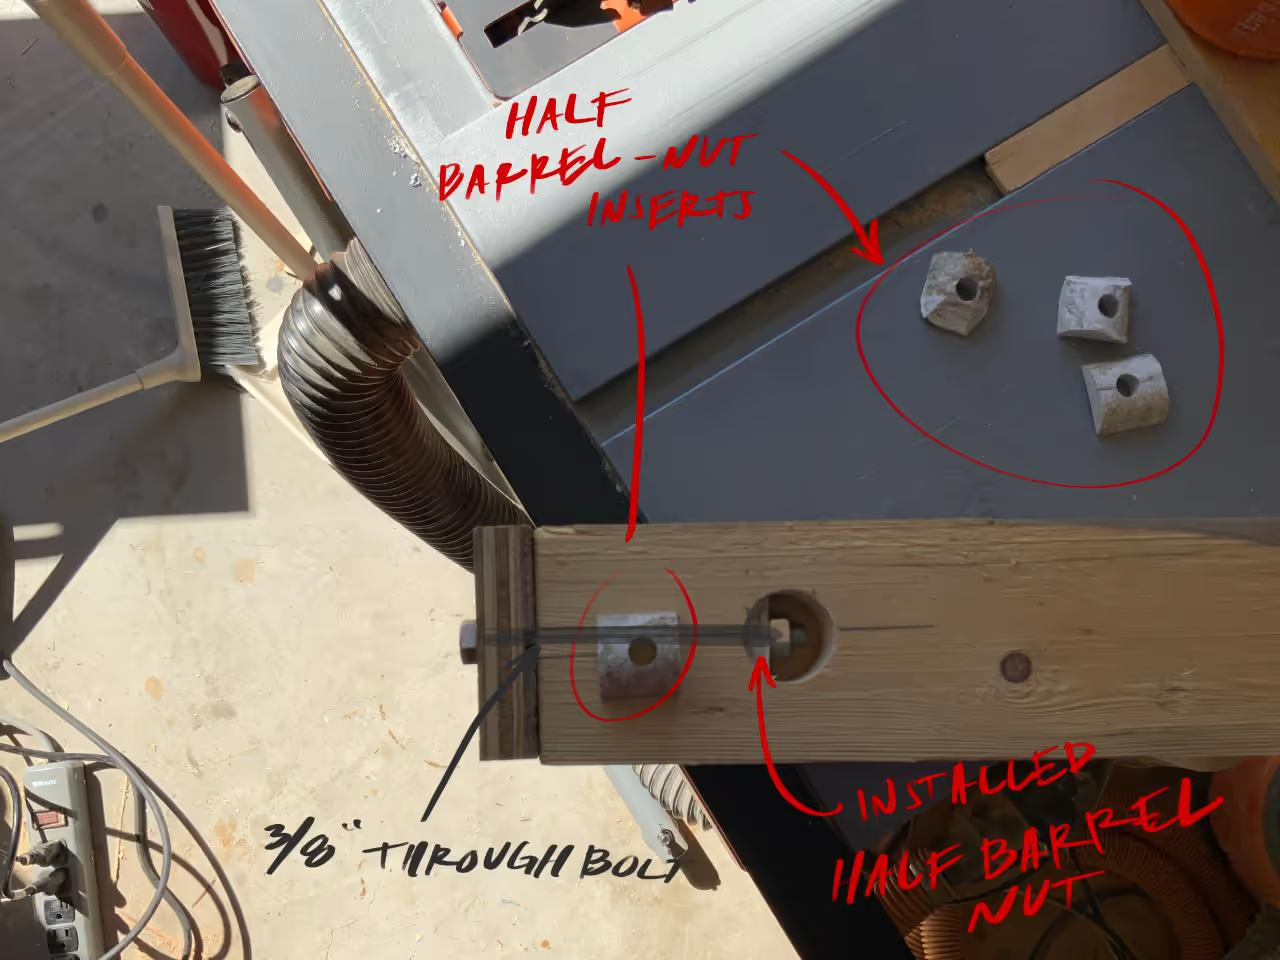
Drilling and Tapping: Drill a hole at the center of each half-cylinder. Use a 3/8-inch x 16 N.C. tap for threading, followed by inserting the appropriate bolt.
Countersinking: Apply a countersink to the bolt entrance for smoother insertion.
Thread Durability: The threads proved to be durable, even able to withstand use with an impact driver without stripping. Bolts with nuts were also added for further stability. The impact of temperature changes on this setup will be monitored.
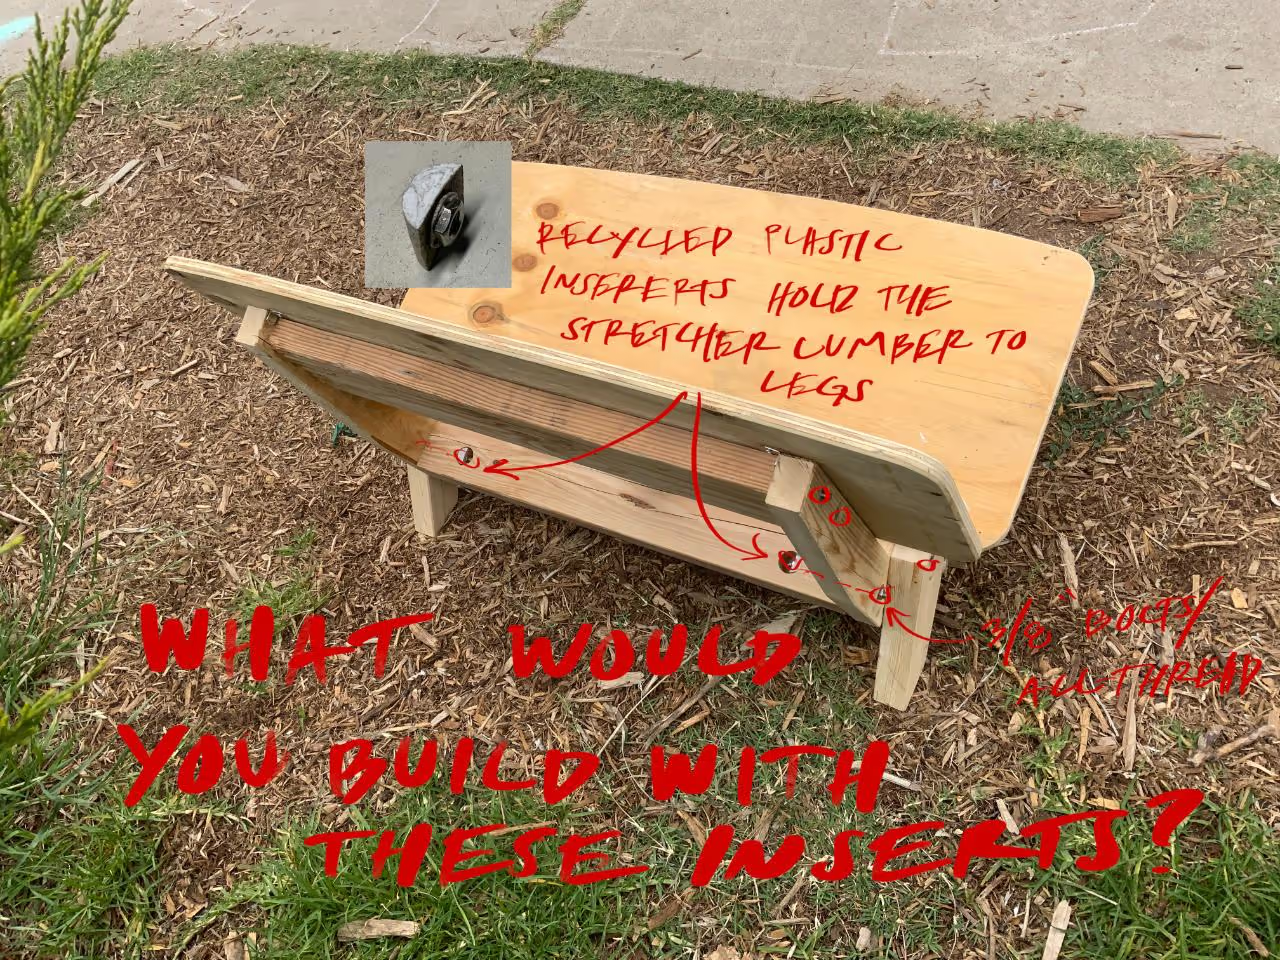
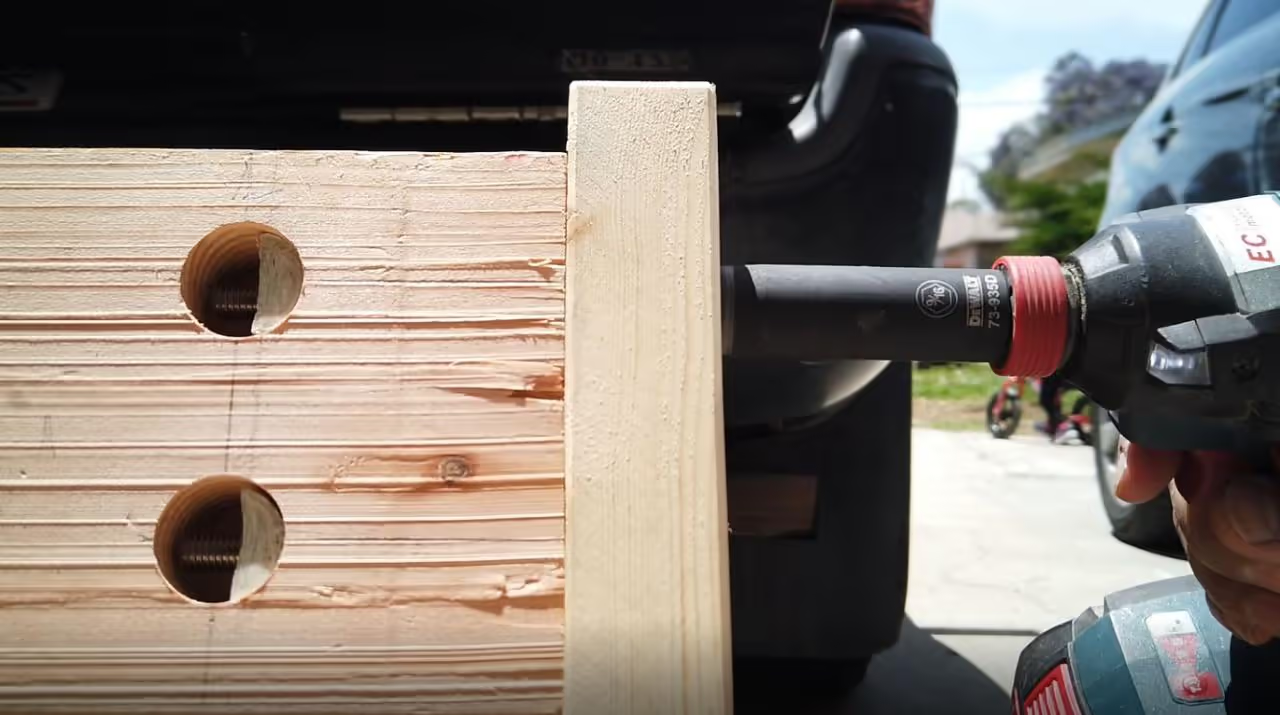
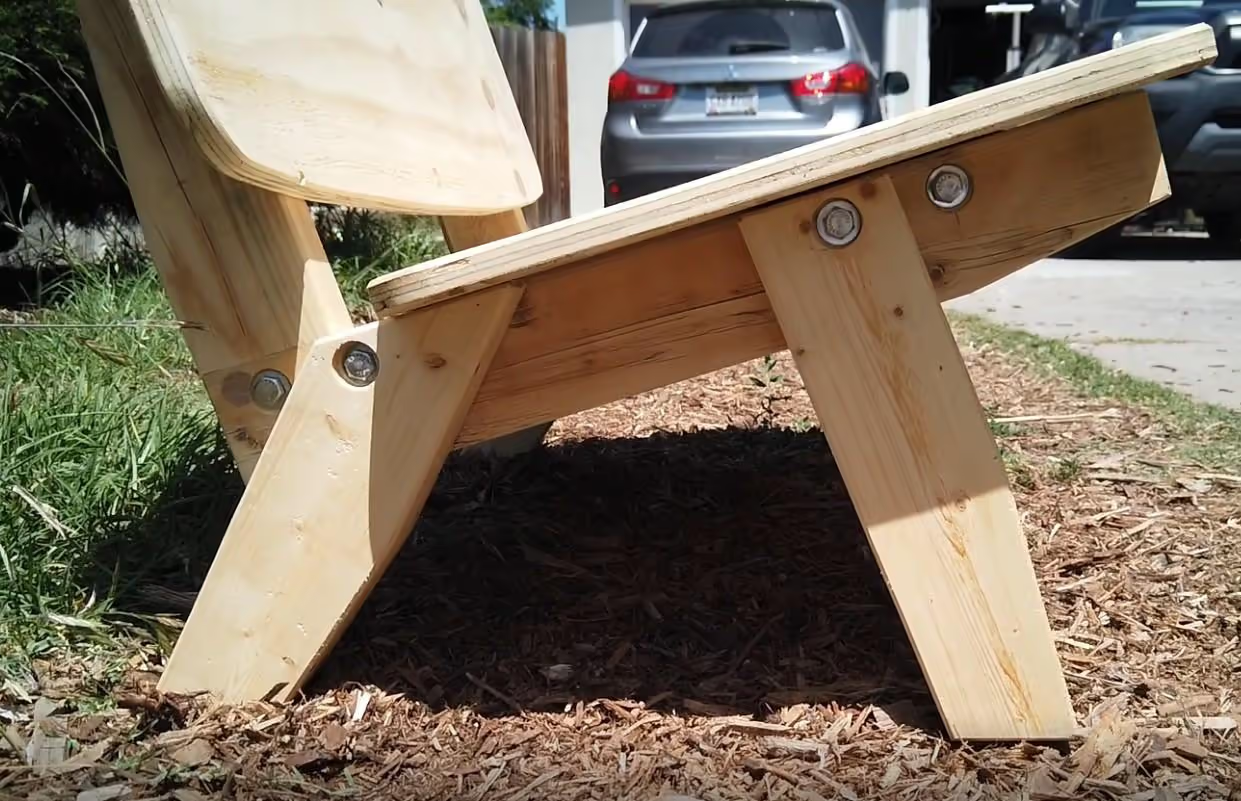
During the prototype phase, I estimated the position for the threaded component and created a 1-inch (2.54 cm) diameter mortise in the stretcher using a forstener bit. I then used a 7/16-inch (1.11 cm) drill bit to penetrate the end grain at the center of the stretcher.
For connecting the 2x lumber to the stretcher, I countersunk a hole for the hex head bolt and washer to fit neatly. Although optional, this detail enhances the bench's appearance.
The bench structure served as the basic framework, onto which I added plywood for the seat and backrest.
I welcome any suggestions and comments as I begin working with HDPE. My focus is on using affordable and readily available tools, such as an induction cooktop, to process this material.
Here's the extracted tool/material list structured by category:
All temperatures (200°C/400°F) refer to induction cooktop settings[1][2][3].