Design an injection mould
INJECTION
MOULD
This guide outlines the steps to design a mold for an injection machine.
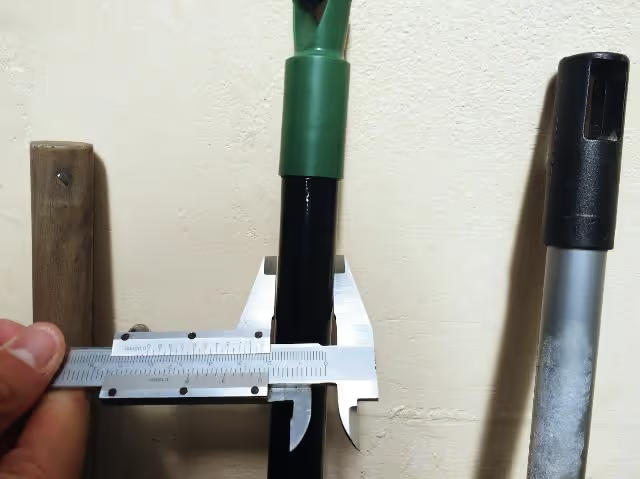
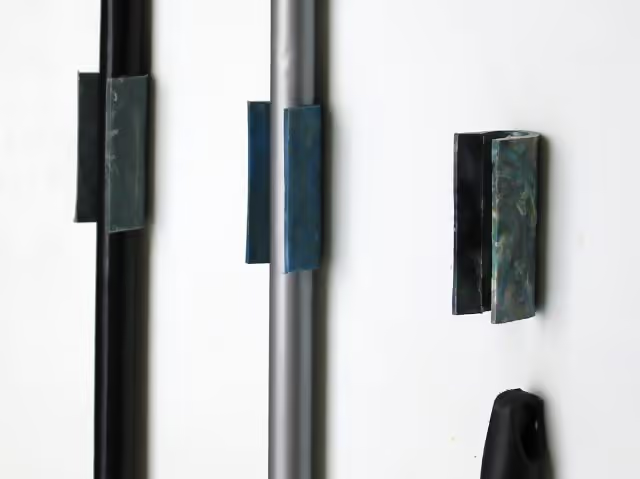
Ensure accuracy from the start. When designing a product to fit with an existing item, take precise measurements from it to establish a correct baseline. For this broom hanger, I measured broom and mop diameters, ranging from 0.83 to 0.94 inches (21-24 mm). I will use the smaller measurement of 0.83 inches (21 mm) as a reference for the clamping system design.
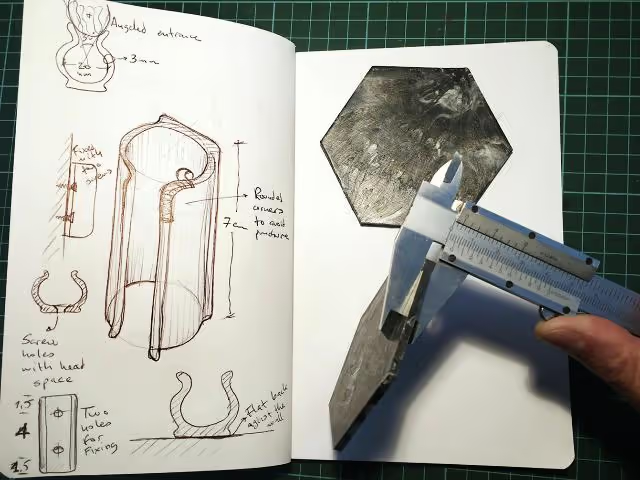
Initiating a design begins with outlining your ideas on paper. Document all essential details to shape an effective design. Particular attention should be given to aspects such as wall thickness, which influences:
To address these aspects, examine and compare materials from previously developed products.
The broom hanger will be created using an injection machine, necessitating an enclosed mold. With the previously sketched product concept, I proceed to design the mold, focusing on six key criteria:
Each criterion will be detailed in the subsequent steps.
Certainly, here is the revised text:
Consider the shapes that will form the cavity inside the mold. For this product, there are three components:
Next, select the standard bars or tubes to use.
In Colombia, materials such as metal bars and steel planks are commonly available in inches, which often makes them more accessible and cost-effective. Adapting to these standard measurements can help you avoid unnecessary expenses.
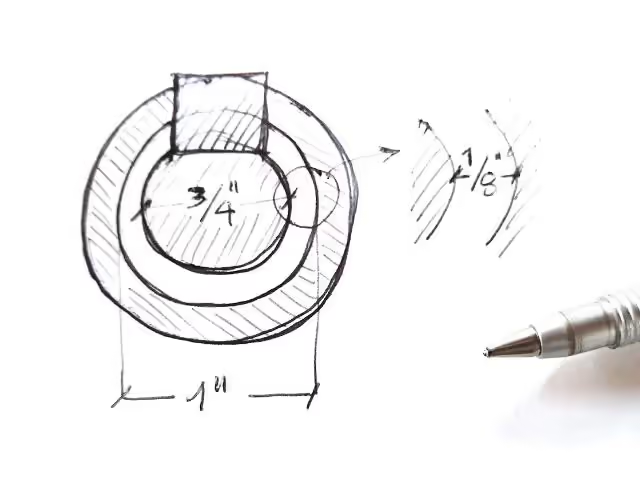
For the inner cylinder, consider using a ¾ inch (19.05 mm) rod, which closely matches the 21 mm broomstick size. For the outer wall, a 1 inch (25.4 mm) tube is recommended, resulting in an approximate broom hanger thickness of ⅛ inch (3.17 mm).
Investigate your local market to identify the most suitable measurements for your project.
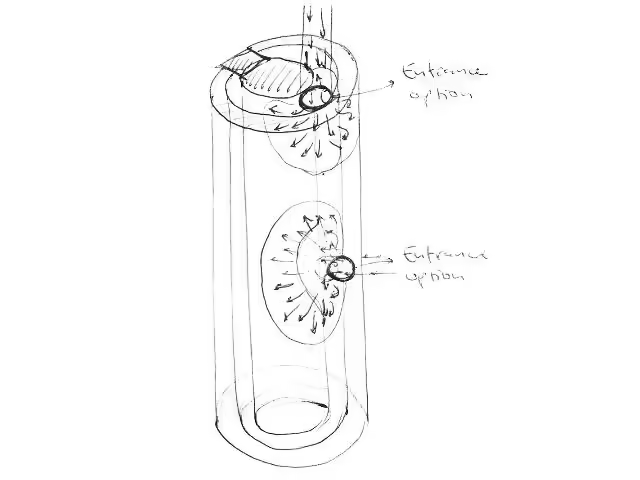
Consider the flow of plastic within the mold. The path should be as short as possible with sufficient space for complete distribution. Drill a ¼ inch (6.35 mm) hole for entry, with a maximum height of 0.39 inches (10 mm), positioned centrally to ensure even distribution. For the broom hanger, fill the mold from its center. To connect the mold to the injection machine, use half of a standard ½ inch (12.7 mm) pipe nipple, welded to a flange that attaches to the mold with closing screws.
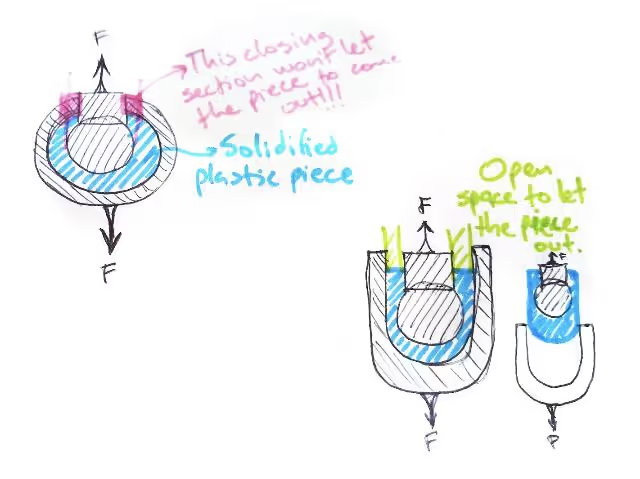
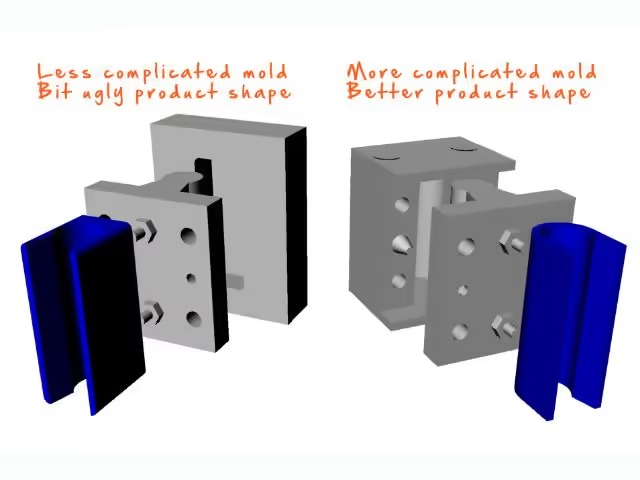
As the plastic solidifies into the product, ensure the mold can be opened to release it. The mold should split into several parts for this purpose. However, fewer parts result in a simpler, more stable, and cost-effective mold. For the broom hanger, which functions as a hook, consider using three pieces: two for the exterior, which split in half to release the product, and one for the interior that will hold the broomstick and be removed by pulling it out.
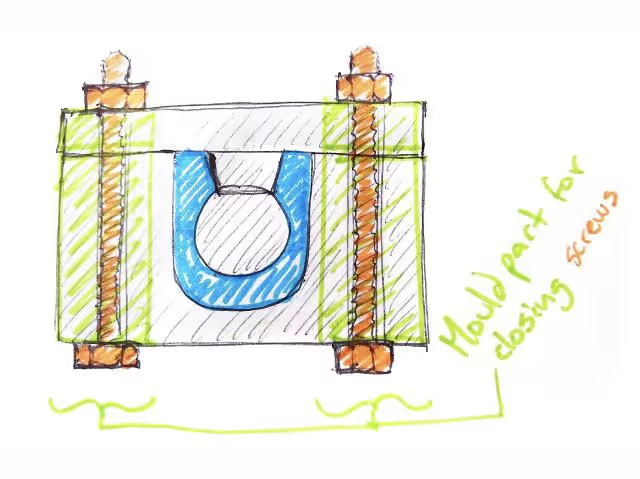
To ensure proper alignment and withstand injection pressure, employ male/female guides between mold parts for a secure fit. Conic dowels are effective in maintaining alignment during assembly. For closure and pressure resistance, use through screws to tightly secure mold parts. Drill mold holes slightly larger than the screws (for 1/4-inch screws, drill 5/16-inch holes) to facilitate easier disassembly if parts shift during injection. Additionally, consider opening the screw hole side to allow screw removal by slightly loosening the bolts, avoiding the need for full removal.
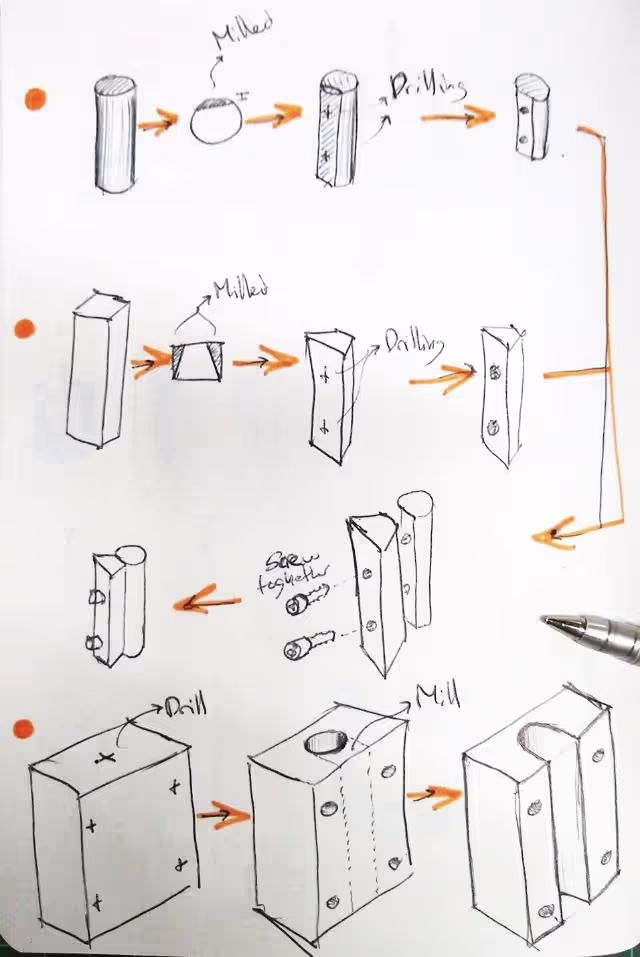
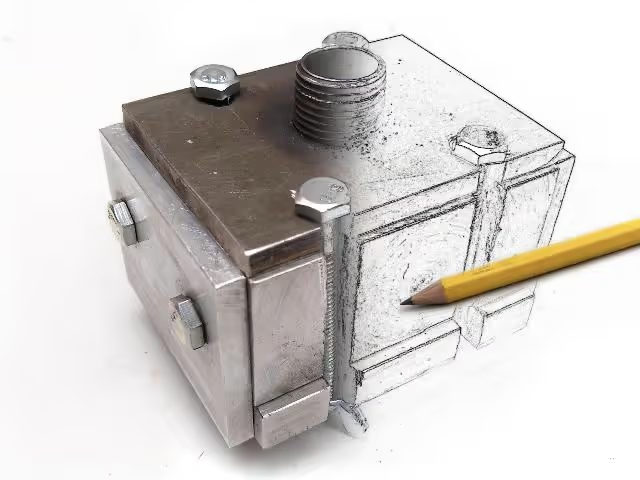
Design your products using basic shapes such as cubes, cylinders, cones, and straight lines. These shapes are straightforward to create with manual lathes and mills. Utilizing concentric, aligned, and perpendicular figures enhances the machining process. Simplicity in design leads to simplicity in execution. Use standard measurements; for example, holes matching a drill bit's size and grooves matching a milling cutter's width allow for faster, more precise work. For instance, a broom hanger can be designed as a straight plastic tube with an opening on one side, involving straightforward line milling and circular hole creation for the mold parts.
We aim for greater precision than paper allows, so we utilize CAD software to model mold dimensions accurately. Continuing from the previous step, CAD enables us to create and refine mold versions based on the six design criteria.
Here are some decisions made during the mold design process:
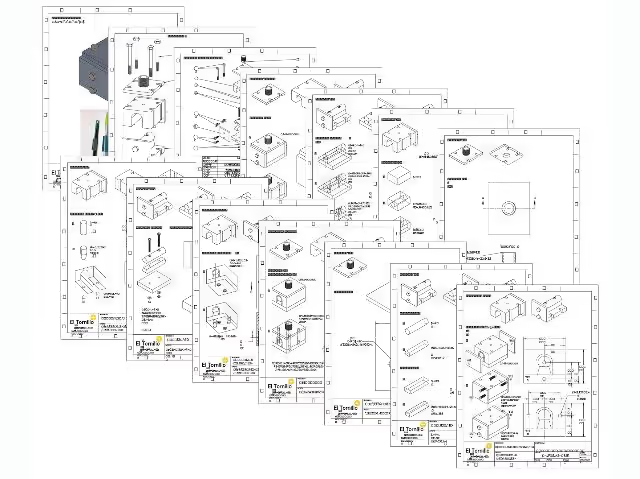
The design process should culminate in detailed drawings and a comprehensive parts list. Consider the machining steps to identify critical procedures, such as machining parts together for precise fitting and determining fixation methods to the machine. Document all this information in the drawings.
Create a parts list for all raw materials as a shopping guide. Include dimensions and quantities. Purchase raw parts slightly longer (0.2 to 0.4 inches) than final dimensions to accommodate machine fixation and final adjustments.
With your mold design ready, proceed to construct it and create your product. Follow the instructions in the "Make a Broom Hanger" guide, or use these tips to develop an original idea.
Citations for hardware dimensions and design criteria are derived directly from the tutorial’s material specifications and assembly instructions.