Creating Beams out of HDPE plastic bags
COMPRESSION
INJECTION
MELTING
HDPE
This guide outlines the steps to convert HDPE plastic bags into beams using basic tools, without the need for specialized machinery like shredders or injection machines. If a long clamp is available, additional instructions at the end can help improve beam quality.
In this guide, we will outline the process to prepare plastic bags.
Materials Required:
Steps:
Fold a single bag in half lengthwise.
Roll the bag tightly so it remains thin, as it will shrink considerably.
Place wax paper beneath and above the folded bag.
Pass the iron over it 2-3 times with minimal pressure for less than 10 seconds per side. If using a panini press, simply press it.
Flip the bag and repeat.
Allow the semi-firm bag to cool under a heavy object to prevent curling, easing insertion into the mold later.
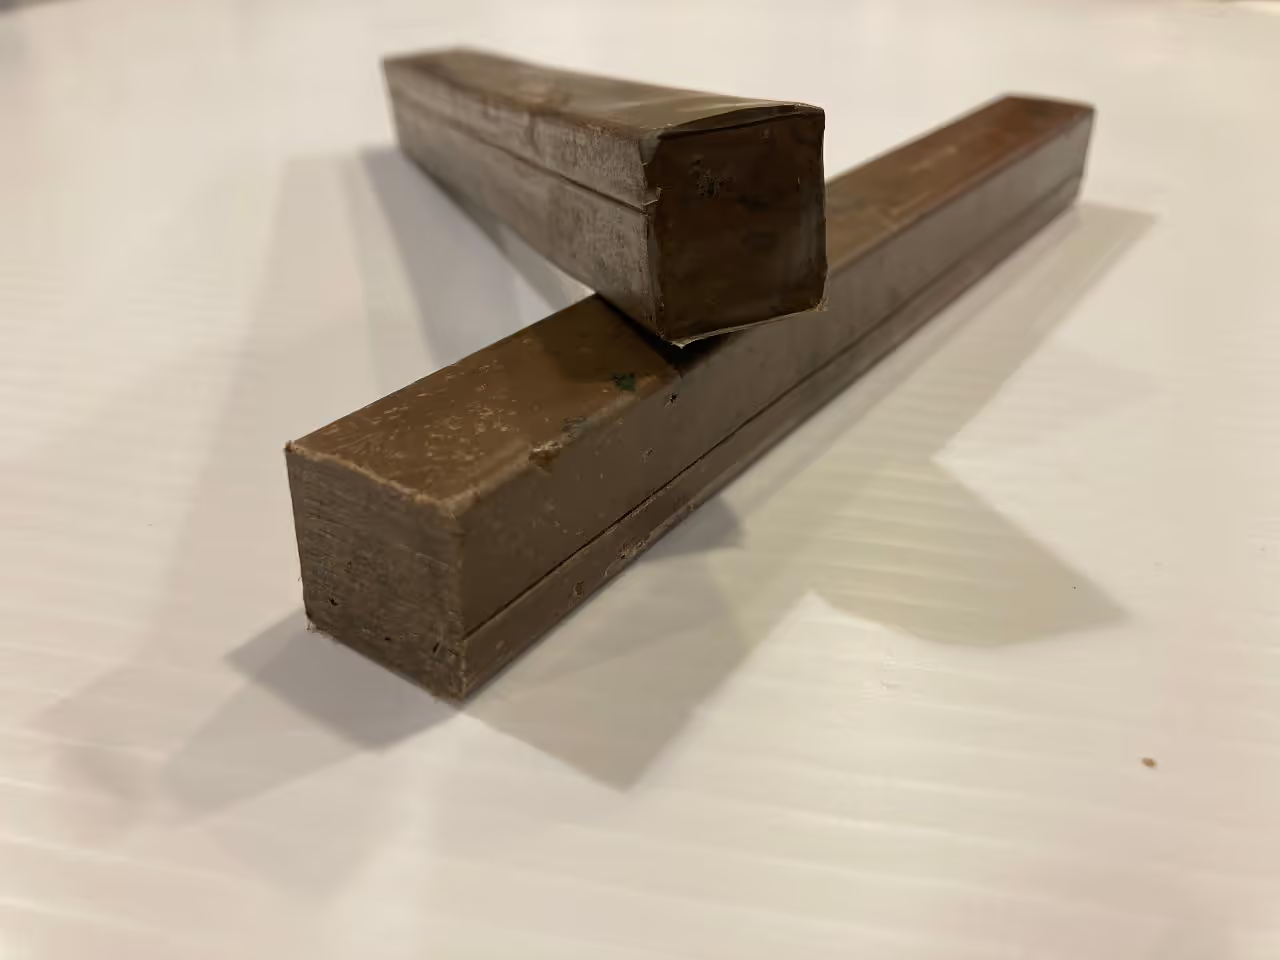
Note: A standard-size bag will occupy approximately 0.4 inches (1 cm) in a 1-inch by 1-inch (2.54 cm by 2.54 cm) beam. Ensure sufficient bags are processed before proceeding.
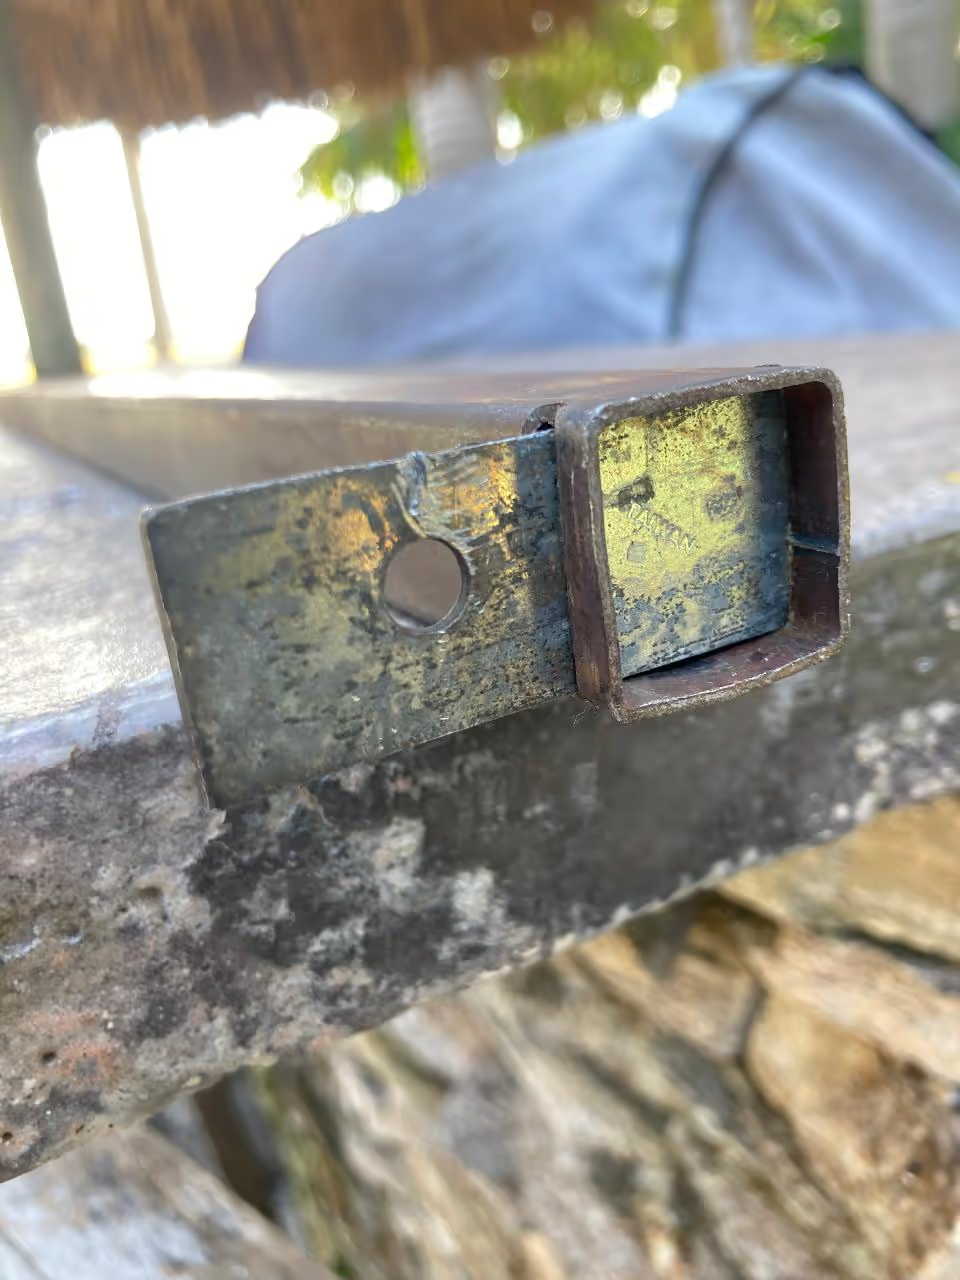
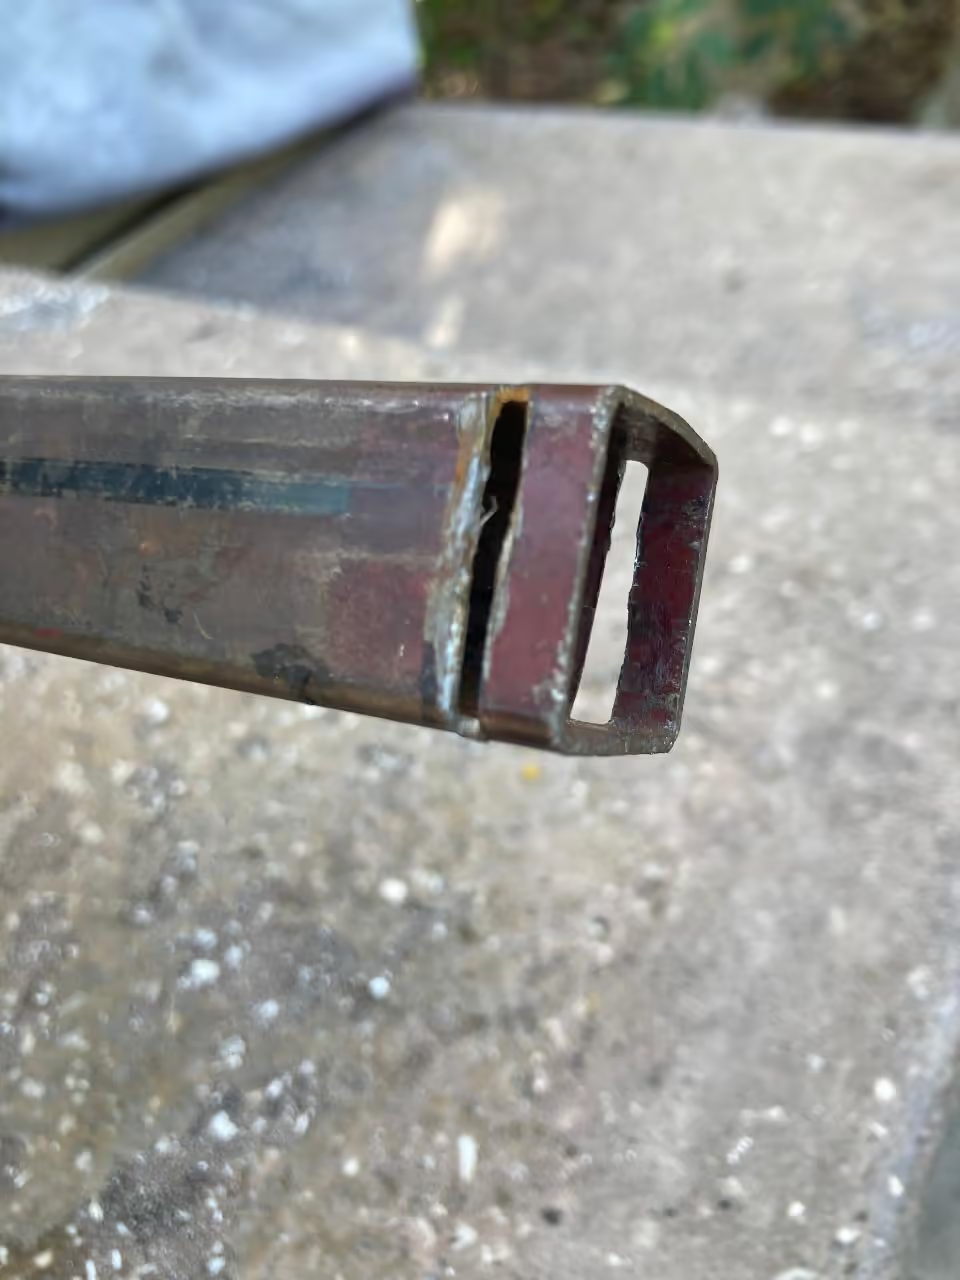
Your beam/mold requires a quick-release mechanism for easy removal before the plastic cools and obstructs access to the bottom. This guide outlines the necessary steps.
Step 1: Measure and mark 1/16 inch (or 1.6 mm) from one side of the beam for cutting. If the beam is aluminum or very thin, consider increasing this distance, but note that deeper cuts make plastic removal more difficult.
Step 2: Repeat the marking process on the opposite side of the beam.
Step 3: Utilize the metal grinder to make slots on both sides, ensuring they align for the metal scrap to slide through. Misaligned cuts may prevent proper fitting.
Step 4: Select and cut a scrap metal piece to fit tightly with minimal gaps.
This method is more efficient than manual techniques and produces a denser beam. A 5-foot clamp is beneficial for this process.
Step 1: Insert a metal piece at the bottom of the mold. Ensure it is secure yet removable with pliers, serving as a quick-release mechanism for later removal.
Step 2: Load a few plastic bags into the mold and compress them with a push stick before igniting a fire. It is advisable to use a clamp technique for adding more bags due to the difficulty of doing so manually later.
Step 3: Build a consistently burning fire. Keep wood nearby to maintain the fire for at least 30 minutes if needed.
Step 4: Position the beam over the fire and allow it to heat.
Step 5: Once sufficiently heated, insert and secure the push stick in the clamp.
Step 6: Tighten the clamp to compress the beam, repeating as necessary to solidify it.
Note: Depending on your clamp type, you may need to adjust it by sliding the stationary side closer for additional compression length.
Note: If desired, add more plastic bags after the initial compression to achieve the preferred length, though it is advisable not to exceed 10 inches (25 cm) for ease of removal.
Remove Stopper: Use pliers to extract the stopper from the bottom.
Attempt Beam Removal: Press the push stick in, applying steady pressure. If successful, the process is complete. If not, proceed to the next step.
Reinsert Beam: Place the beam back into the rig, ensuring the stopper is not in place.
Tighten Clamp: While the material remains pliable, tighten the clamp. Once movement is detected, remove the mold from the beam and complete with the push stick.
Begin by constructing your mold and preparing the plastic bags. Once ready, proceed with melting the bags into beams. Be aware that manual methods may result in more air pockets compared to the use of metal clamps. If possible, utilize a metal clamp longer than 5 feet (1.5 meters) for improved results.
Step 1: Place the metal piece at the bottom of the mold, securing it for later removal with pliers as a quick-release mechanism.
Step 2: Insert several plastic bags into the mold and compress them with a push stick before igniting a fire. Ensure the mold is not entirely filled, using no more than eight bags at a time. Compress manually to achieve a solid final product.
Step 3: Maintain a consistent fire, keeping wood nearby to sustain it for at least 30 minutes.
Hold the mold over the fire, rotating it. Prepare the push stick to compress in a few moments. If the fire is well-built, the material will become malleable in about 30 seconds.
Use the push stick to compress the material. Apply maximum pressure; the more force exerted, the denser the product will be.
Gradually add extra strips of material while compressing it with the push stick between additions until you reach the desired length. Add approximately 1 inch (2.54 cm) extra to account for thermal expansion and removal.
Once the beam is properly compressed, use pliers to remove the bottom slider acting as a stop. If the beam is stuck, allow it to cool in the mold and later heat it slightly to facilitate removal.