Make the ‘Plástico Fantástico’ Recycling Bicycle Shredder

COLLECTION
SHREDDER
HDPE
The adapted bicycle shredder integrates shredding capability with cycling, allowing you to shred plastic for molding while on the move. This specific adaptation draws inspiration from the Precious Plastic Shredder tailored for bicycle use.
For further inquiries about this adaptation, please contact @jam_goreing on Instagram.
Additionally, you can view the 3-minute project video here.
The basic design and instructions for the shredder are available on the Instruction pages.
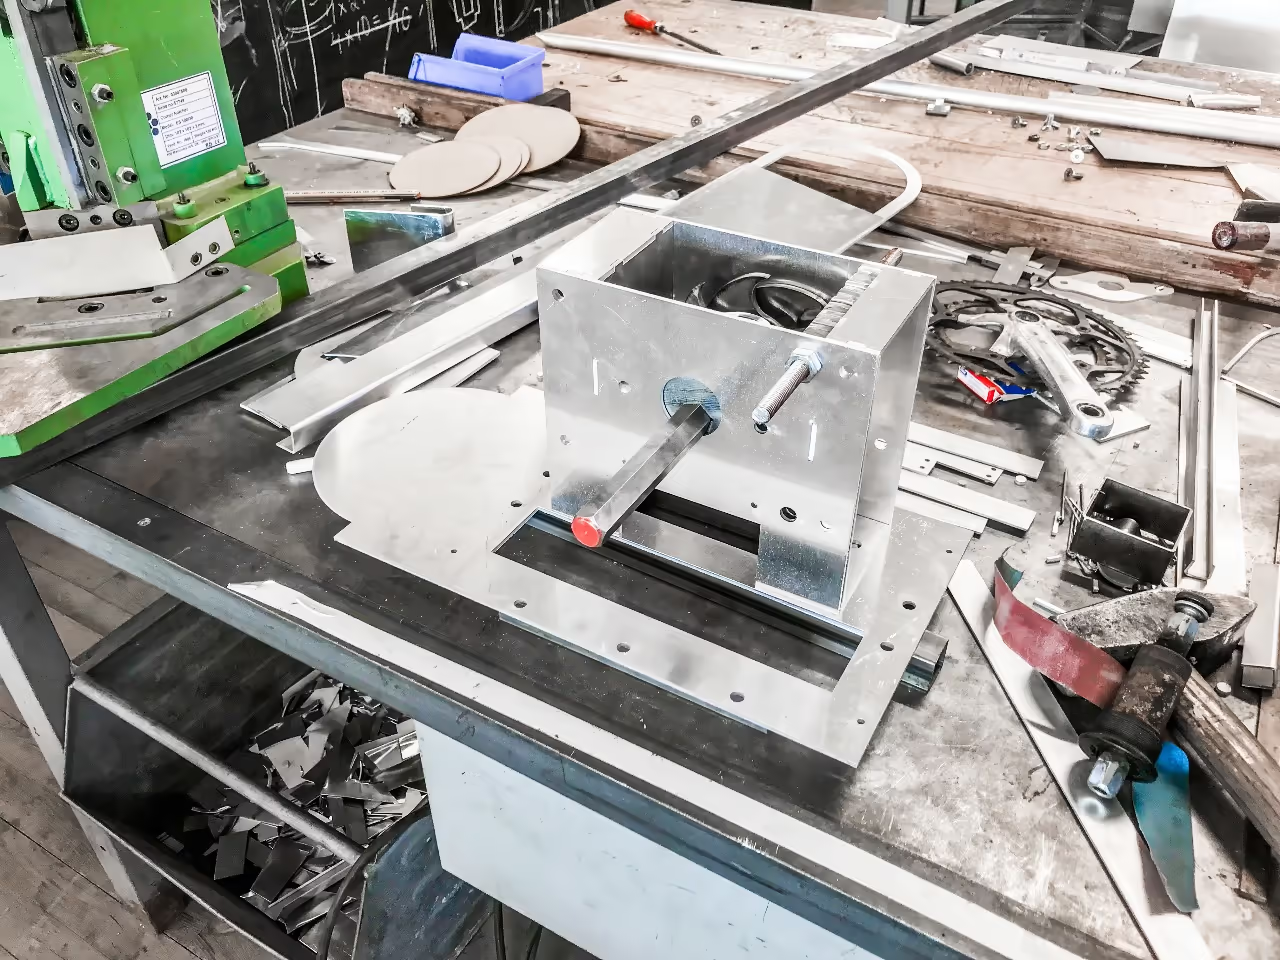
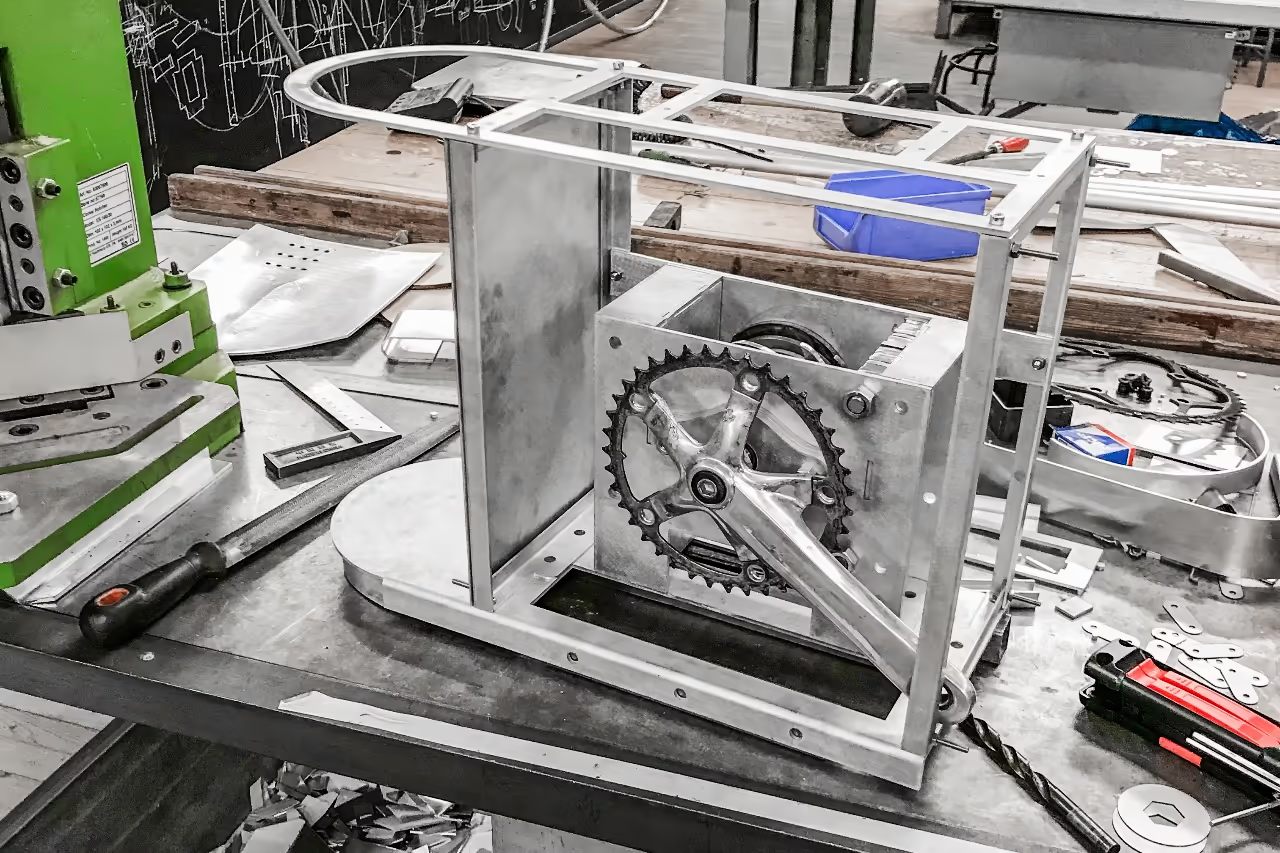
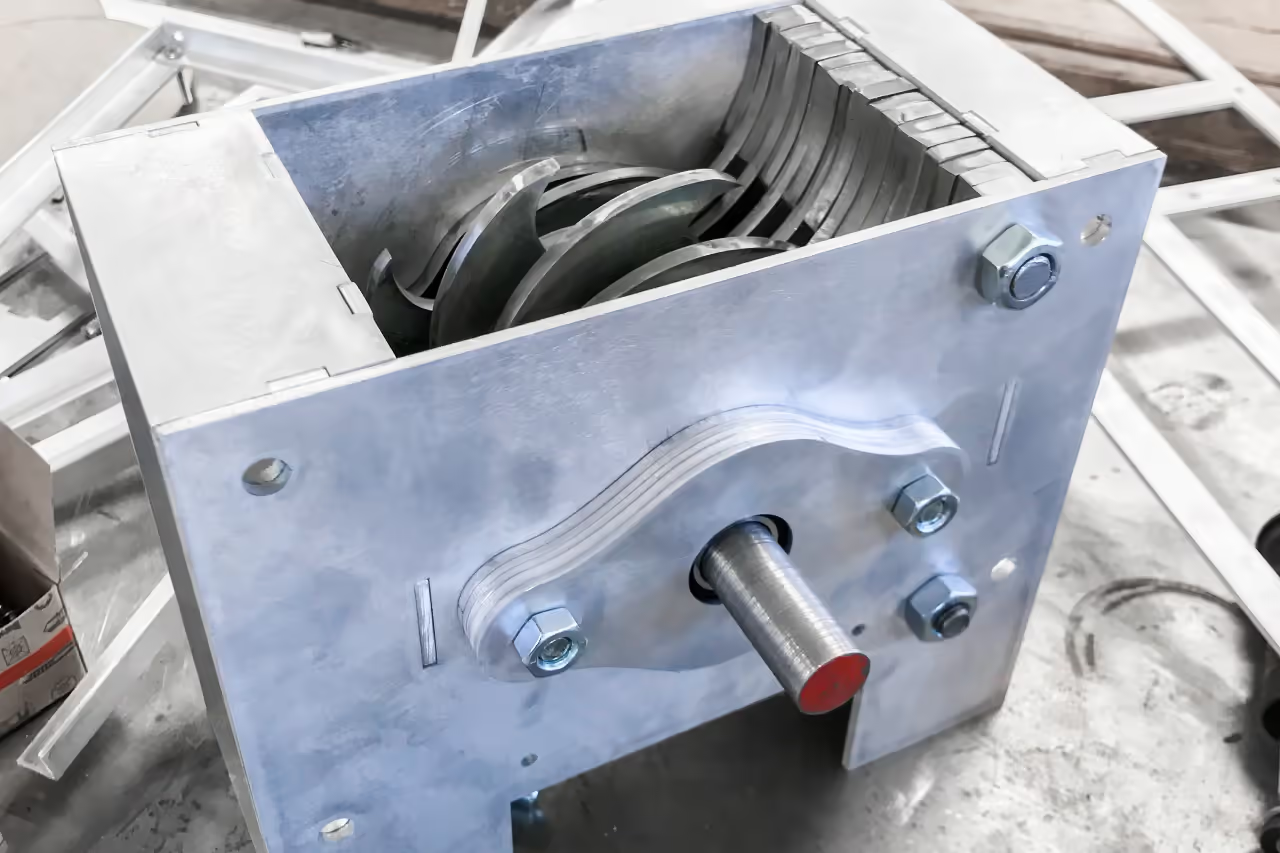
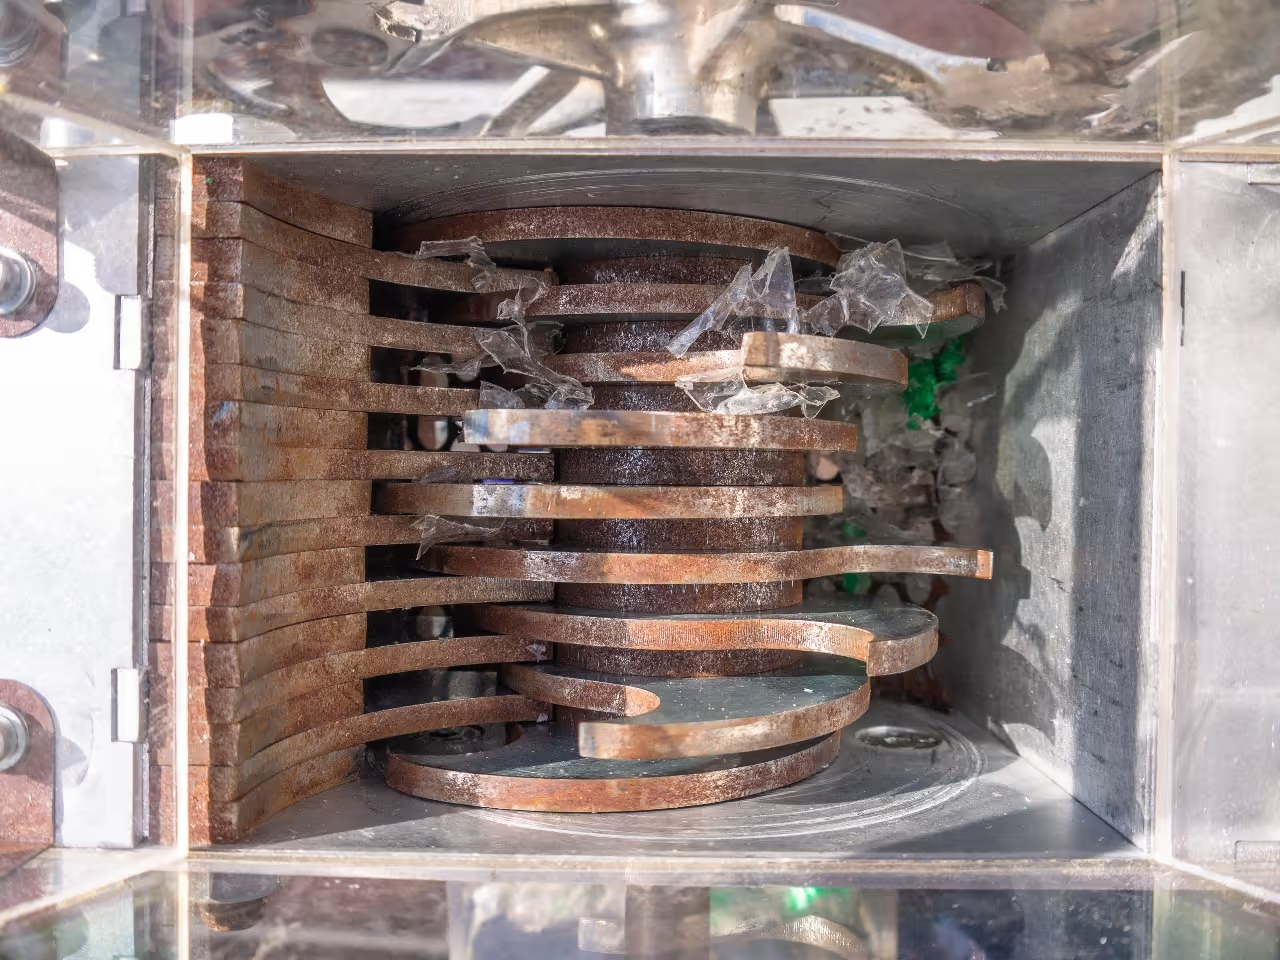
Reduce the number of shredder blades to approximately 9 from the original design for a lighter structure suitable for bicycle mounting. You may add more blades if needed. Adjust the shredder housing depth to match the reduced blade count. Use aluminum or steel for the housing, ensuring blades and spacers remain steel. Aluminum requires bolting the housing instead of welding.
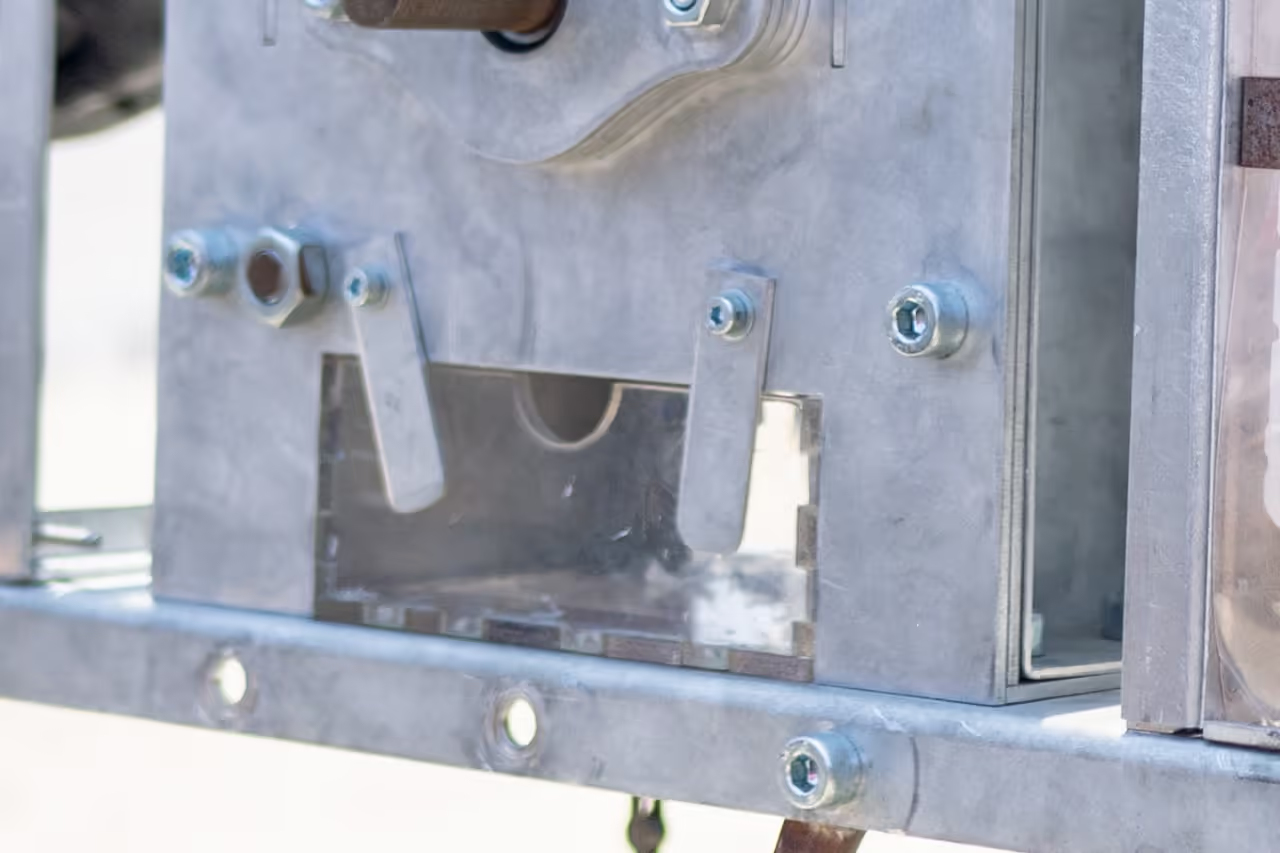
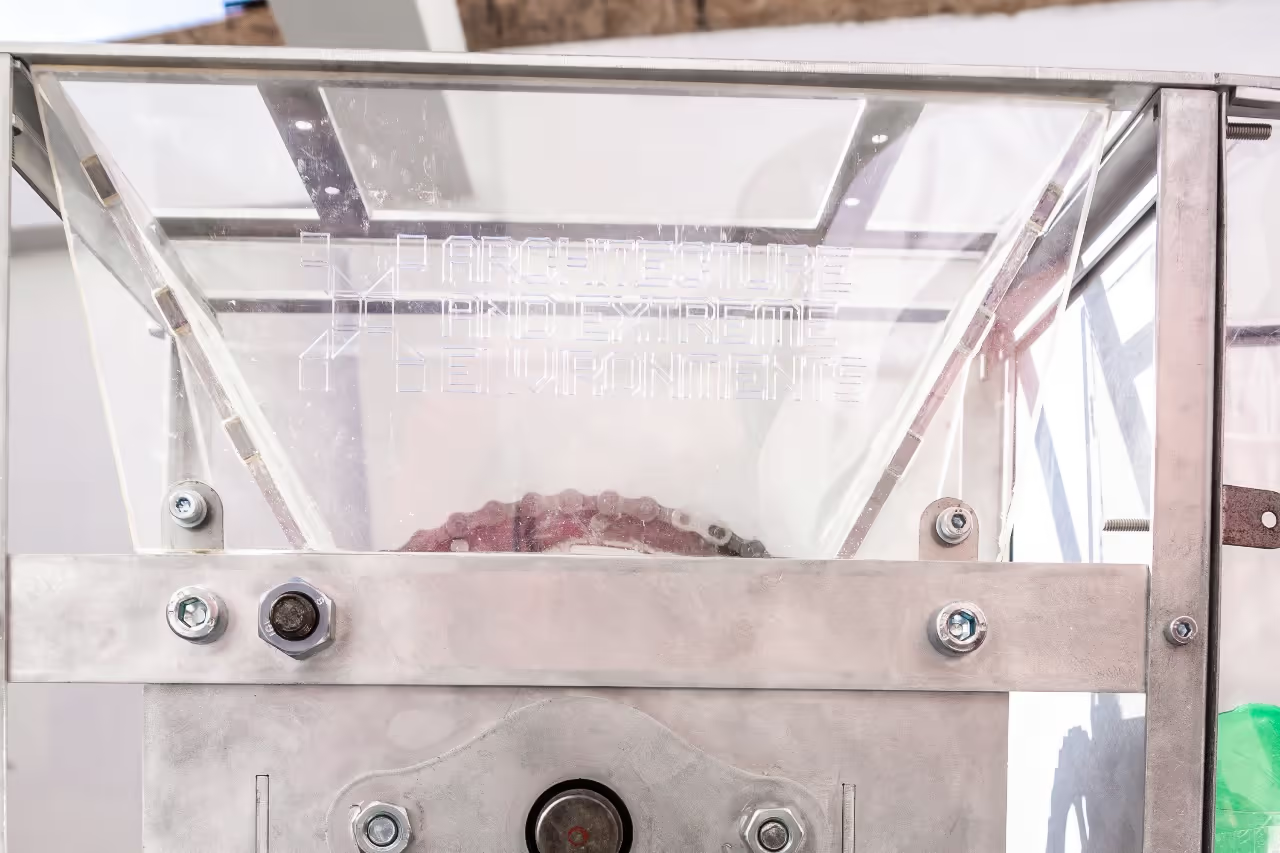
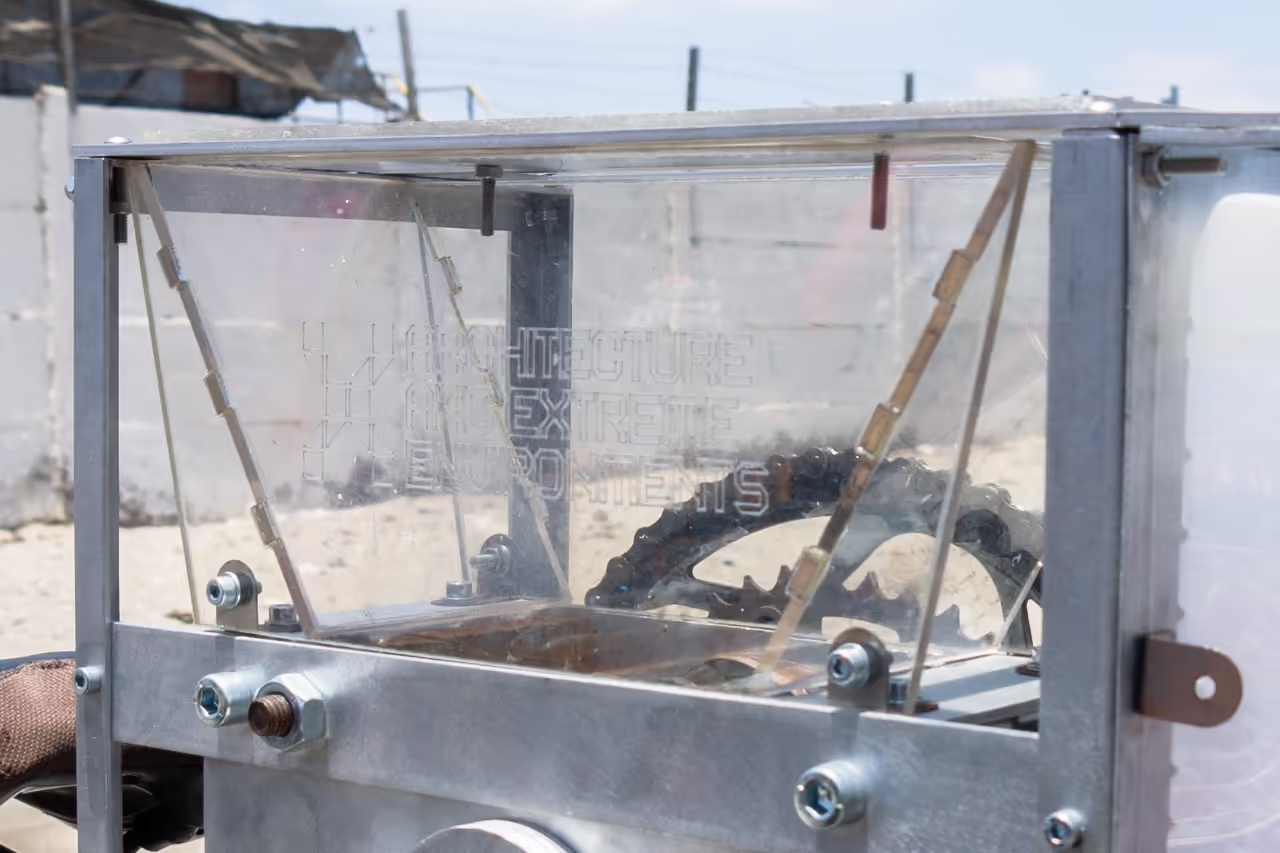
The housing must be extended downward approximately 2 inches (50 mm) to accommodate a collection tray below the shredder blades. This space in the middle for the collection tray is shown in the images. The collection tray is constructed from clear acrylic that interlocks.
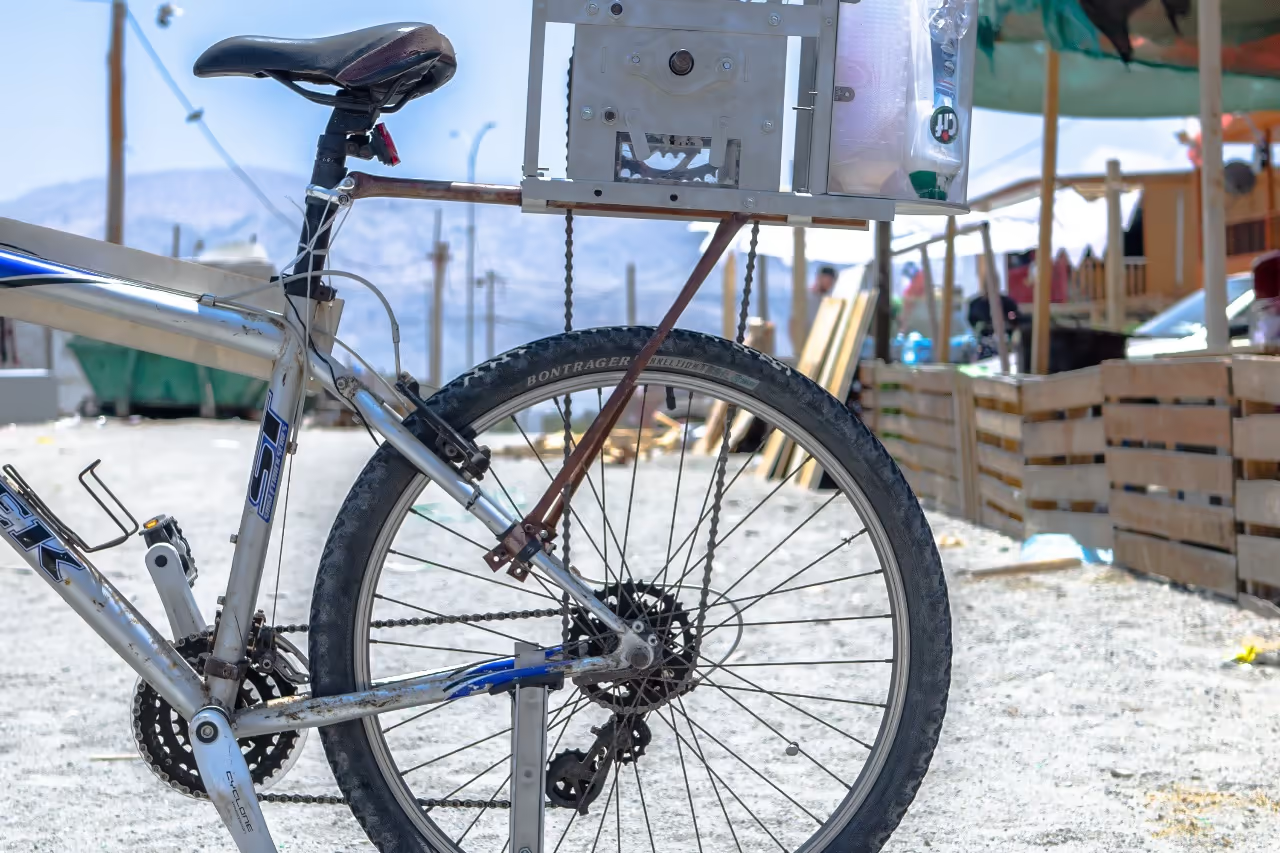
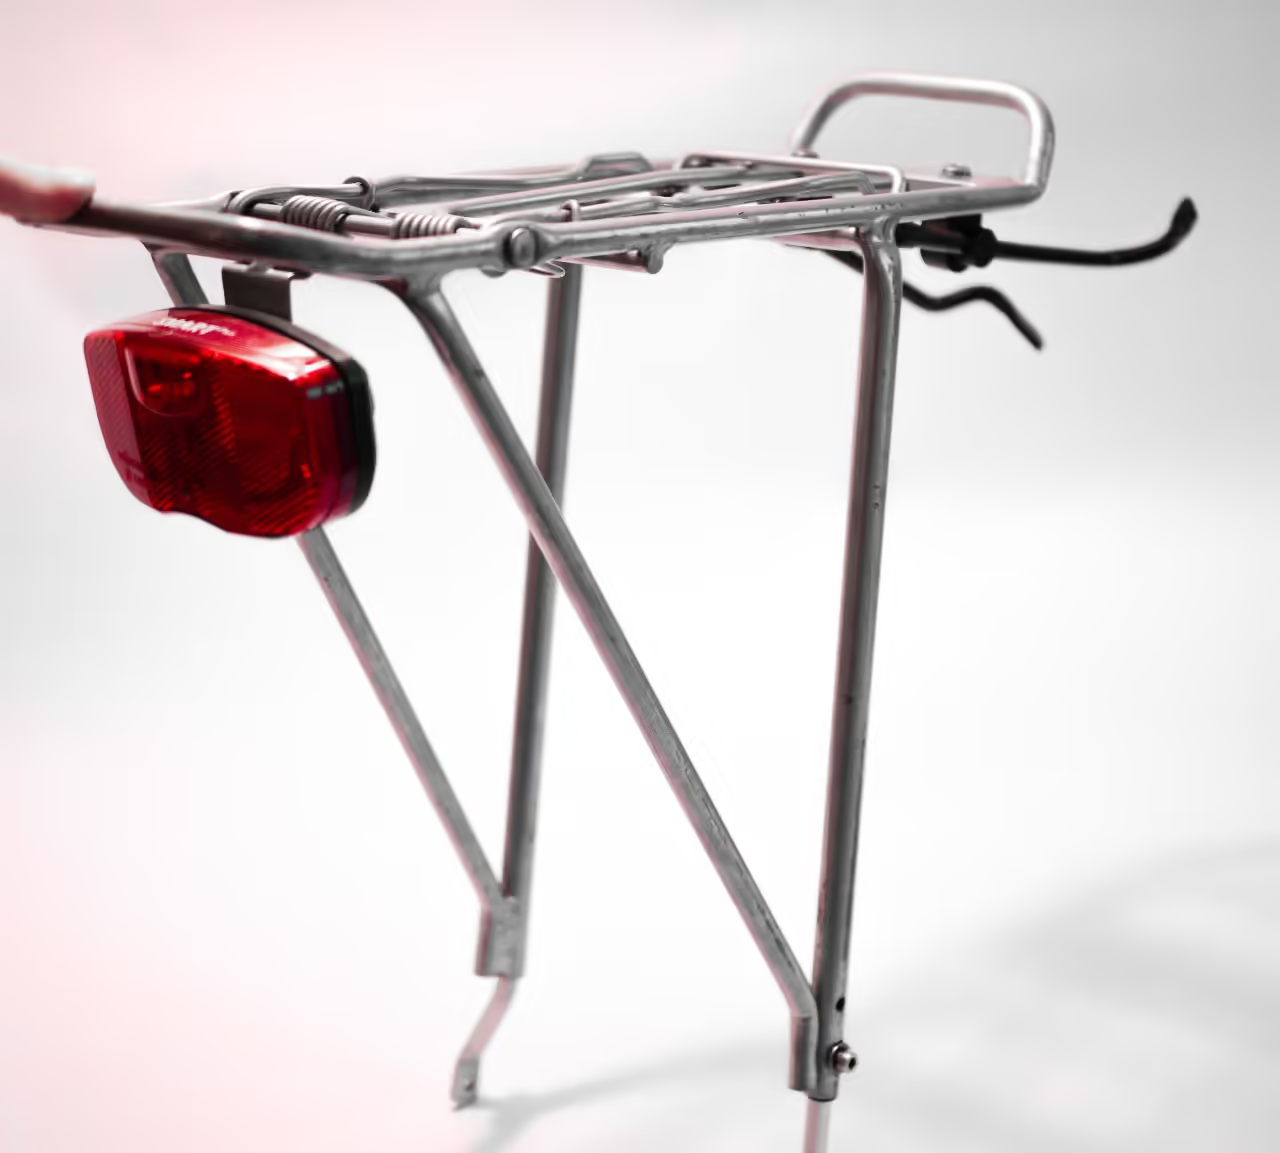
The shredder requires a sturdy base to accommodate its weight and the force exerted during shredding when attached to a bicycle. A standard bicycle rear rack typically suffices. The rack can be mounted on the bike and modified to secure the shredder.
In my experiment, I was unsure which bicycle I would use since I intended to rent one upon reaching Chile for the project. Therefore, I designed a versatile support frame compatible with various bicycles.
For installation, the shredder was placed on an aluminum support base with three steel rods bolted to it, connecting it to the bike. The central rod attached to the seat post via a secondary seat collar. The two side rods connected to the seat stay, each ending with a 0.02-inch (0.5mm) thick steel plate that could be manually wrapped around the frame. An old inner tube served as a rubber lining to secure the support frame and prevent slipping.
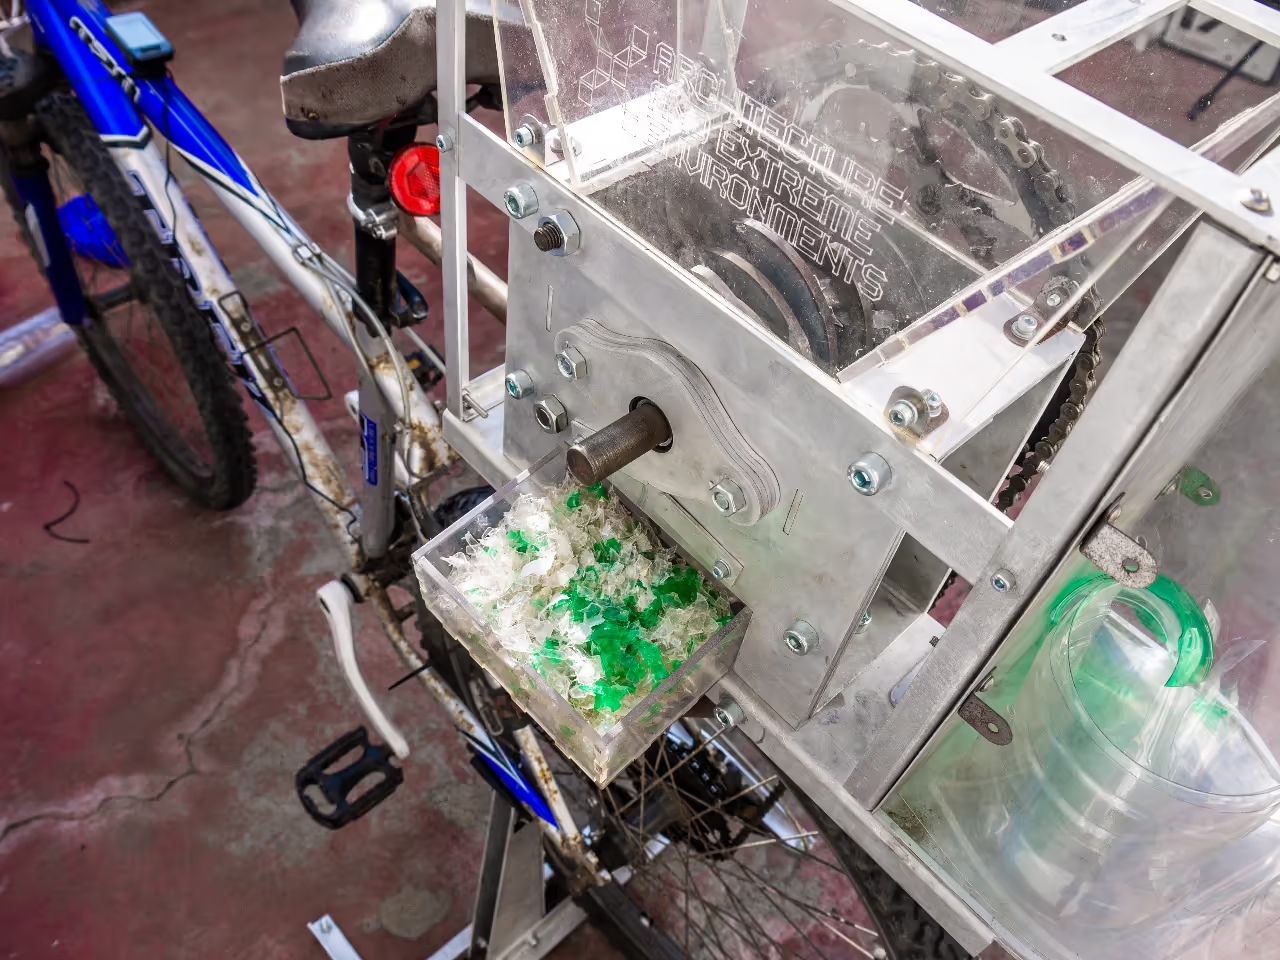
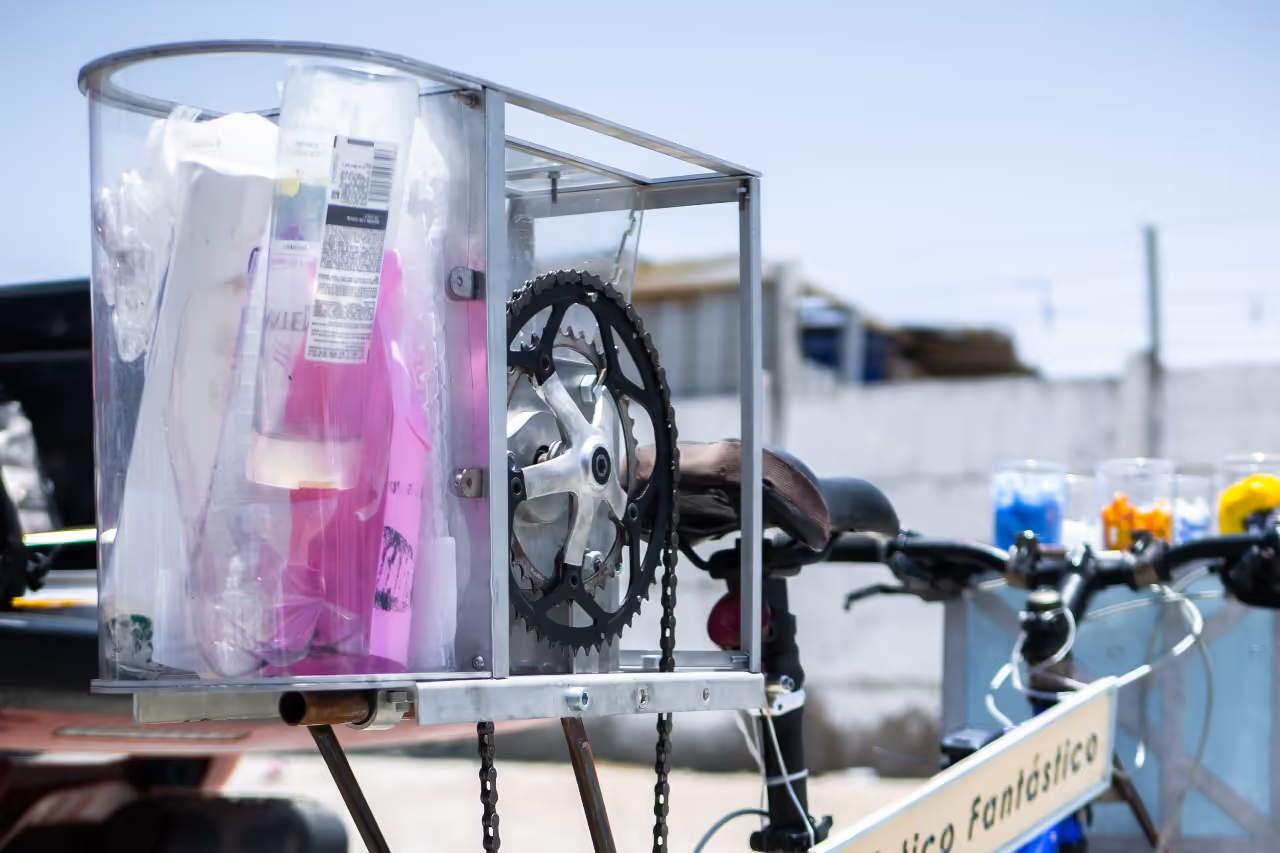
The hopper is constructed from clear acrylic, including the shredded plastic collection tray beneath the blades. It must be securely bolted to the top of the shredder housing. An aluminum casing frame can be added around the hopper for aesthetic purposes, with optional rear storage for collected plastic prior to shredding. Alternative designs are possible without impacting the shredding function or hopper stability.
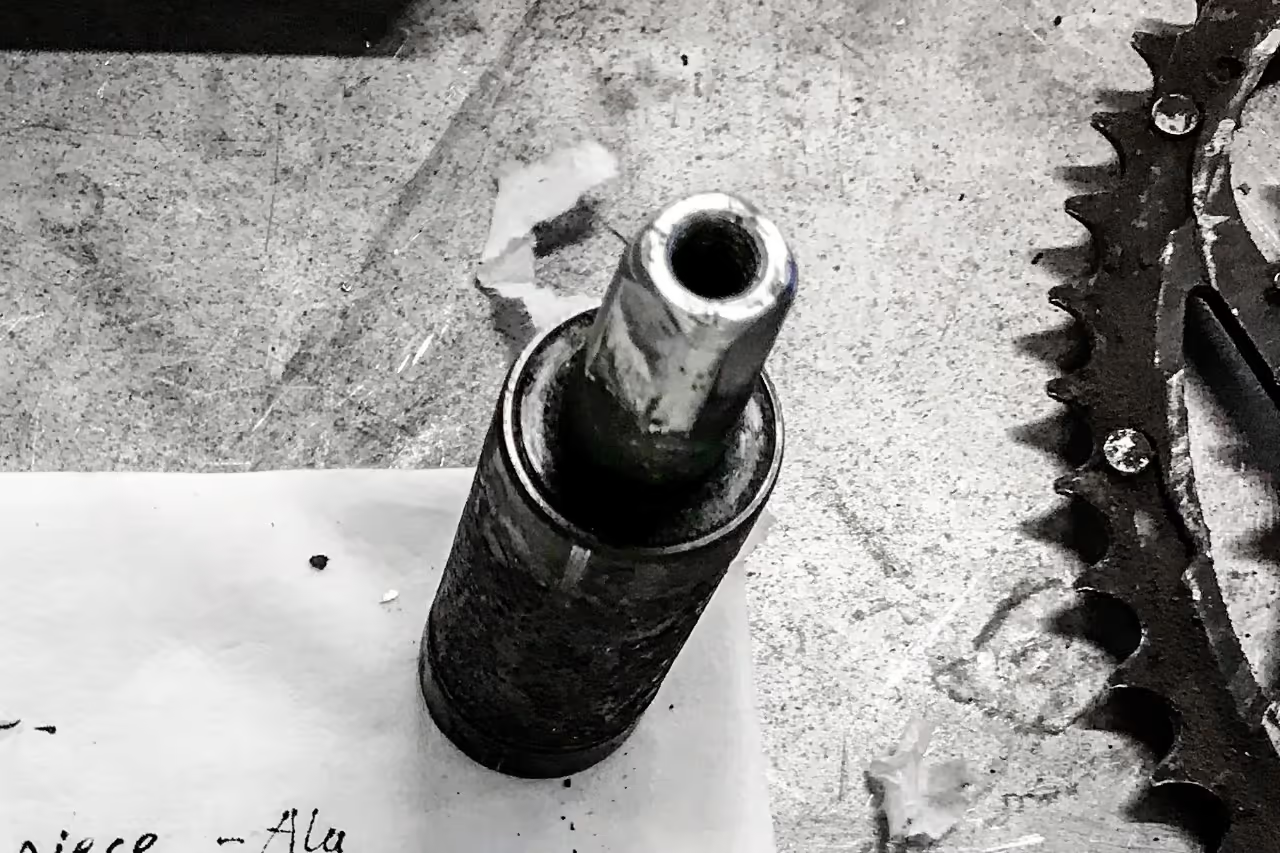
A used bicycle square taper bottom bracket, along with the crank and crank bolt, is required to attach the gear to the shredder. First, use an angle grinder to cut off the steel square tapered end of the bottom bracket.
A sealed ball bearing is necessary for the blades to spin on the axle. The bearing should accommodate the thickest part of the taper. In my case, the square taper had a maximum diameter of 0.63 inches (16 mm), so a sealed ball bearing with an inner diameter of 0.67 inches (17 mm) was used.
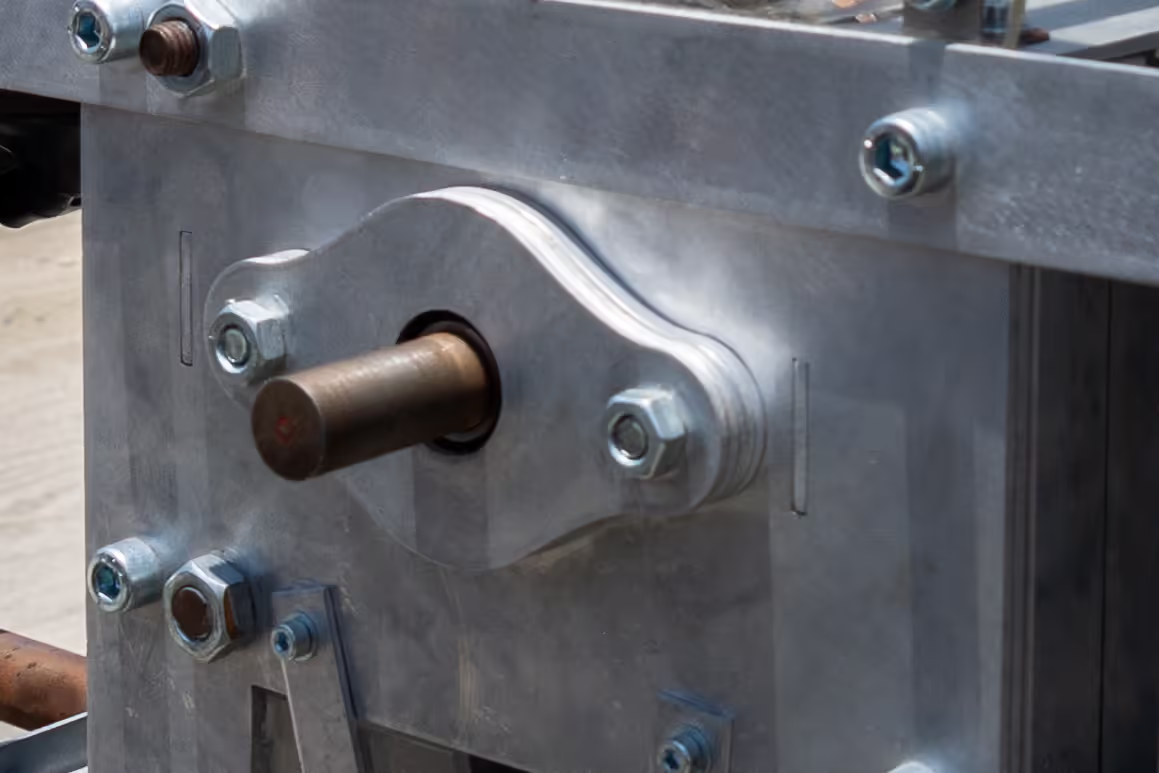
The axle for the blades is based on the instructional video, featuring a hexagonal design that is turned on a lathe to create rounded ends. These ends are machined to match the diameter of the ball bearing's inner diameter, ensuring a snug fit. The outermost 0.2 inches (5 mm) of the rounded axle is further reduced to match the crank bolt thread diameter. The square taper, pre-threaded through the center, allows the axle, once lathed to the appropriate thickness, to fit securely inside, ensuring proper alignment for welding.
Next, weld the cut-off square taper to the axle. Once welded, machine it on a lathe to fit back through the ball bearing. Attach the gear securely using the crank bolt.
Use an angle grinder to cut off the crank arm. Shape it with the grinder to achieve a smooth, formed finish.
Create a housing from layered laser-cut aluminum or steel to securely hold the ball bearing and axle. The total thickness of the layers should match the ball bearing's thickness, with a hole matching the bearing's outer diameter. Use an end cap with a diameter between the inner and outer bearing diameters to prevent sliding. Design any shape that attaches to the shredder housing and secures the bearing.
Use 1.5 mm (0.06 inches) internal spacers if needed to prevent movement.
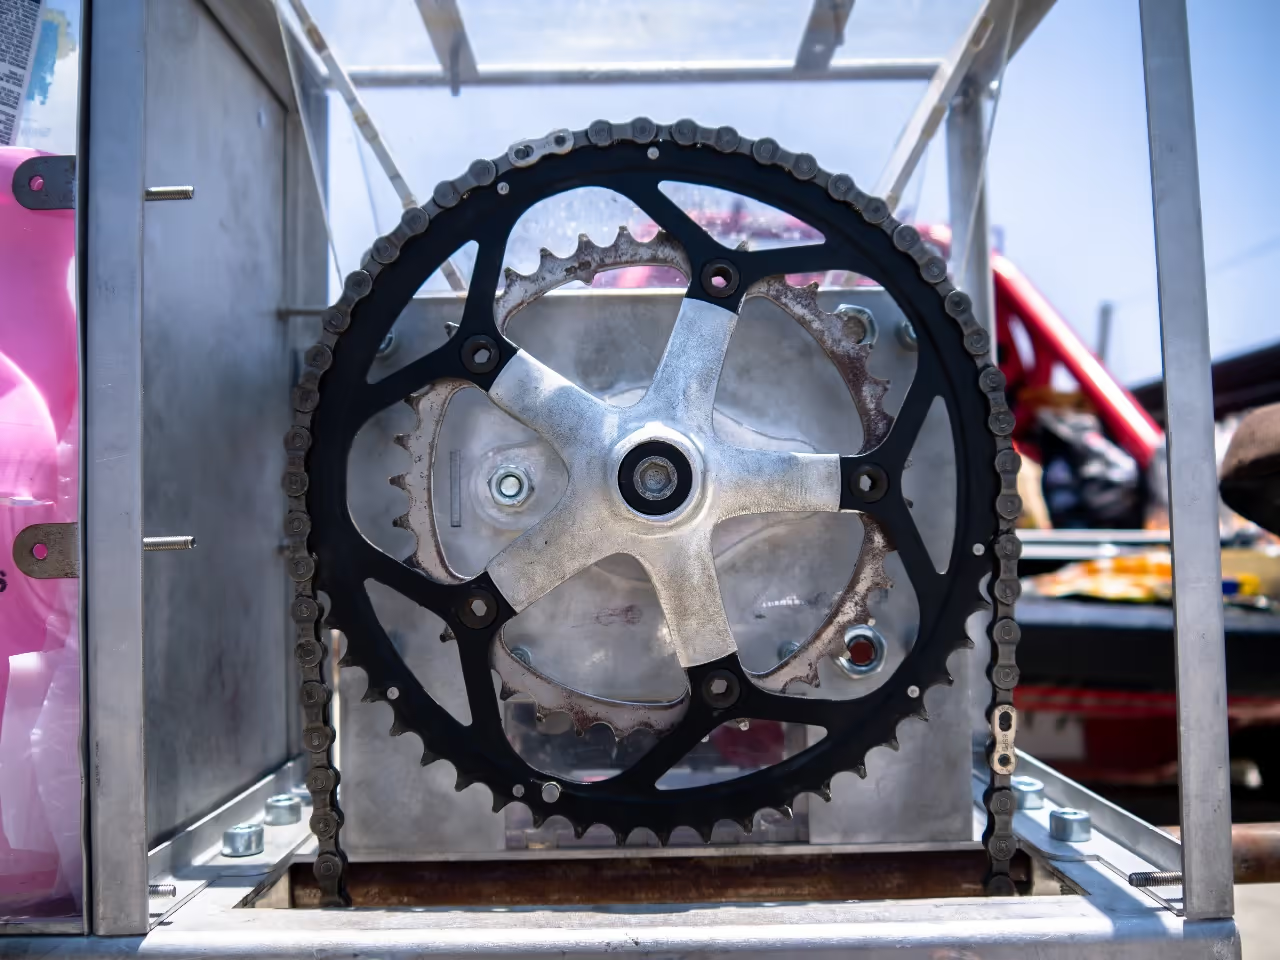
After assembling the shredder, securely connect the axle and gear. Once the shredder is bolted to the support frame, proceed with installing the chain and gearing.
The chain connected to the shredder is crucial for operation, necessitating correct gearing and tight installation. A quick-release chain facilitates easy adjustment and proper length setting before securing it around the gears.
I opted not to use a derailleur to maintain chain tension. Instead, I adjusted the support frame by raising the seatpost attached to the shredder support base, effectively tightening the chain by elevating the shredder.
I used a 4.6:1 gearing ratio, meaning 4.6 pedal revolutions equate to one shredder revolution, to decrease the shredder's speed while increasing torque. I attached the chain connected to the pedal on the largest gear of the cassette and the chain to the shredder on the smallest gear, which functioned effectively.
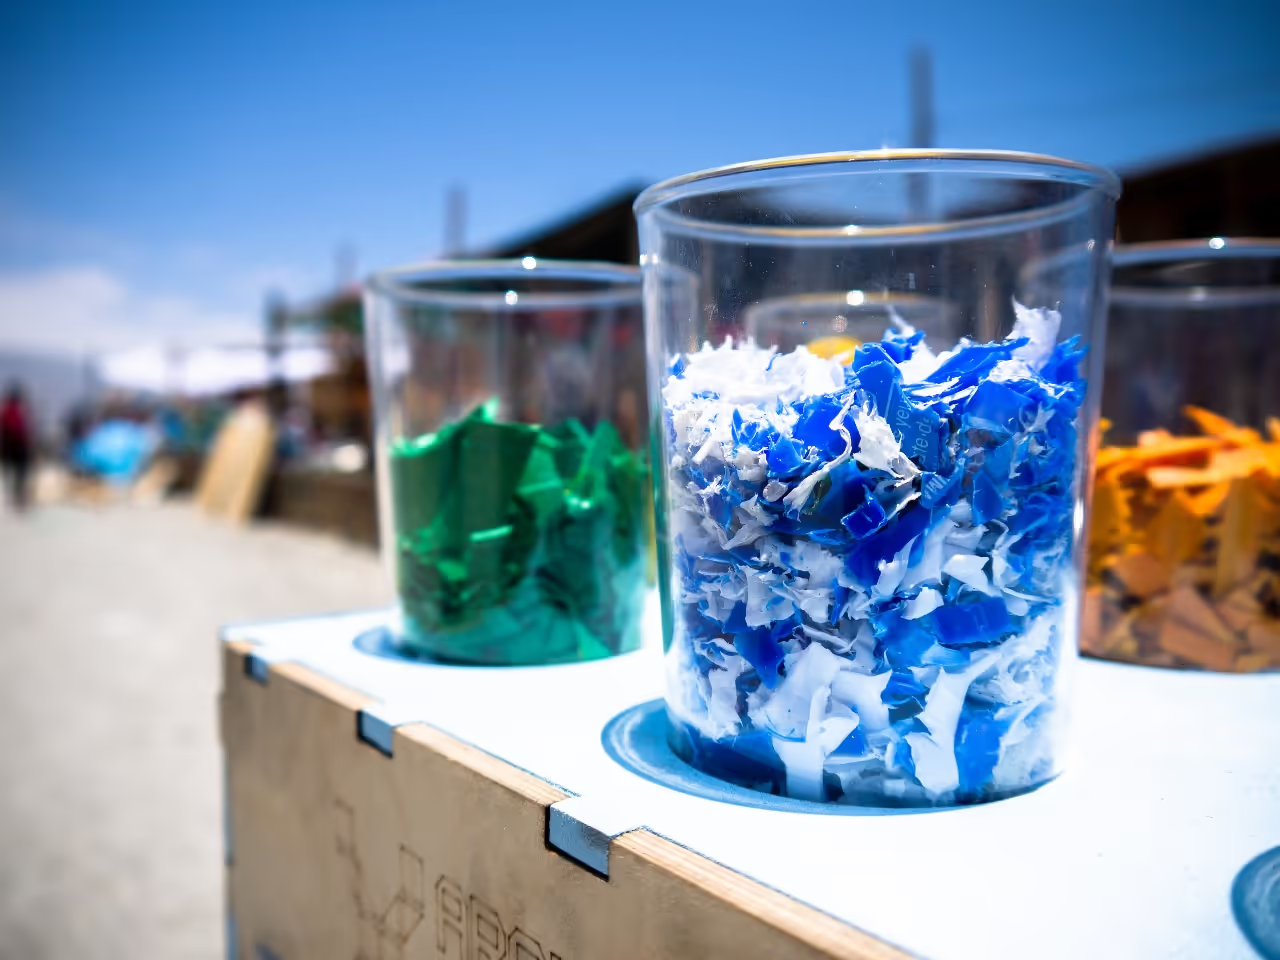
After installing the shredder and attaching the chain, use pedal power to shred plastic. HDPE plastic, being softer, is easier to shred manually. The shredded material can be repurposed into items like flat cladding panels.
Contact @jam_goreing on Instagram for adaptation details [1].