Reduce micro-plastic & dust when shredding
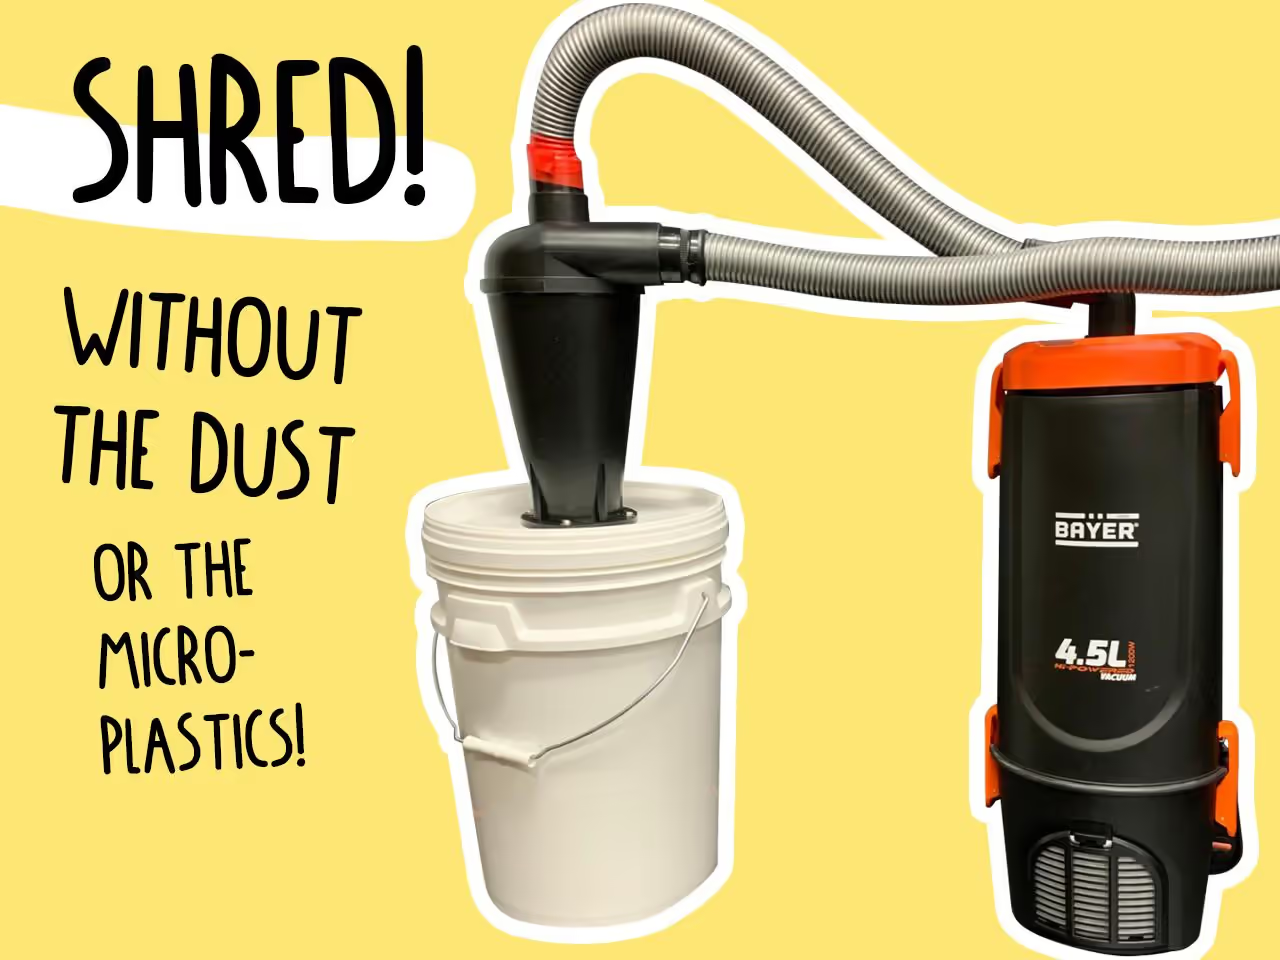
HACK
SHREDDER
COLLECTION
Reduce micro-plastic and dust from your shredder with this effective upgrade. It also simplifies cleaning when changing colors or materials.
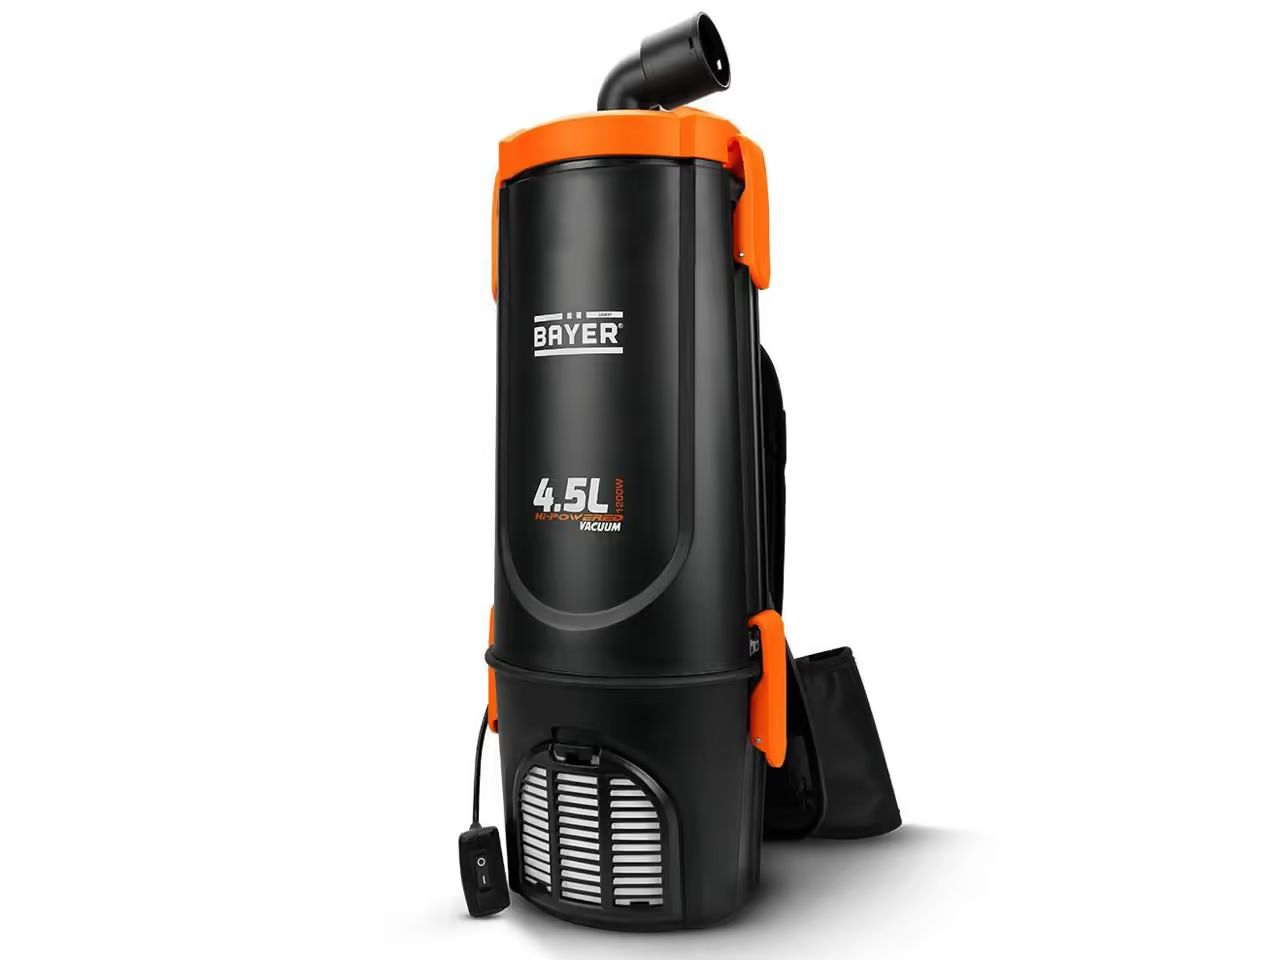
The vacuum is the most critical component of this setup. You may use an existing vacuum or acquire one suitable for your needs.
We opted for a backpack vacuum. In our shared, small workshop, we required a compact, quiet, yet powerful device. As our vacuum operates for extended periods, we decided on a model designed for commercial use.
Our selected vacuum: Bayer BP45L 1200W Hi-Powered 4.5L Tank Dry Backpack Vacuum.
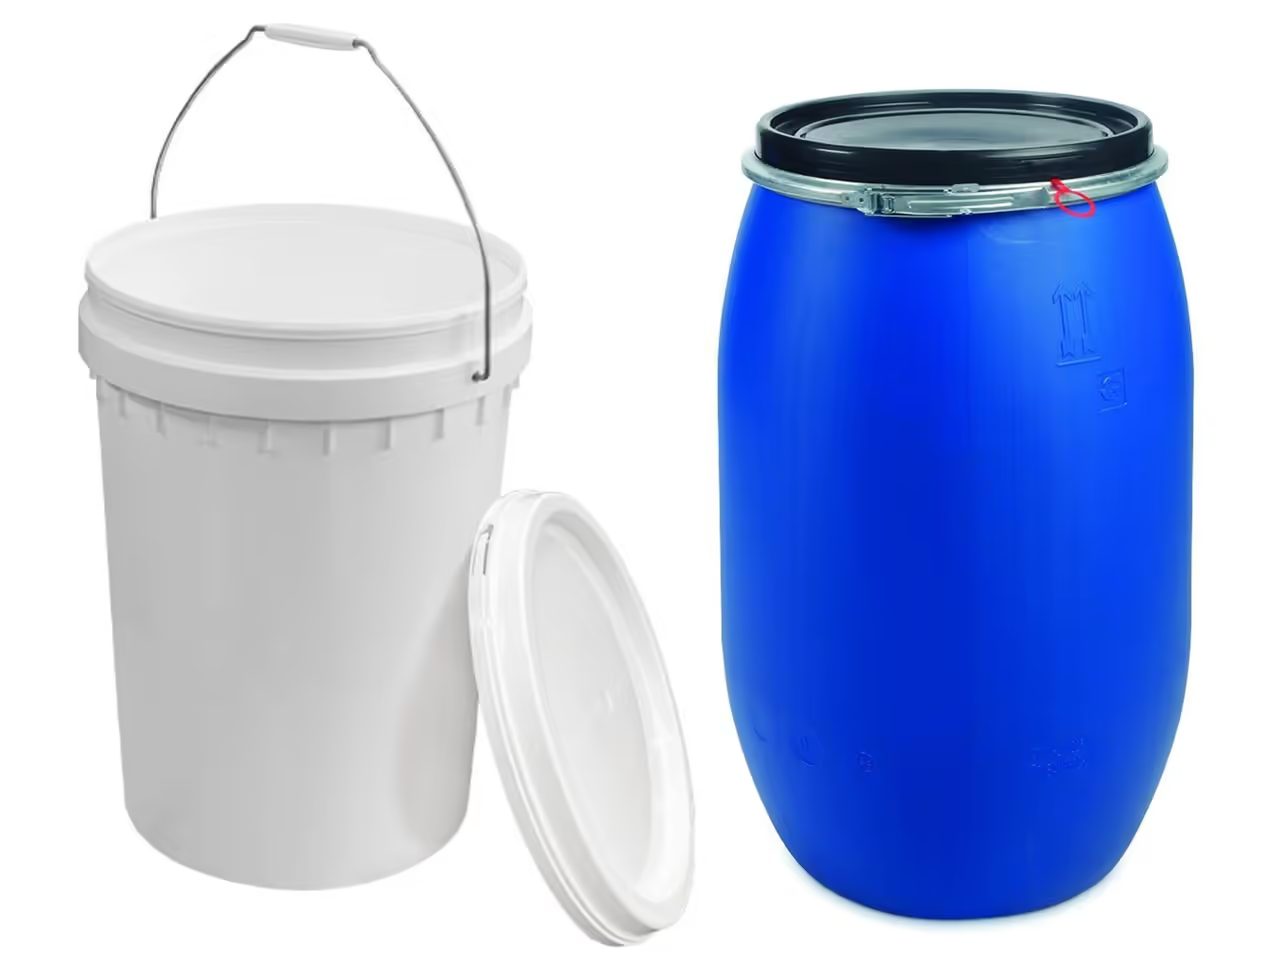
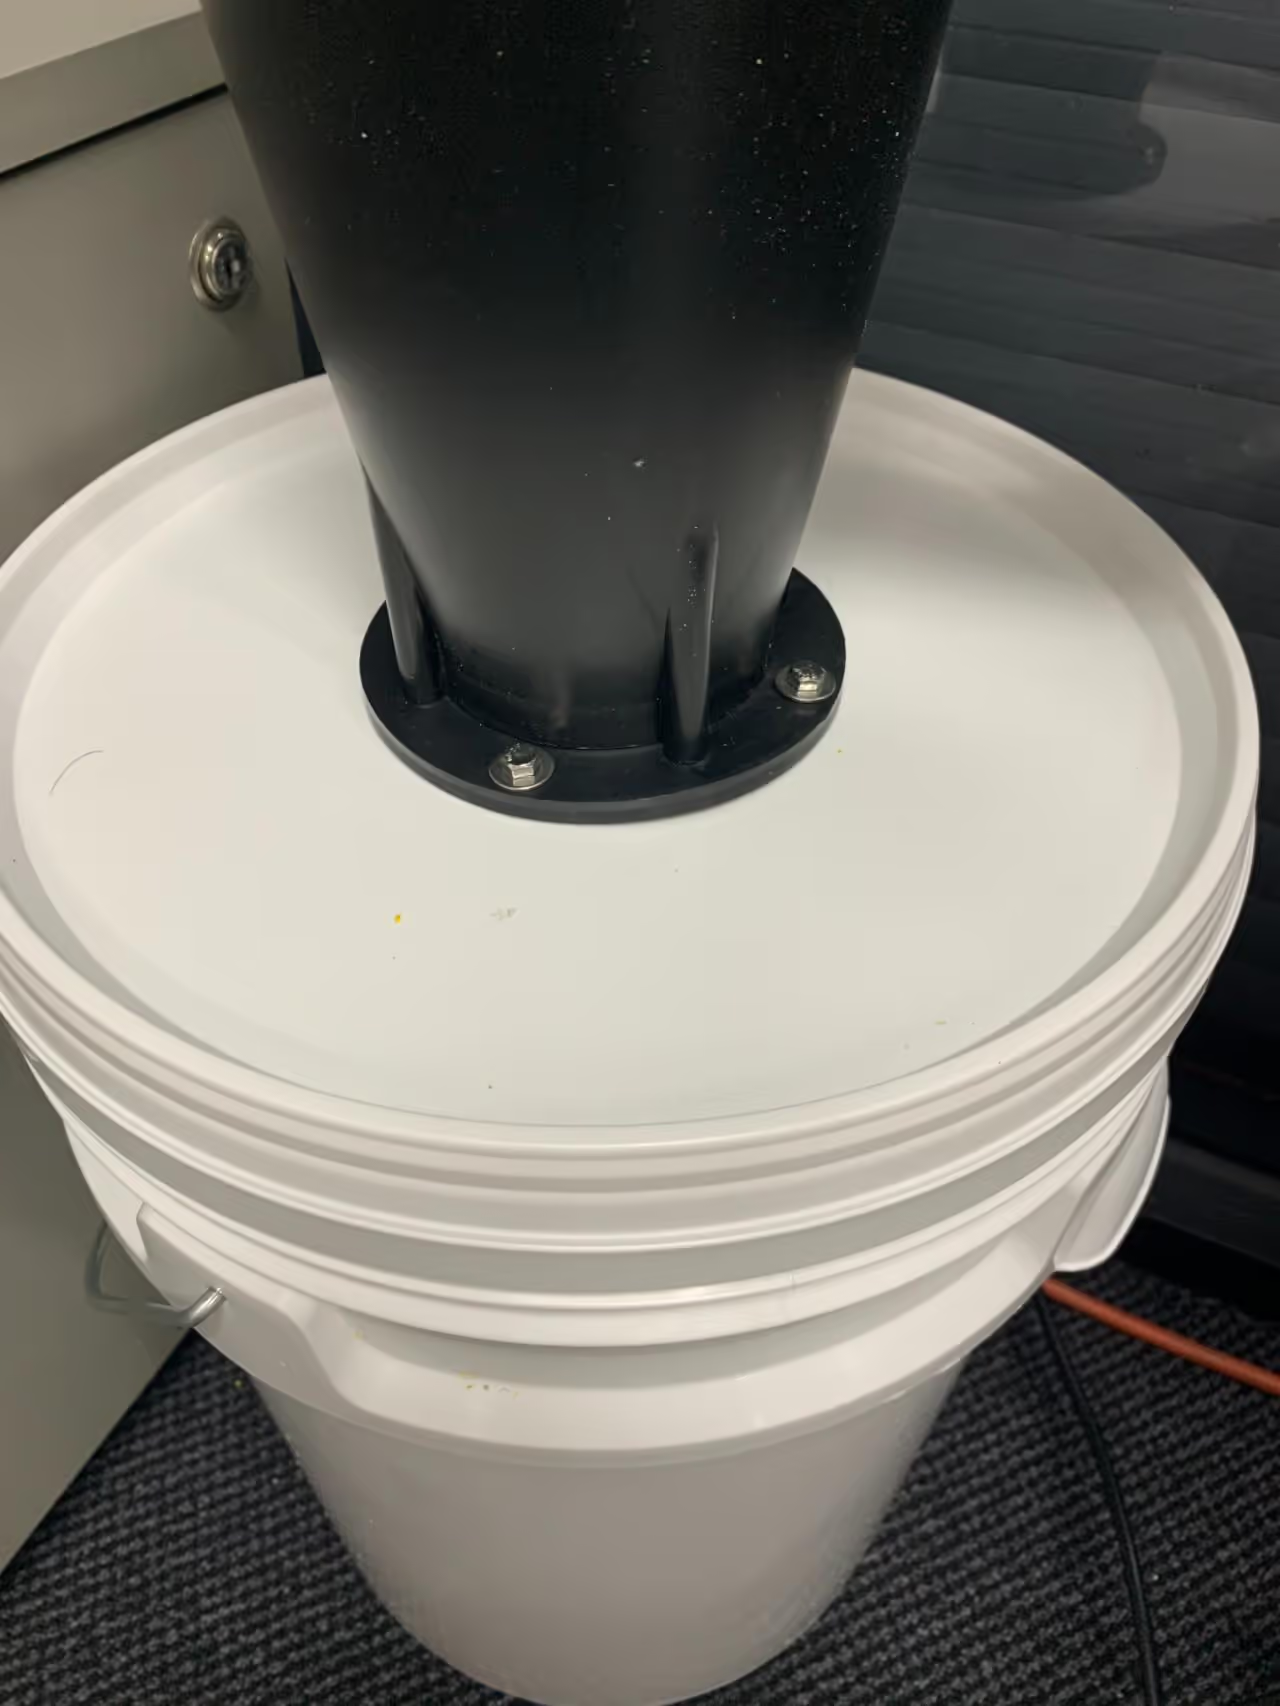
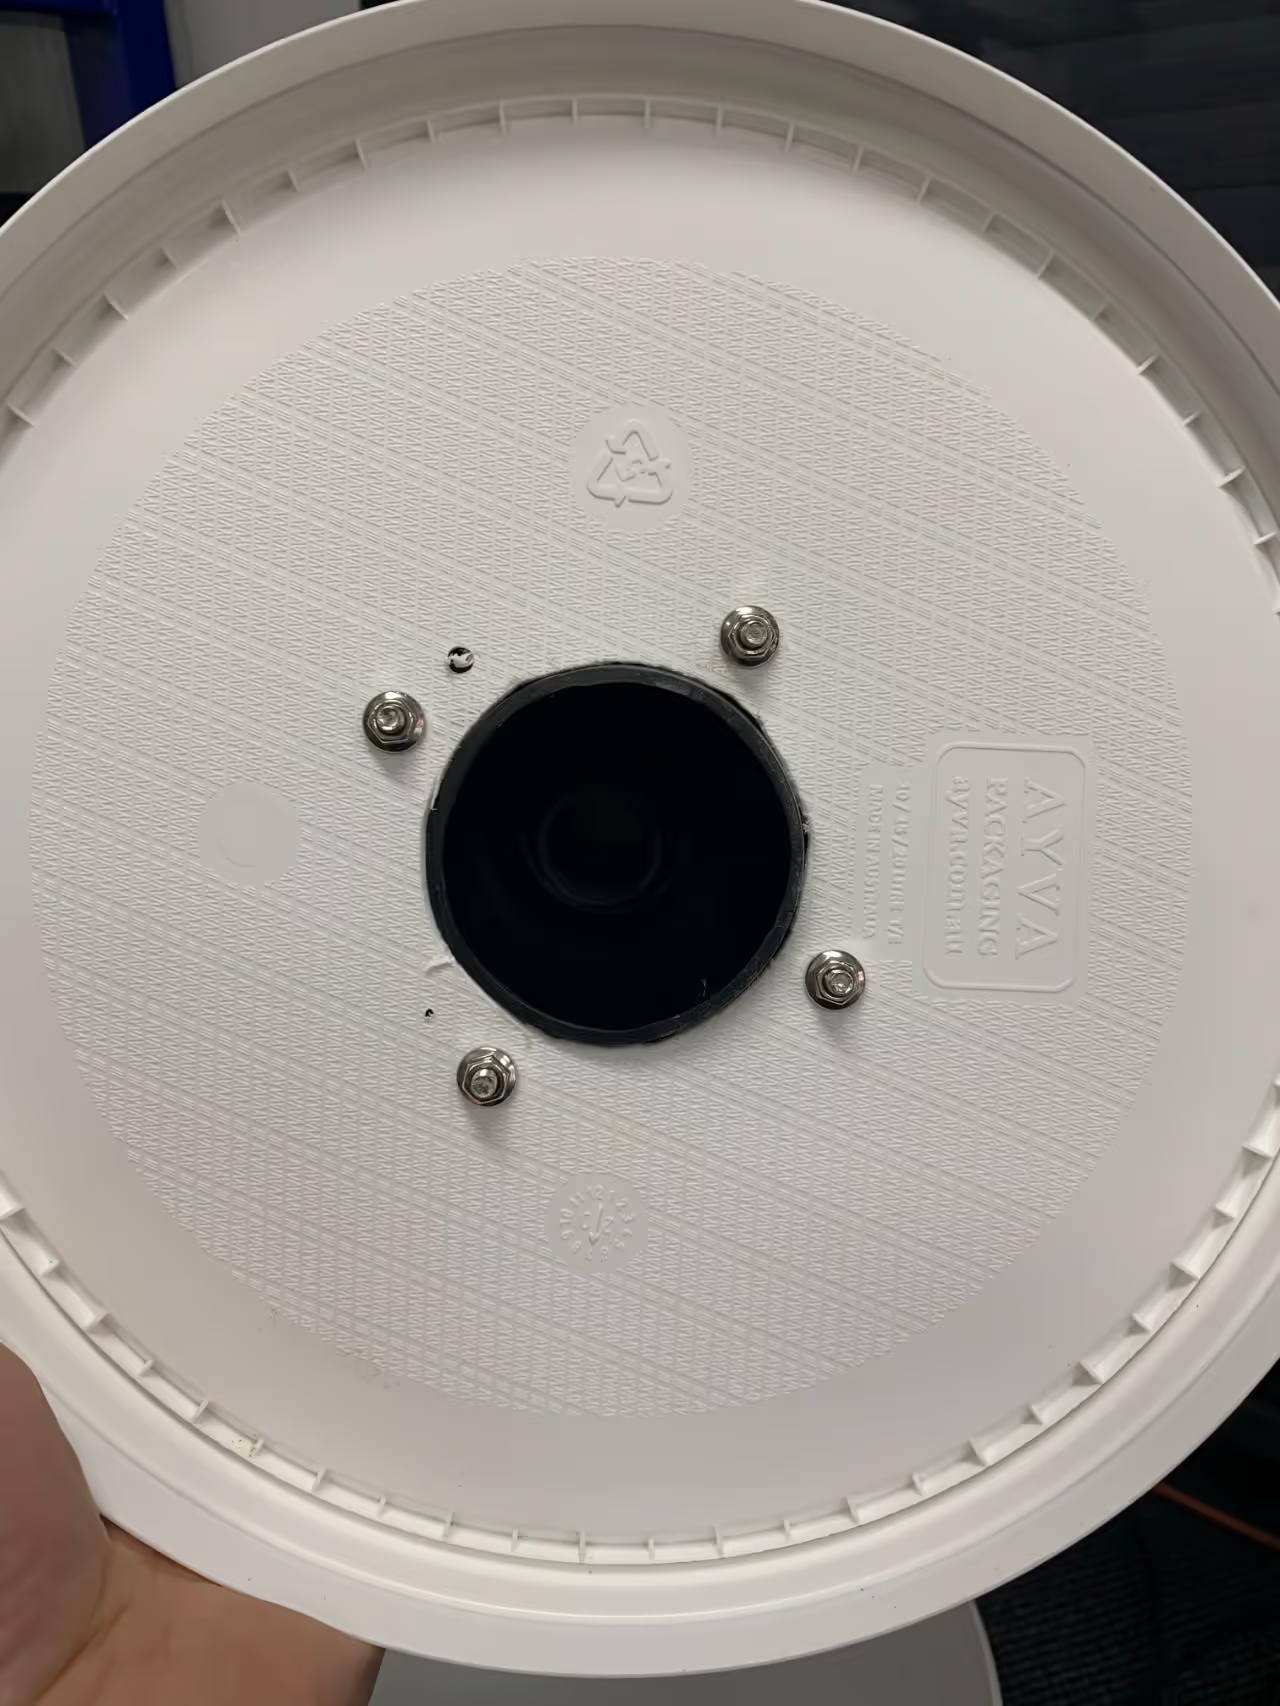
This type of bucket is common and generally easy to find secondhand. Choose one in good condition with a removable lid. A round bucket is preferable to a square container for this purpose.
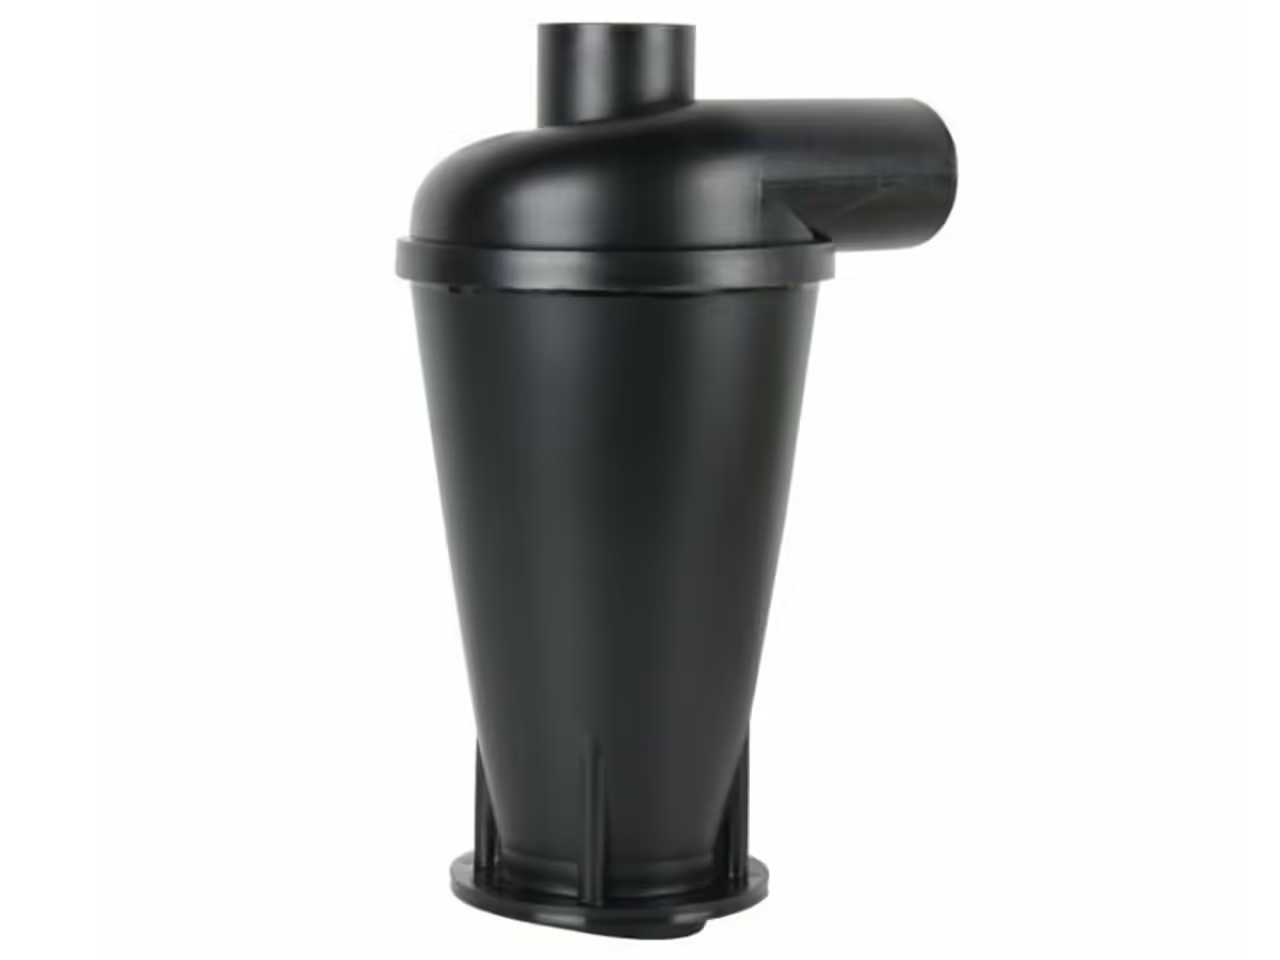
Dust cyclones effectively remove over 99% of dust and debris from the airflow, preventing accumulation in the vacuum. Our Dust Extractor has consistently operated without any plastic particles reaching the vacuum.
The cyclone kit includes a cutting template, instructions, nuts, bolts, and connection pieces. It is available for approximately $40 AUD ($26 USD) here.
For a cost-effective or DIY approach, consider this tutorial.
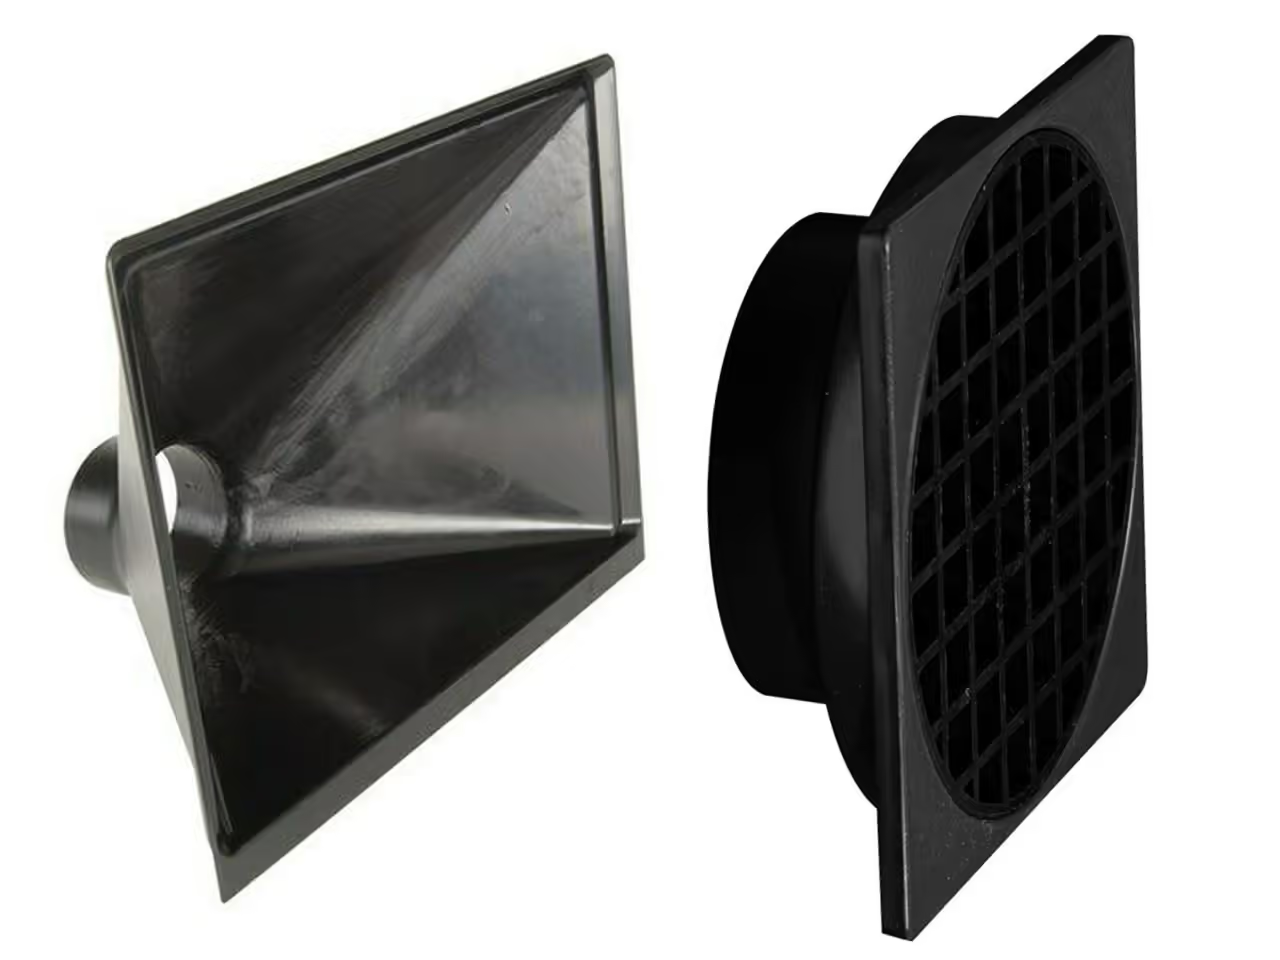
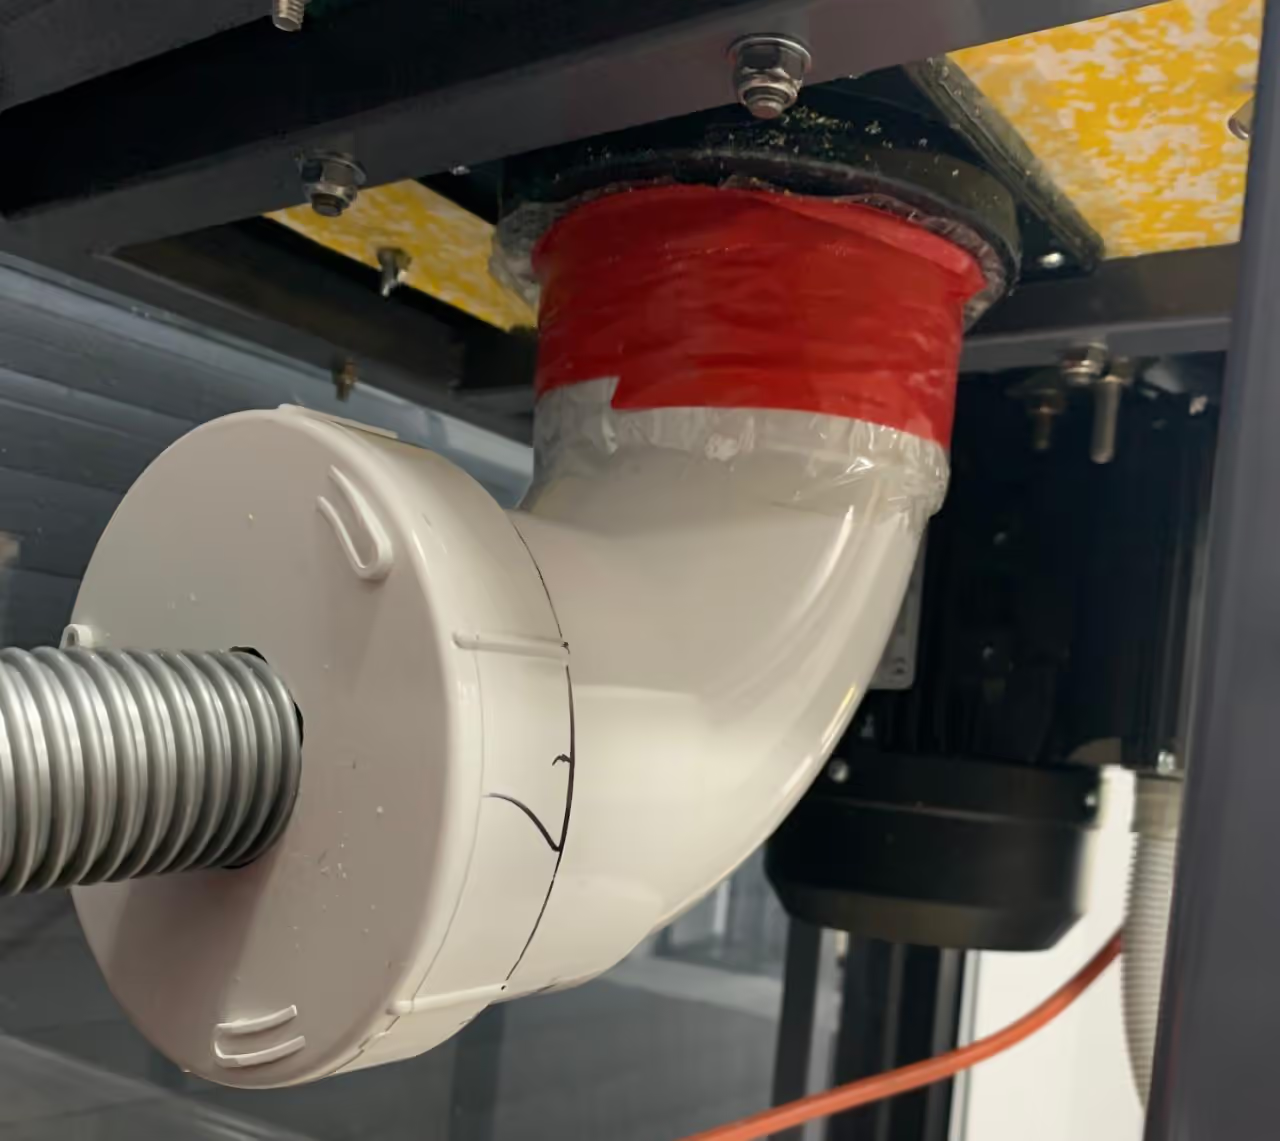
To capture the shredded plastic from the sieve to the vacuum hose, an airtight funnel is essential. You may use a purpose-built funnel, a 3D-printed design, or a D Square grate with a plumbing pipe. A suitable option is available at: www.timbecon.com.au/dust-extractor-hood-large-big-gulp