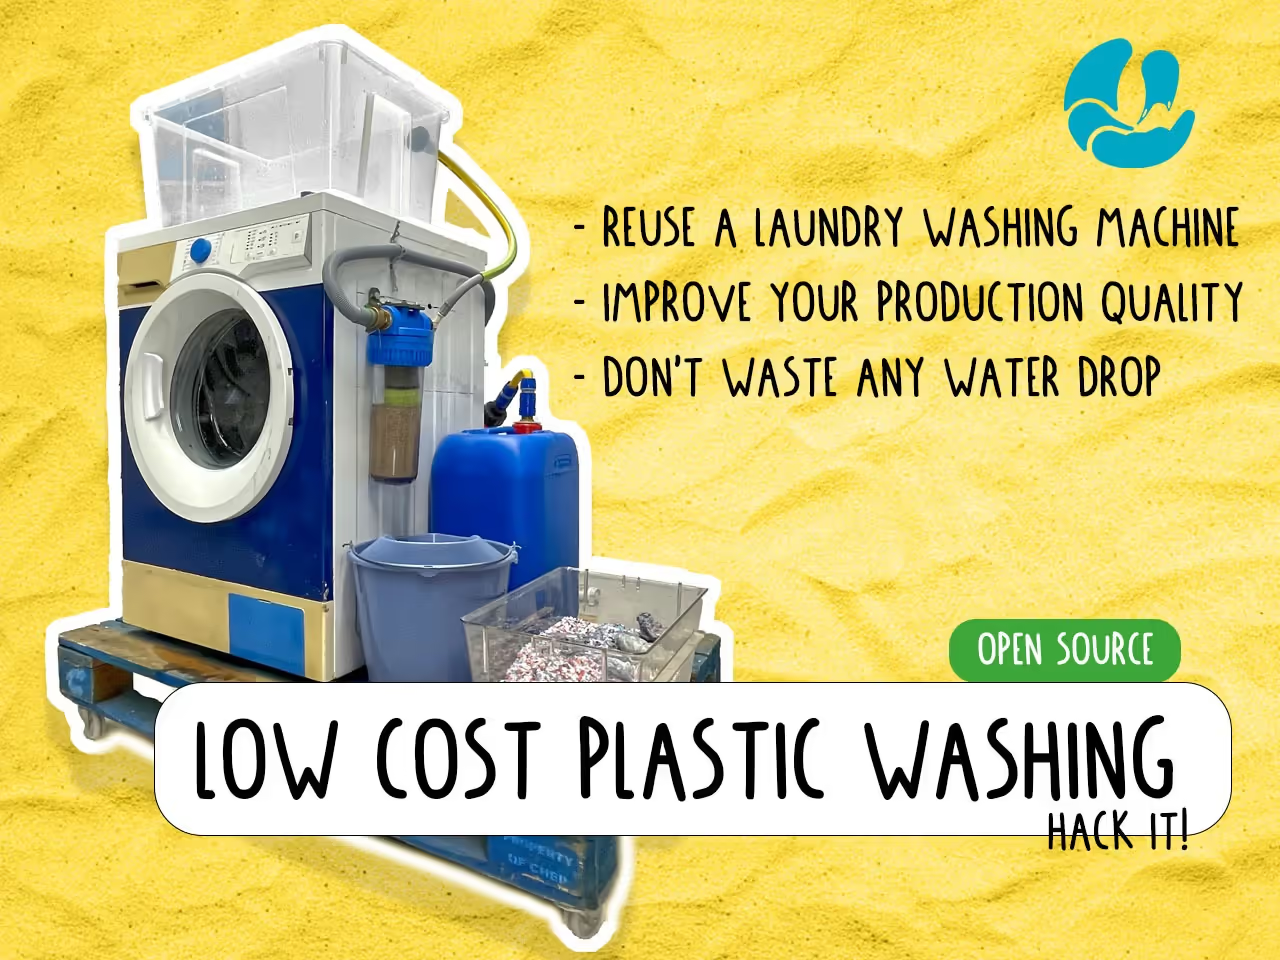
This guide instructs on converting a laundry machine for plastic washing without water waste. It covers modifying the electrical system and adding a water tank with a custom 3D-printed sand filter.
Table of Contents
-
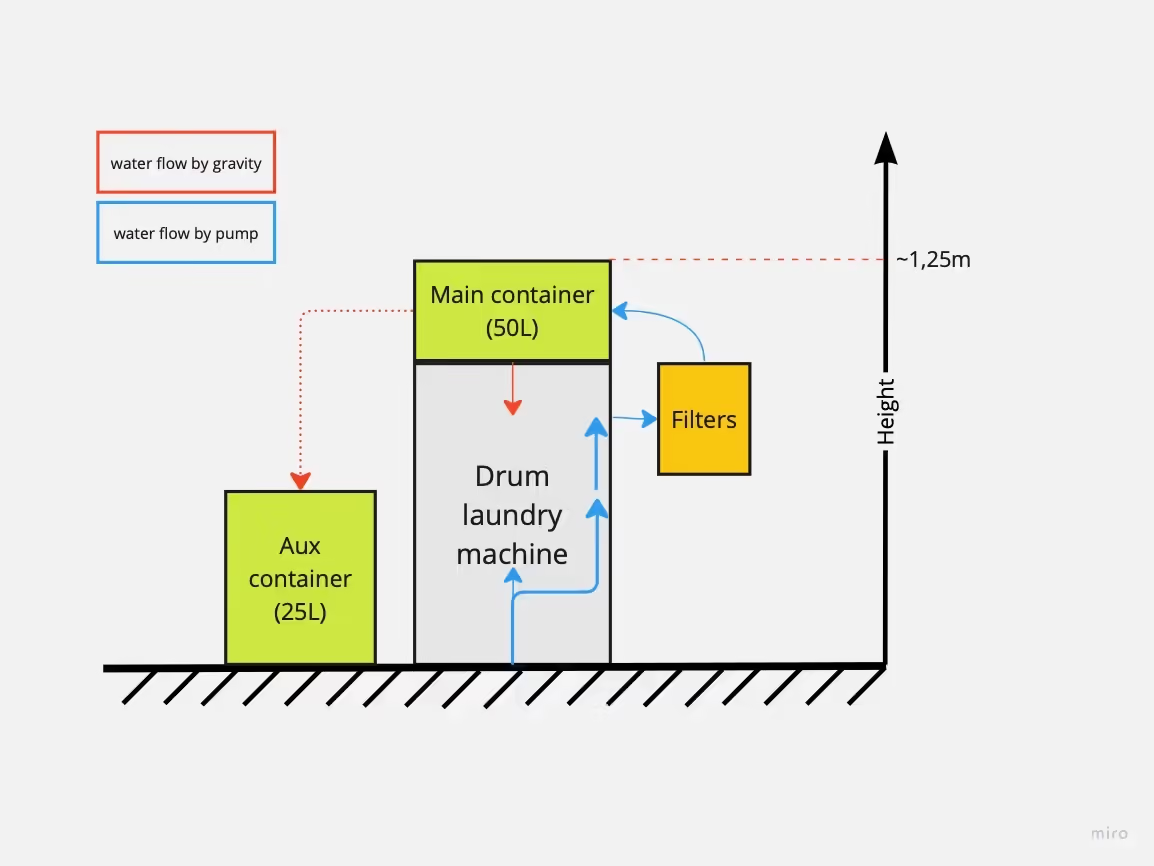
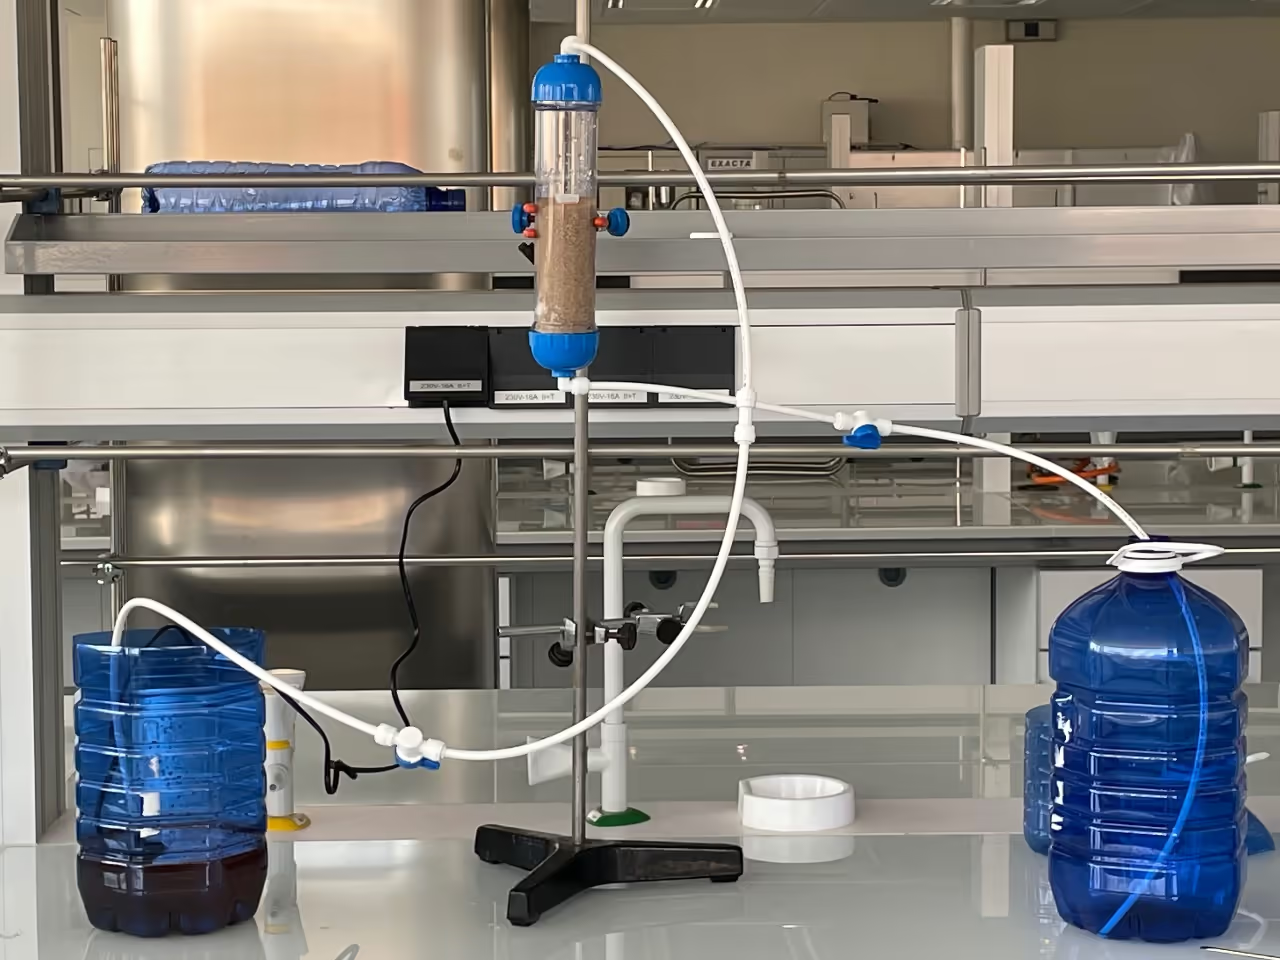
I've developed a straightforward, efficient, and cost-effective laundry machine design based on gravity, allowing water to flow through the system using a 40W pump, commonly found in laundry machines. This design is ideal for small workspaces processing 44-110 lbs (20-50 kg) per day with short washing programs. For higher capacities, consider building multiple machines.
Video: Watch here
Download Contents:
- Comprehensive guide and Bill of Materials (PDF)
- STL files for the filter and support
The folder will be updated with future changes.
0){ currentIndex--; lightboxLoaded = false; preloadAndOpen(); } }" class="product-gallery"> -
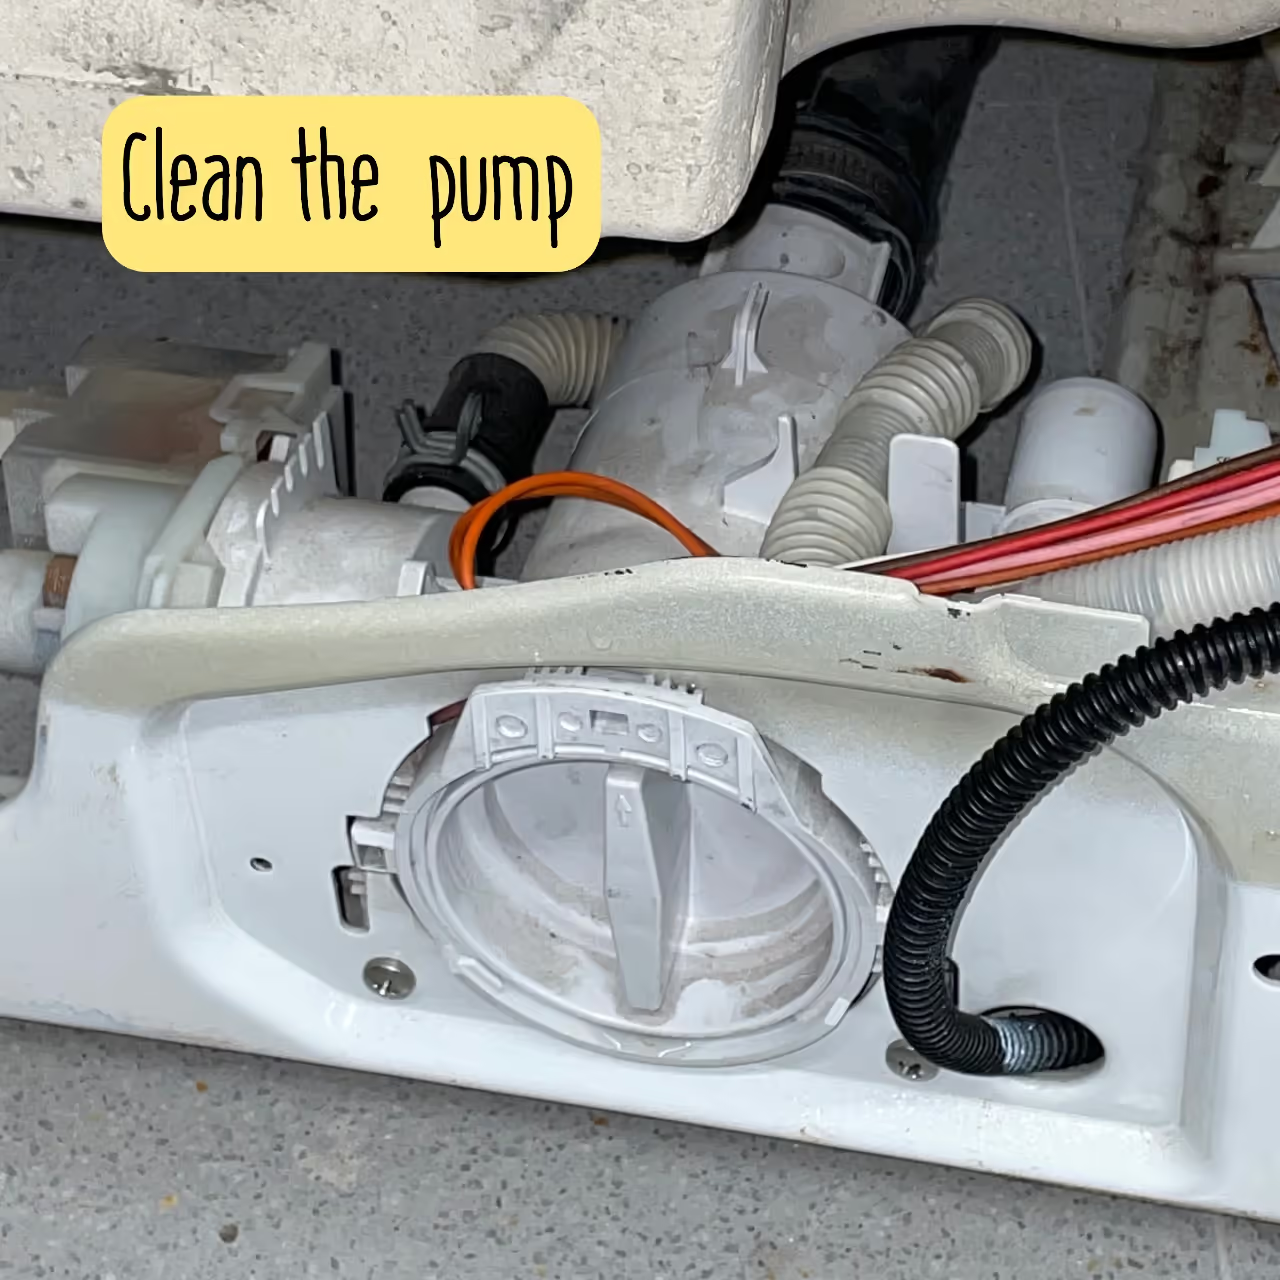
Ensure the machine is drained of water before beginning.
- Remove the top and back panels.
- Disassemble the water input system and cleaning compartment.
- Clean the pump and drum.
0){ currentIndex--; lightboxLoaded = false; preloadAndOpen(); } }" class="product-gallery"> -
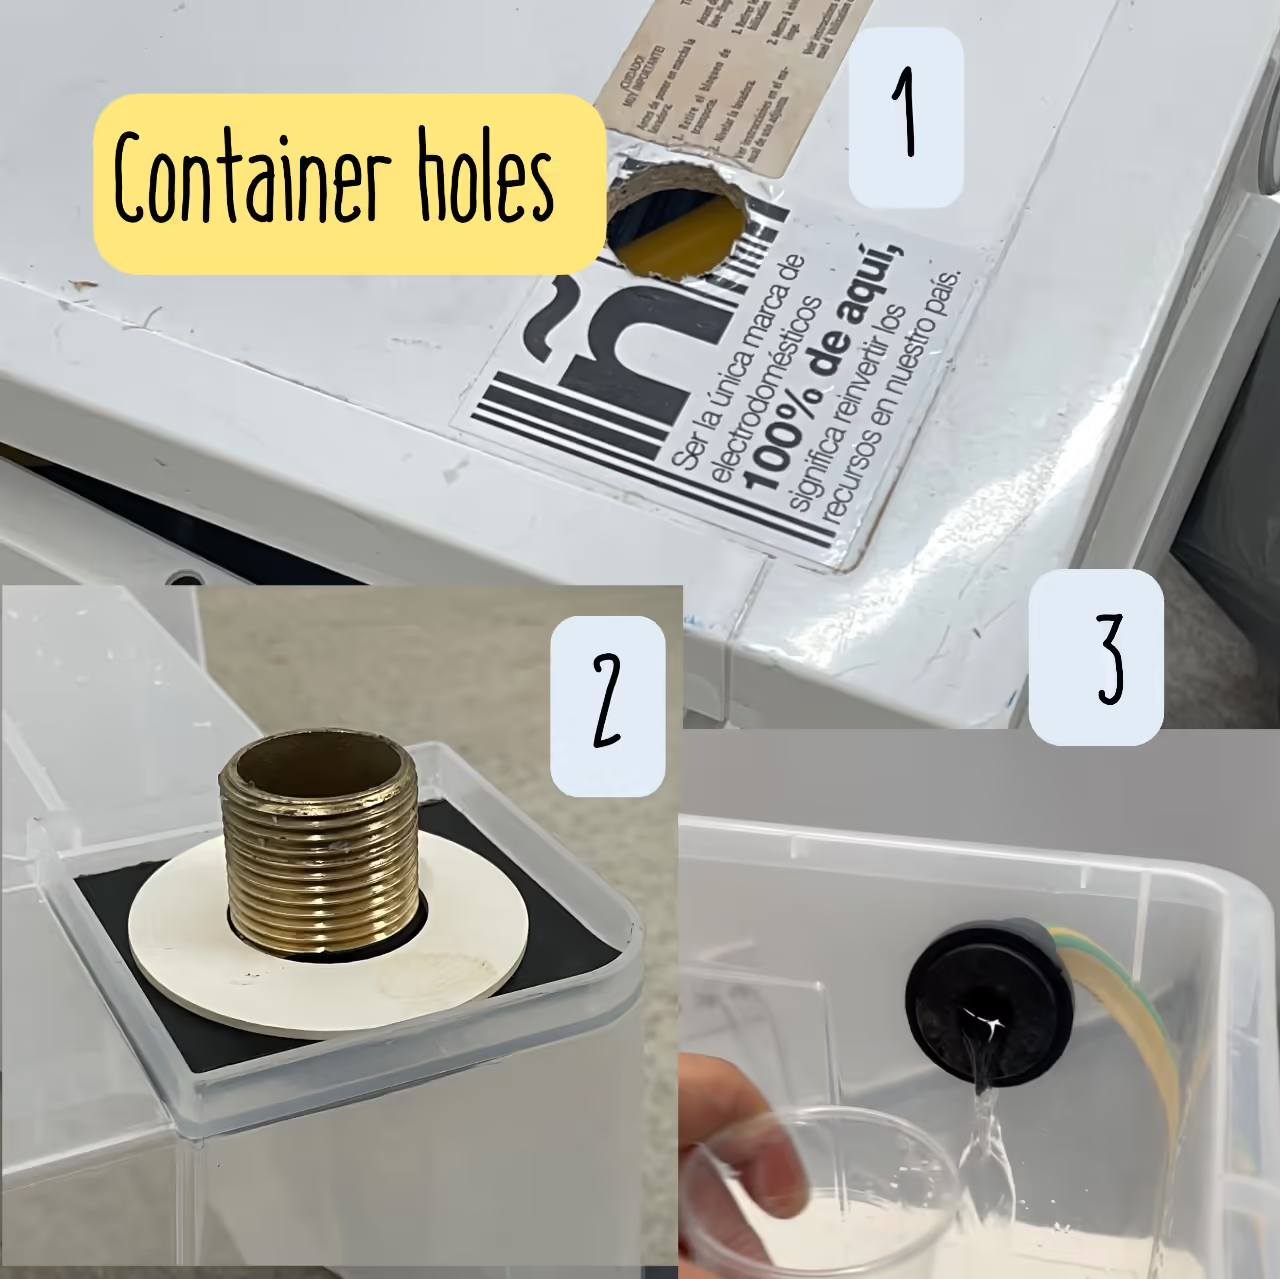
I'm using a 55-liter (about 14.5-gallon) container from Ikea costing approximately €10 (about $11). Attempts with cheaper containers resulted in breakage. It is crucial to select durable plastic to withstand the pressure from the water and the stress of hole creation.
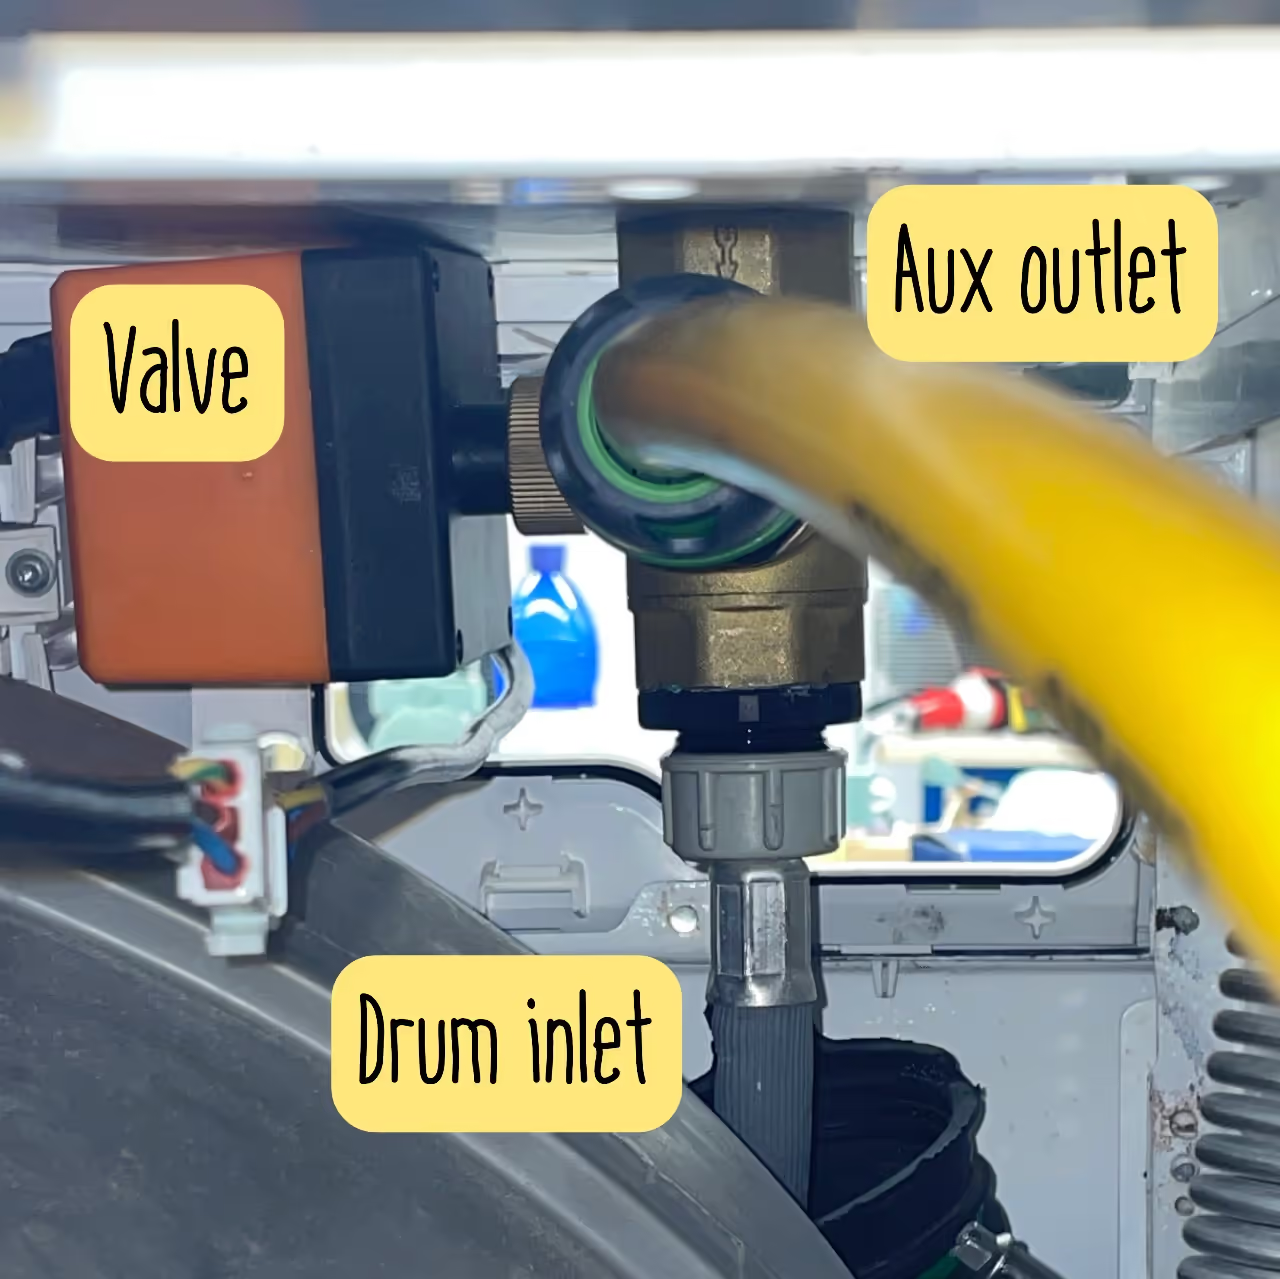
For assembly, two 1-inch pipe bushings are required: one for the water inlet and another for the outlet.
- Center a hole with the drum inlet.
- Drill a hole in the container.
- Create a hole for water input.
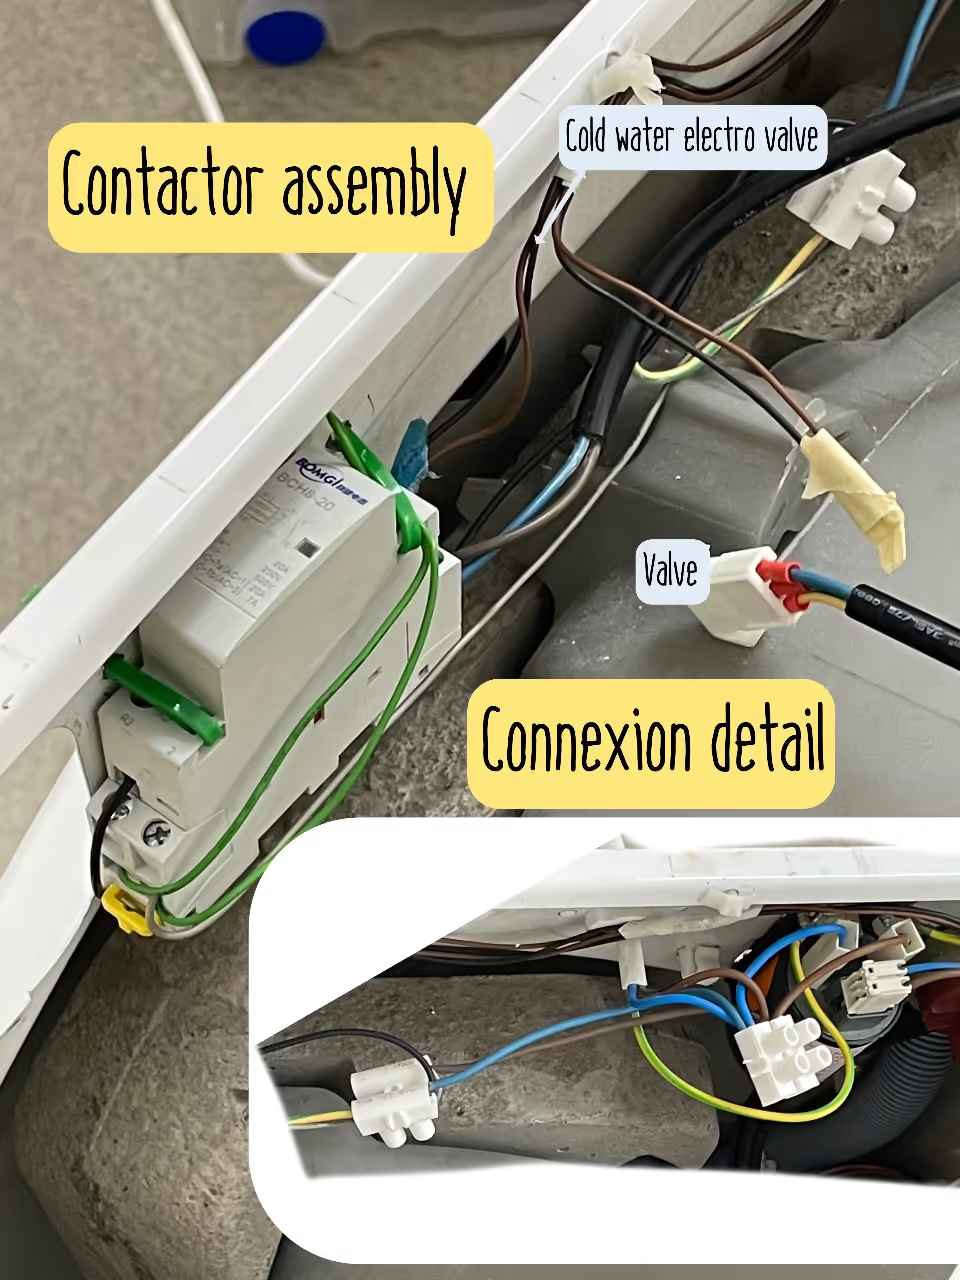
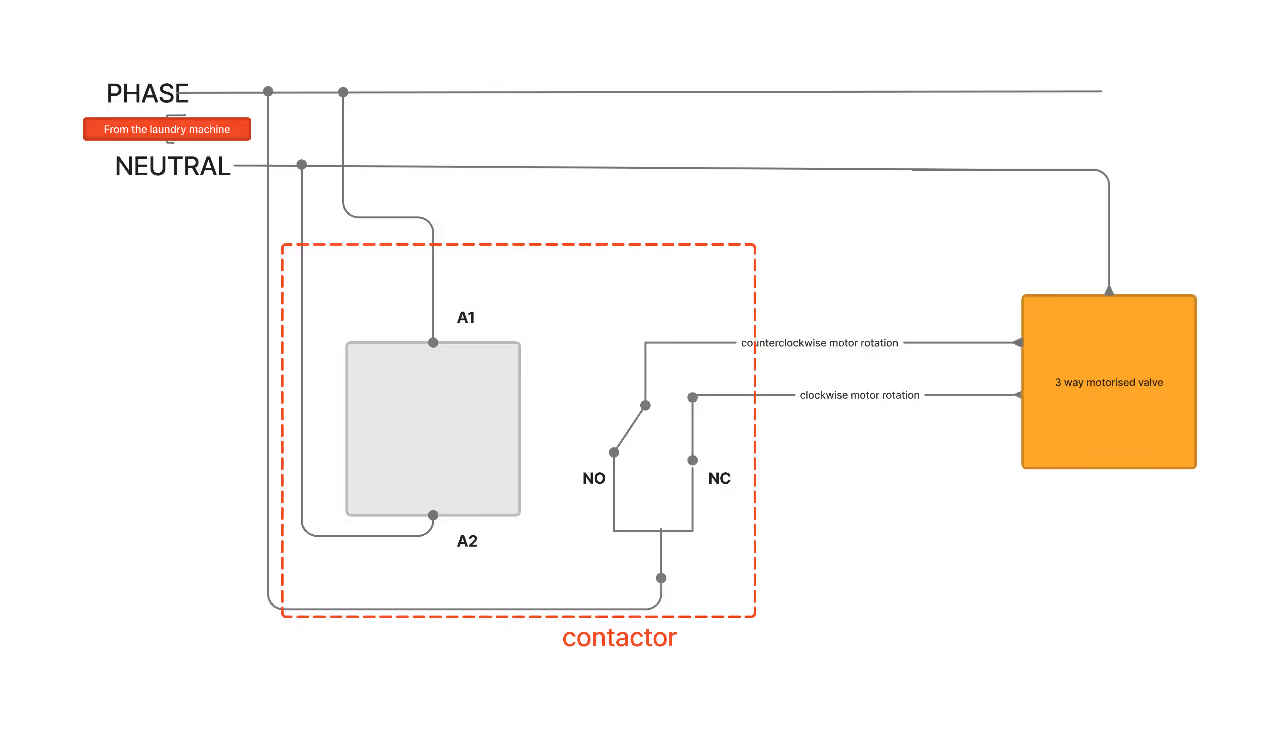
Following the hole creation, proceed with wiring. Welding skills are necessary for reliable results. Use security connectors and heat-shrink covers to prevent water damage or electrocution.
I installed the contactor on the back wall using a fastening clip.
0){ currentIndex--; lightboxLoaded = false; preloadAndOpen(); } }" class="product-gallery"> -
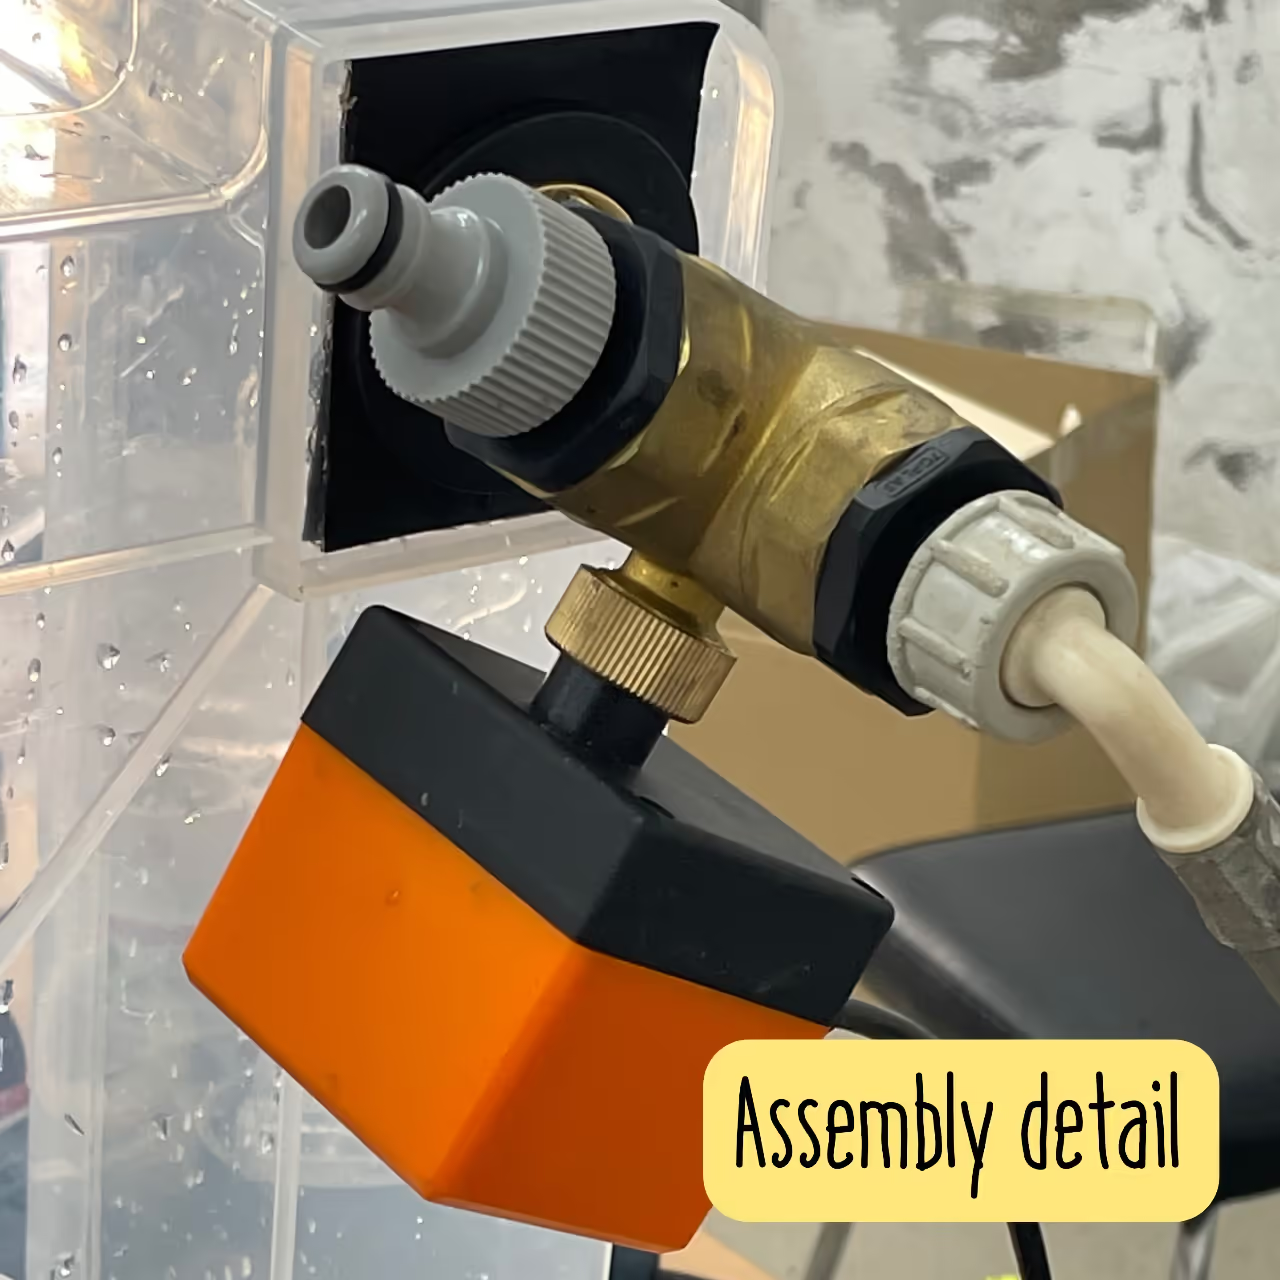
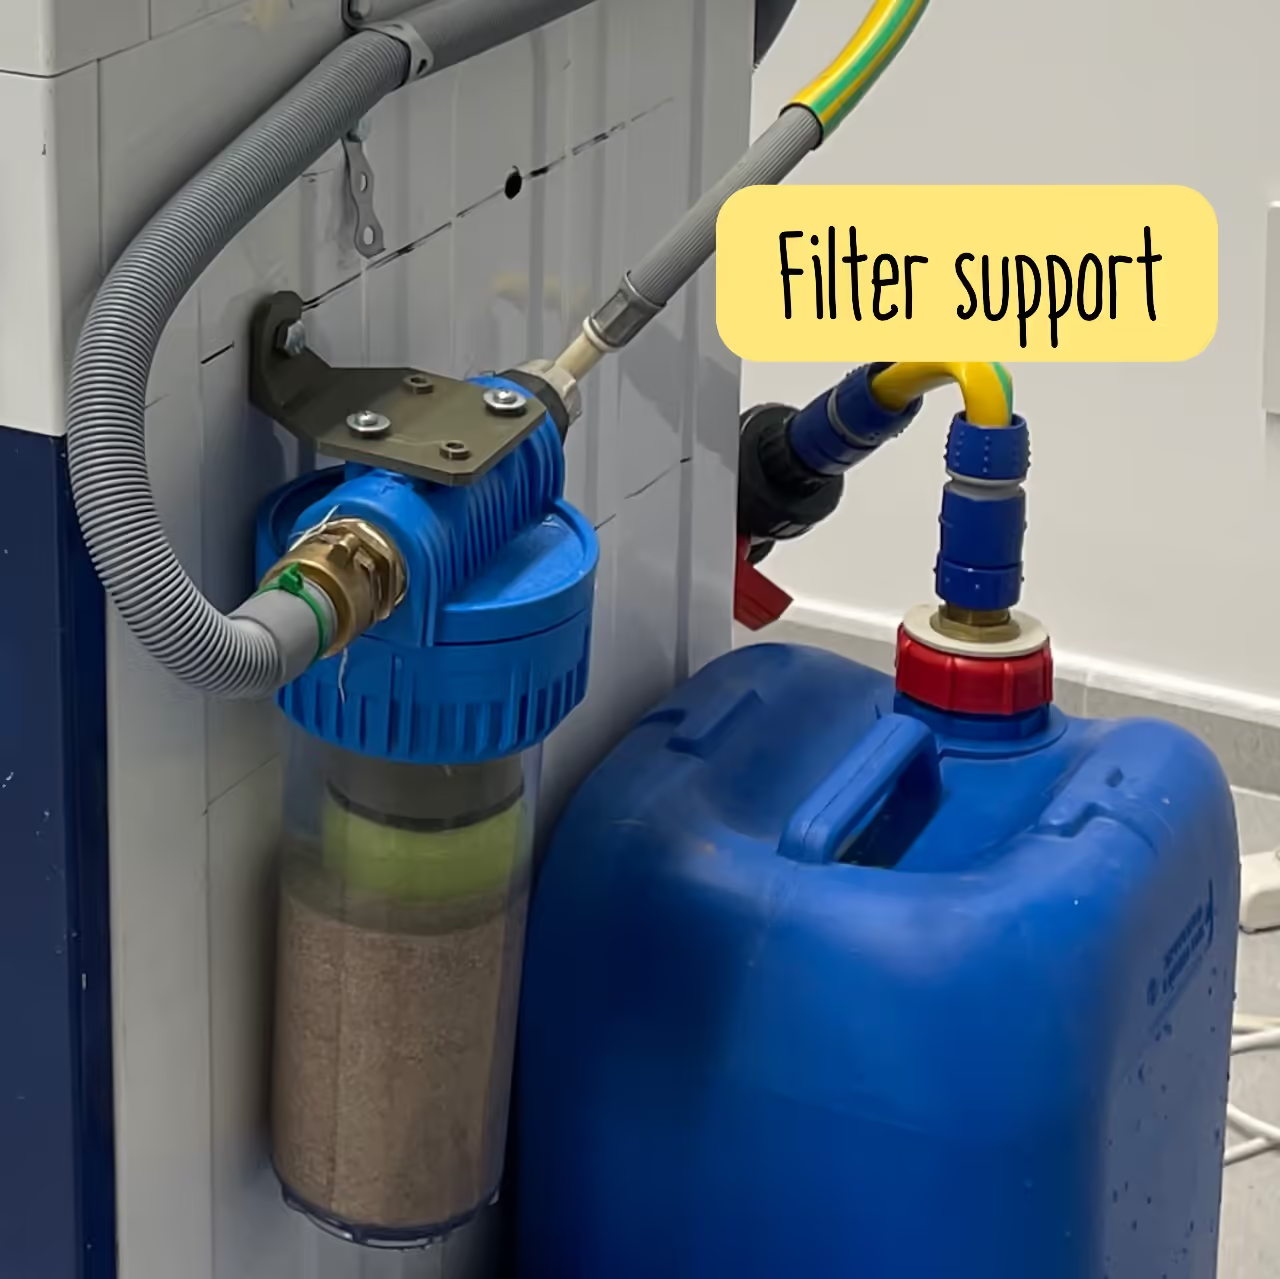
Before assembling, ensure the valve is correctly positioned and functioning properly. Apply Teflon tape to the valve and pipe adapter connections.
0){ currentIndex--; lightboxLoaded = false; preloadAndOpen(); } }" class="product-gallery"> -
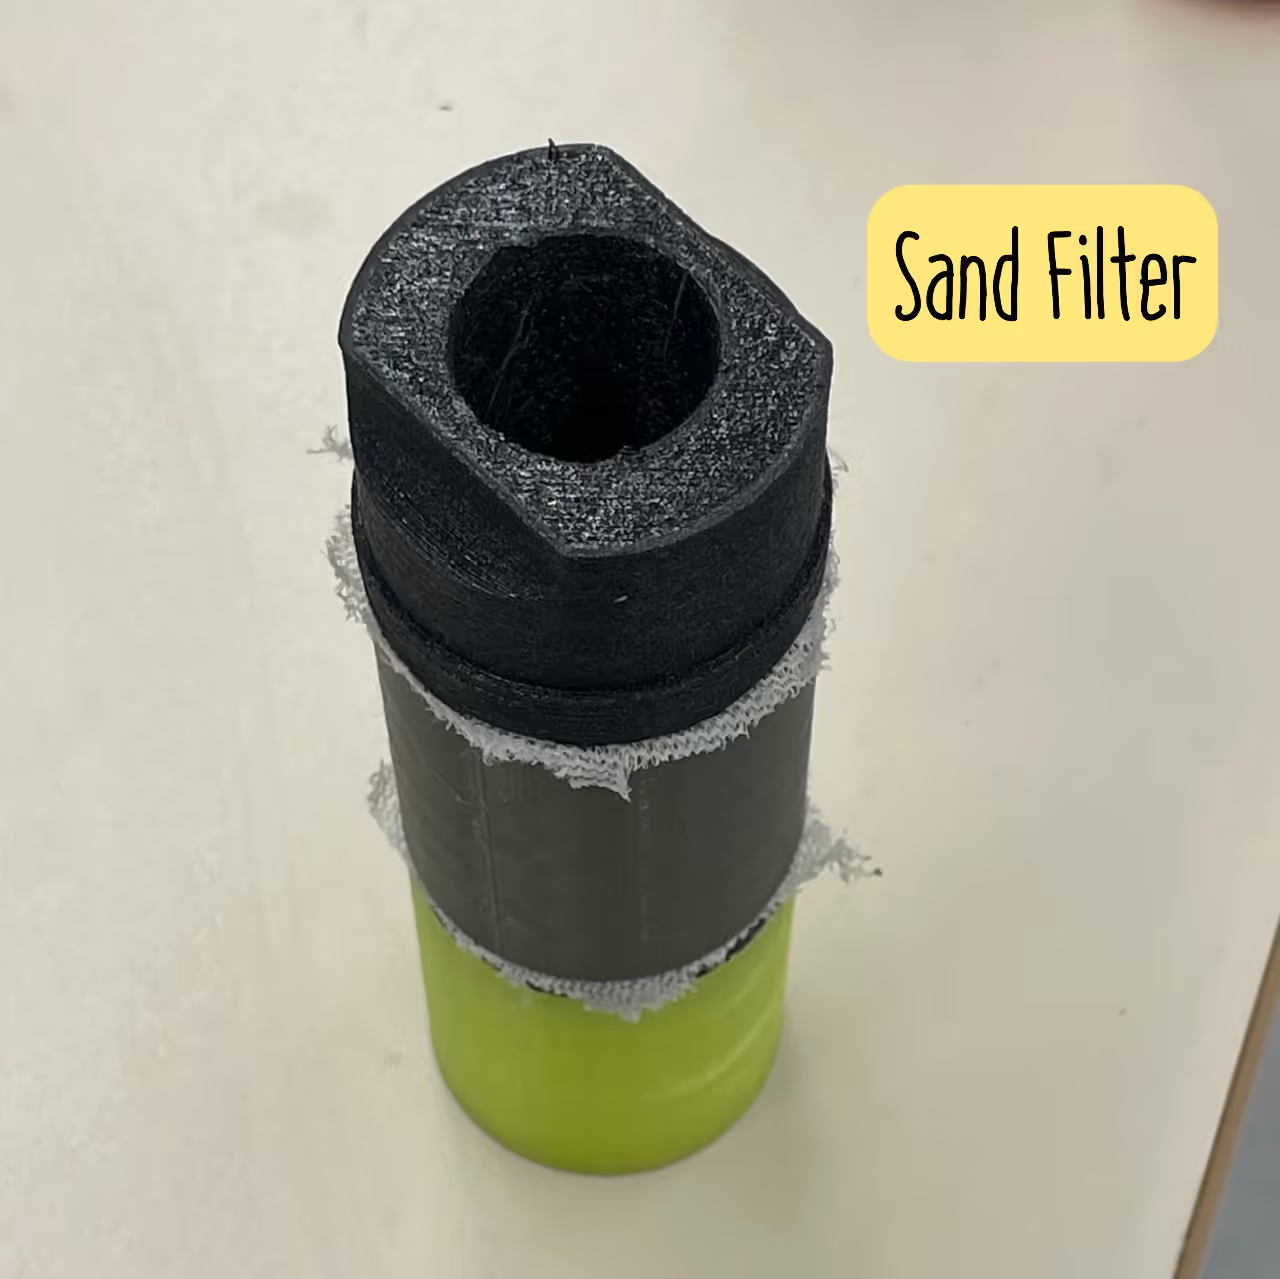
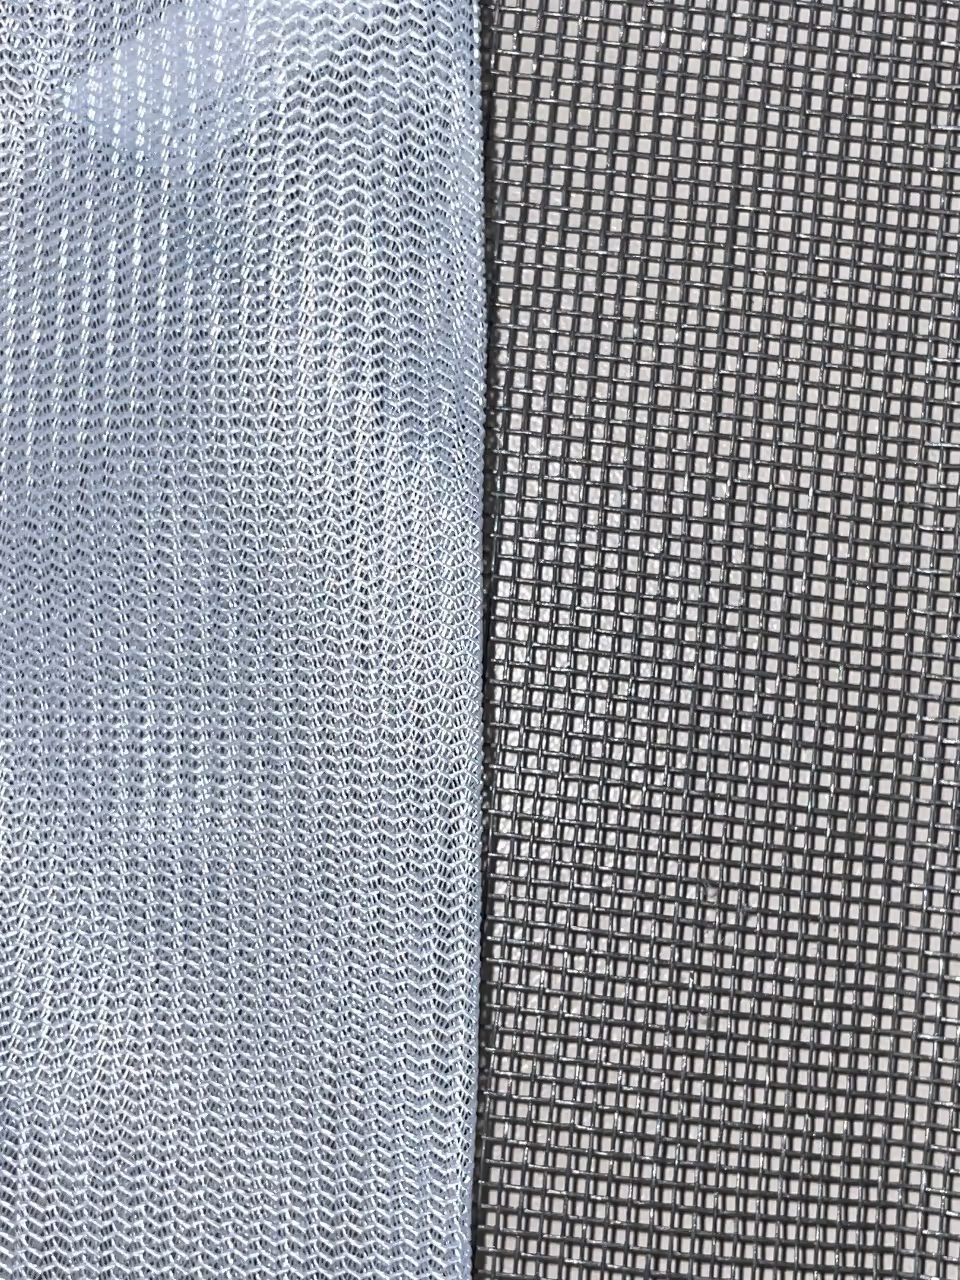
Print the necessary files. Insert nets between components. Drill holes for filter support, attach the filter, and connect it to the water system. Ready for testing. Fill the filter with sand until it covers 1/4 of the main body.
0){ currentIndex--; lightboxLoaded = false; preloadAndOpen(); } }" class="product-gallery"> -
Instructions
- Fill the main container and ensure the auxiliary container is attached.
- Install an additional manual valve to prevent misdirection of the water.
- Test the system and repair any leaks.
0){ currentIndex--; lightboxLoaded = false; preloadAndOpen(); } }" class="product-gallery">
Tools
- Drill (hole creation in container and filter support)
- Welding equipment (secure electrical connections)
- Pipe bushings (1-inch, for water inlet/outlet)
- Teflon tape (sealing valve and pipe connections)
- Security connectors and heat-shrink covers (waterproof wiring)
Hardware
- 40W pump (standard laundry machine component)
- 55-liter IKEA container (~€10, durable plastic)
- Sand (fills 1/4 of 3D-printed filter)
- Manual valve (prevents water misdirection)
- 1-inch pipes/adapters (water system connections)
Software
- 3D printing software (custom filter/support STL files)
- PDF reader (comprehensive guide and Bill of Materials)
- STL files (filter and support, provided in download)
Safety Components
- Heat-resistant drum (post-modification testing)
- Reinforced filter nets (prevents clogging)
References
YouTube
Opensource Designs
- ~~[Filter and Support STL Files](No link provided in source text)~~
- ~~[Conversion Guide & Bill of Materials (PDF)](No link provided in source text)~~
Note: The text mentions downloadable STL files and a PDF guide but does not include direct links. For access, contact the creator or check their provided updates.